Windows Defender isn’t only the native Windows 10 antivirus protection system, but also one of the most advanced security solutions out there.
And the latest antivirus tests are pretty much the living proof, as Windows Defender’s performance was on par with what you typically get from leading vendors in the security software market.
Like third-party security products, Windows Defender receives definition updates on a regular basis, and because it’s integrated into Windows, it relies on the Windows Update system for the whole thing.
In other words, Windows users are provided with a pretty smooth process that takes place at OS level, without the need for a second update system bundled into Windows Defender.
Unfortunately, as it’s the case of Windows updates, some of the improvements that Microsoft releases with Windows Defender sometimes do more harm than good.
This is what happened recently when an update released for the Windows 10 antivirus actually broke down the scanning feature, making it impossible to start a manual scan. Automatic scans still worked as expected, however, only that users weren’t able to manually scan a certain location or drive.
When this happens, one of the most important things to do in order to fix the broken antivirus is to determine the versions of the AntiMalware engine and Security Intelligence. With Microsoft not making it easy to undo botched updates, the company pretty much forces the majority of users to wait for the company to release a fix – truth be told, every time such an incident occurred, Microsoft was really fast in delivering a patch.
But as some of our readers told me recently, determining the version of Windows Defender isn’t really easy business.
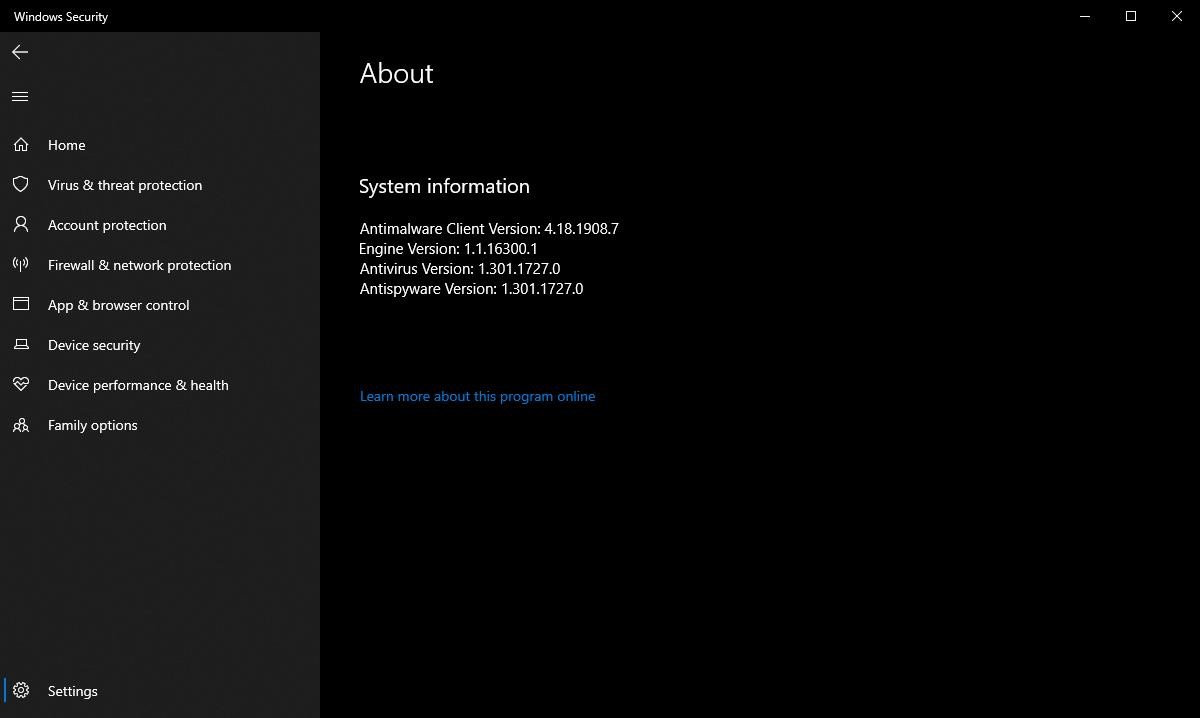
First and foremost, to determine the version of the antimalware engine, you need to go to the following path:
Windows Security > Settings > About
| Antimalware client version Engine version Antivirus version Antispyware version |
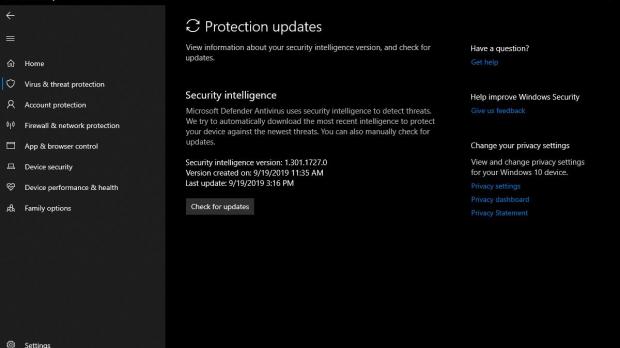
To find out the security intelligence version and the date when the last update was installed, you need to go to this location:
Windows Security > Virus & threat protection > Protection updates
| Security intelligence version Version creation date Last update installation date |
To check for updates in Windows Defender, head over to the following path:
Windows Security > Virus & threat protection > Virus & threat protection updates > Check for updates < Check for updates
What’s important to know, however, is the security intelligence is downloaded automatically by Windows Defender when it’s released. This way, the latest virus definitions are available on your device, so the latest known threats are blocked as well.
“Microsoft Defender Antivirus uses security intelligence to detect threats. We try to automatically download the most recent intelligence to protect your device against the newest threats. You can also manually check for updates,” Microsoft says.
Needless to say, keeping Windows Defender fully up-to-date helps guarantee that no threat reaches your device, so make sure you install the latest updates or enable the automatic updates on your device.

 14 DAY TRIAL //

