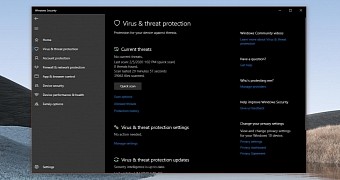
I said it before, and I’m saying it again: Windows Defender has evolved so much that with the right protections in place, third-party antivirus is no longer required on Windows 10, as the OS has pretty much everything it needs to block the majority of threats.
The most recent security tests performed by various organizations are living proof of just how advanced Windows Defender has become in Windows 10, so it’s no surprise that many actually keep it running in the background to protect their data.
Managing Windows Defender isn’t necessarily a difficult thing to do, especially as Microsoft has created a pretty straightforward interface that you can easily launch from the system tray icon. But the more Windows Defender advances and new settings are being added, the more difficult it gets to find a specific feature.
At the same time, administrators would rather stick with commands they can run in Command Prompt to manage Window Defender, as this makes it easier to automate certain tasks on a specific set of devices.
Working with Windows Defender in the command line pretty much comes down to the mpcmdrun.exe process, as it lets you conduct a series of tasks, including launching a scan. This exe is located at the following path:
%ProgramFiles%\Windows Defender\MpCmdRun.exe
mpcmdrun.exe -Scan [-ScanType [0\|1\|2\|3]] [-File <path> [-DisableRemediation] [-BootSectorScan]] [-Timeout <days>] [-Cancel]
mpcmdrun.exe -Scan -1
-RemoveDefinitions [-Engine]
mpcmdrun.exe -SignatureUpdate [-UNC \| -MMPC]
mpcmdrun.exe -RemoveDefinitions [-All]
mpcmdrun.exe -Restore [-ListAll \| [[-Name <name>] [-All] \| [-FilePath <filePath>]] [-Path <path>]]
All these commands need to be launched in a Command Prompt window with administrator privileges, otherwise you won’t be able to make any changes to Windows Defender – standard accounts are not allowed to modify system files.
And of course, they work in all Windows 10 versions, including the upcoming Windows 10 version 2004. This particular release has already been completed, and now Microsoft is only giving the finishing touches before it begins the public rollout to production devices across the world in April or May.

 14 DAY TRIAL //