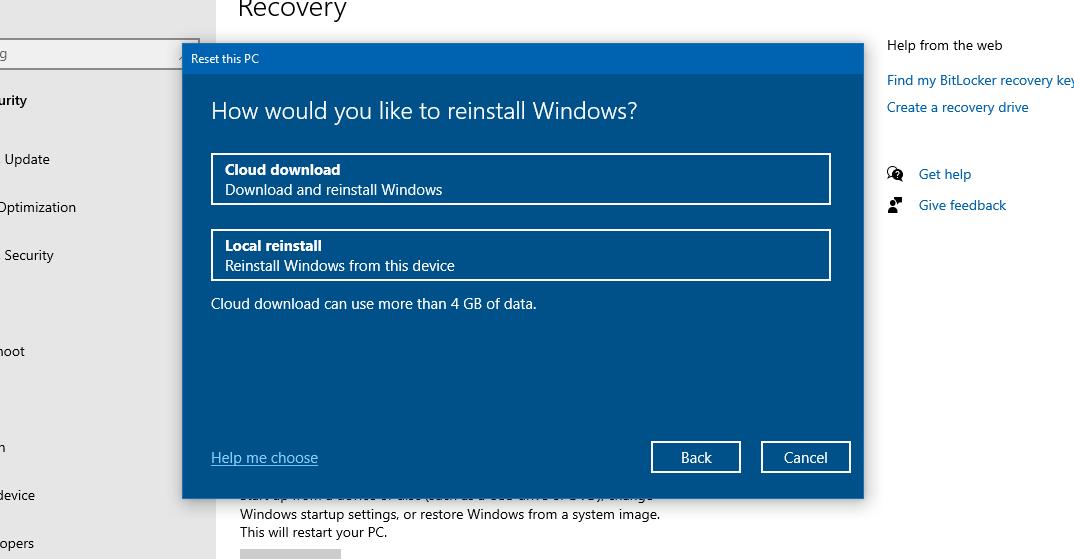
Windows 10 20H1, which is the feature update that will go live in the spring of 2020, will introduce a new cloud reinstall option that will allow users to start from scratch and reinstall the OS using nothing more than a system image stored in the cloud.
This means installation media is no longer required, with the whole process carried out via your network connection.
Depending on the speed of your network connection and the hardware inside your computer, reinstalling the OS using the cloud option can take anywhere from just a few minutes to several hours.
For the end user, the cloud reinstall option pretty much comes down to clicking just a few options within Windows 10, and this is exactly the way the whole thing should be. Such a feature must be easy to use and straightforward, especially because it’s addressed to all categories of users, including beginners who for any reason need to reinstall the OS.
Basically, kicking off the cloud reinstall requires users to follow the next path:
Settings > Update & Security > Recovery > Keep my files/Remove Everything > Cloud download
First of all, it checks if the device is on battery power, and if it’s not, it prompts you to plug it in. Then, it verifies the status of the Windows Recovery Environment, or Windows RE/WinRE to determine if this feature is enabled on the device.
Other checks target optional features, languages, and the status of the Windows Update service. This last step is required because the download process is carried out through Windows Update, so Windows 10 needs to make sure the files can be downloaded successfully and there’s enough space on the local storage to complete the process.
Once the download is complete, Windows 10 automatically reboots the device and enters the Windows RE screen to continue the process. Windows RE can also be used to trigger the cloud reinstall in the first place, which is useful if you can’t log in to Windows 10, by following the next path:
Troubleshoot > Reset this PC > Keep my files/Remove everything > Cloud download
So what Windows 10 does next is apply the image that it downloaded and import data from the previous OS installation to the new one. This includes user profile information (if you selected the Keep my files option), drivers, optional features, and languages.
Next, the process changes the OS root folder and points it to the new Windows 10 installation and deletes the files it downloaded to kick off the reinstall task. This is necessary to free up disk space before you can sign in back to Windows.
After a system reboot, a series of other quick optimizations are performed, including setting up drivers, OEM customizations, pre-loading the apps that come with Windows 10 or the device, and loading the Out of Box Experience. If you selected to keep your files, then the OOBE step is ignored and you can finally sign in back to Windows.
How much the whole thing takes is something that depends on a series of factors, including network speed and hardware performance. A new-generation device with a high-speed network connection should be able to complete this in 15 to 20 minutes, while in the case of older PCs with slow Internet connections it could take up to several hours.
A Wi-Fi connection can also be used for the cloud reinstall, but only if the adapter drivers can be loaded in Windows RE.

 14 DAY TRIAL //

