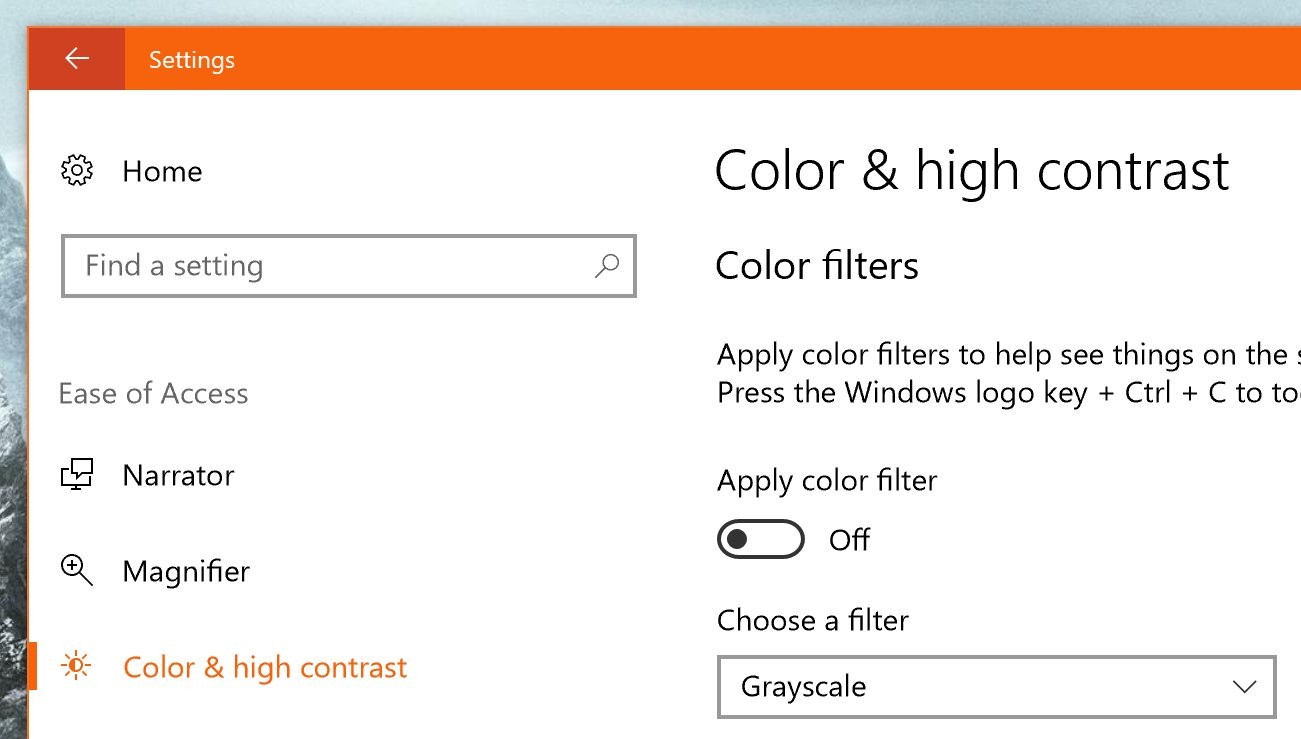
Microsoft has substantially improved Windows 10 in terms of accessibility features since the debut of the operating system back in July 2015, and every new release brought new capabilities that make it easier for those with disabilities to use their PCs.
One of the most useful features is support for color filters, which are specifically aimed at colorblind users who have a hard time distinguishing elements on the screen.
Microsoft’s Windows 10 integration of color filters is based on a very straightforward approach that includes a shortcut to easily enable and disable them without having to open the Settings app every time. Without a quick toggle, this shortcut certainly comes in handy, though users are recommended to launch the Settings app first to configure color filters according to their needs.
By default, the Windows logo key + Ctrl + C allows you to enable and disable the color filters. Windows 10 comes out of the box with the grayscale filter configured, but users can also switch to invert, grayscale inverted, deuteranopia, protanopia, and tritanopia. Once selected in the Settings app, each can be enabled and disabled with the very same keyboard shortcut.
All options are placed in Settings > Easy of Access > Color & high contrast, and the same section also includes high contrast controls that allow you to choose one of four pre-defined themes.
If you’re not a big fan of keyboard shortcuts, or if you have a hard time remembering it, the Settings app also includes the quick toggle to apply or disable the color filter. On the other hand, disabling the keyboard shortcut completely isn’t possible unless a registry hack is being used.
What you need to do is launch the Registry Editor and navigate to the following path (copy and paste it in the address bar of the editor):
HKEY_CURRENT_USER\Software\Microsoft\ColorFiltering
In order to make any registry settings, you’re going to need an administrator account, so you won’t be able to use this hack with a standard account. Also, to launch the Registry Editor, you can simply type regedit in the Start menu, unless you have already created a shortcut on the desktop if you’re a power user.
Once you’re here, you should notice that this path leads you to a destination with just one entry called Active. The value of the Active key changes according to the current state of color filters, as it follows: if they’re enabled, the value is 1, whereas when disabled the value is changed to 0.
To disable the color filters shortcut (we’re being told that this trick only works in Windows 10 versions released before the Creators Update), you have to create a new entry called HotkeyEnable by right-clicking the right panel and going to New > DWORD (32-bit) Value. If you want to have the keyboard shortcut disabled, double-click this newly-created item and input value 0. To enable it, just switch the value to 1, as its name pretty much suggests.
Once all the registry changes are made, simply close the editor and reboot your system to have everything applied.
In case you’re wondering why anyone needs to disable the keyboard shortcut, the answer is as simple as it could be. Hitting it by mistake means enabling color filters every once in a while, and this could prove to be extremely frustrating for those who are use hotkeys for working with both Windows 10 and third-party applications, such as screen capture tools.
Don’t forget that creating a backup of the registry before making any changes should be on your priority list, as this step allows you to return to a previous configuration in case something goes wrong and your system experiences any stability or performance issues.

 14 DAY TRIAL //


