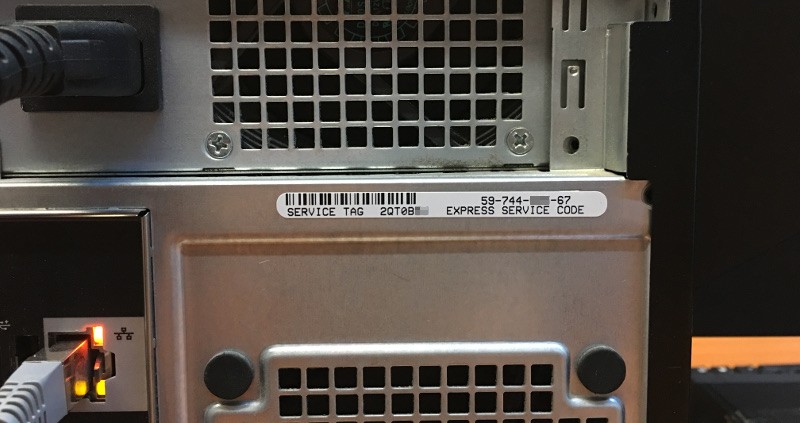
In most the cases, finding the serial number of a PC usually comes down to checking the product label on the computer, as manufacturers typically print all the necessary information for identification and attach it to the case.
But if for some reason the sticker is missing or maybe it’s already ripped apart, then finding the serial number of your device isn’t as easy as it seems at first.
Luckily, it still is super-easy to find it, as Windows comes with integrated tools to display the serial number in a second. And all you need is running a Command Prompt or PowerShell command.
Before describing the commands, let’s detail a little bit why the serial number might be needed. First and foremost, it could be used by the OEM to identify your device, such as when sending it in for repairs or when trying to get support. For example, if you’re trying to connect with a support engineer, they sometimes ask for the serial number, which in turn includes information about the device.
This way, the company can find details like device model, manufacturing date, and other data which could be useful for diagnosing your problem.
Then, serial numbers are also used by device makers for drivers, so when browsing their sites to get new software, they sometimes prompt you to enter this code. This varies by OEM, but being able to quickly find the serial number is definitely recommended.
There’s one important thing, however. Older computers might not have the serial number saved to the BIOS or within the UEFI firmware, and this makes the below commands ineffective. In this case, the result of these commands will be a message reading “To be filled by OEM” and contacting the company is the only way to go.
As I said earlier, finding the serial number can be done with either the Command Prompt or PowerShell – in Windows 10 Fall Creators Update, PowerShell is the preferred choice and it replaces Command Prompt in the Win + X menu, but Command Prompt continues to be available. So it’s up to you which one you want to use, but both work just fine.
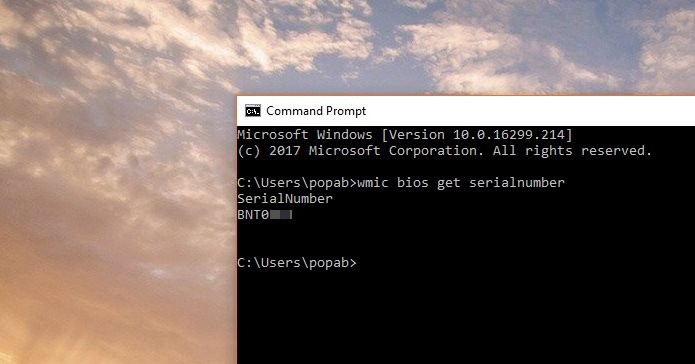
To do this in Command Prompt, it’s enough to simply launch the command line utility by just typing Command Prompt in the Start menu (or cmd.exe) and paste one of the following commands – note that you don’t have to type both commands, but only one of them, and the result is pretty much the same no matter which one you choose:
wmic bios get serialnumber
--
wmic csproduct get identifyingnumber
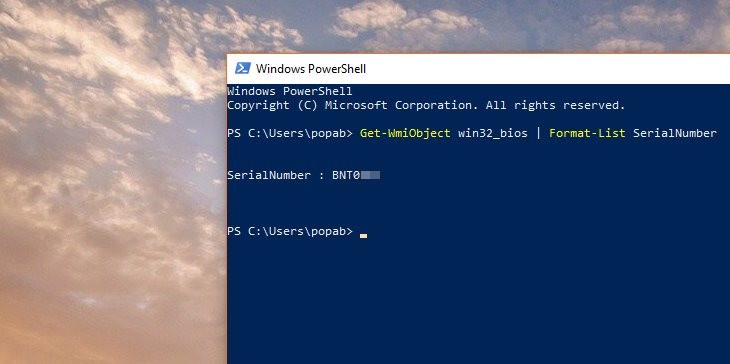
If you want to do this with PowerShell, the method is pretty much the same, only this time you have to launch PowerShell by typing its name in the Start menu or by simply right-clicking the Start menu. Choose one of the following commands and paste it in the command line – again, just one command is needed:
Get-WmiObject win32_bios | Format-List SerialNumber
--
gwmi win32_bios | fl SerialNumber
The serial number is displayed in the same command line window regardless of the app, and you can easily copy and save it for future references.
BONUS TIP: The same method works pretty much in any Windows version prior to Windows 10, including Windows 7 and 8.1. On the other hand, the older the computer, the smaller the chances to have the serial number embedded into the PC BIOS or the UEFI firmware, though it goes without saying that it’s users of these older systems the ones that might need to turn to the aforementioned commands.
Stickers tend to wear out after a while, and a Windows XP computer, for instance, might be more than 15 years old, which means that commands like these might be the only way to find the serial number.

 14 DAY TRIAL //


