Microsoft has recently announced sandbox support for Windows Defender, the default antivirus that’s bundled into Windows 10 to protect users’ computers.
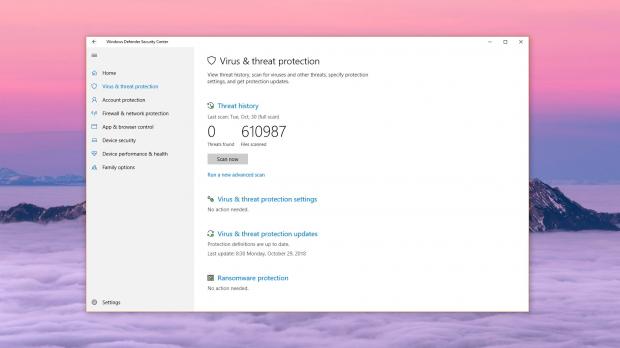
Windows Defender has evolved substantially in Windows 10, and the latest feature updates brought many improvements, including more advantages functionality like ransomware protection.
This obviously pays off, as the most recent antivirus tests conducted by third-party organizations across the world indicated that Windows Defender can provide nearly flawless performance that’s on par with the one offered by leading security vendors like Kaspersky and Bitdefender.
Microsoft sees no reason to stop here, and a few days ago, the company announced a new feature coming to Windows Defender in a future OS update.
Windows Defender will run in a sandbox, technically protecting its process from malware that could compromise the antivirus and then expand to other data. Microsoft explains:
“Running Windows Defender Antivirus in a sandbox ensures that in the unlikely event of a compromise, malicious actions are limited to the isolated environment, protecting the rest of the system from harm. Windows Defender Antivirus and the rest of the Windows Defender ATP stack now integrate with other security components of Microsoft 365 to form Microsoft Threat Protection.”
How to enable the antivirus sandbox feature
What’s important to know is that this sandbox feature is already introduced in Windows 10, but users need to manually enable it. Microsoft says it’s working on making it easier to do this in a future OS update, and an early implementation will be released soon to insiders.
The sandbox requires at least Windows 10 version 1703 (Creators Update), but this particular version is no longer supported. At this point, the April 2018 Update (version 1803) is the number one version in terms of usage, and the October 2018 Update (version 1809) is likely to overtake it once it becomes available.
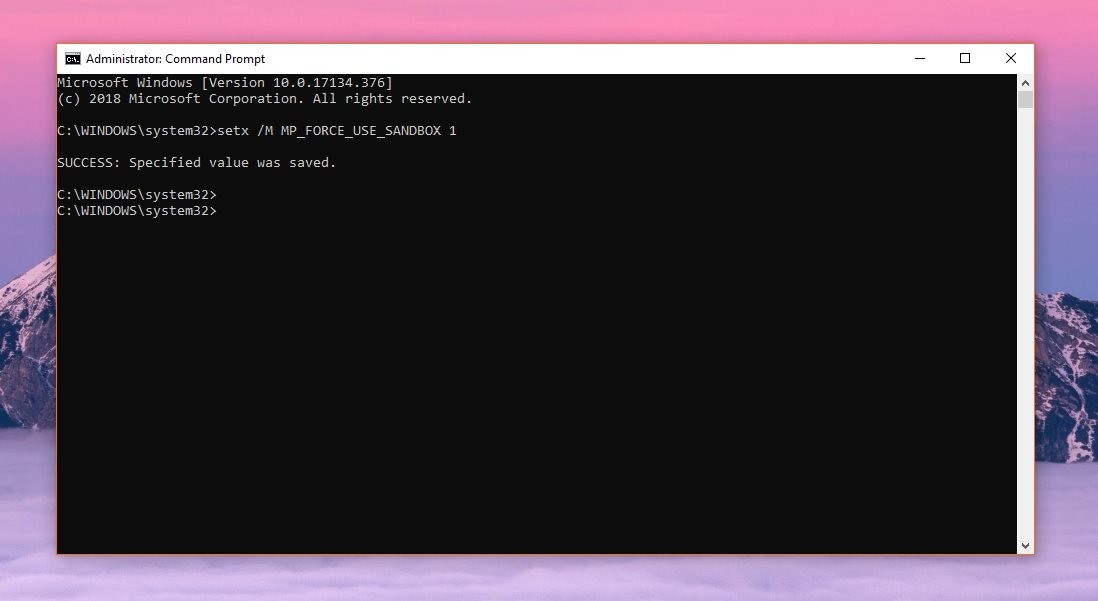
To enable the sandbox in a supported Windows 10 version, you need to run an elevated Command Prompt – type cmd.exe in the Start menu, right-click Command Prompt and click Run as administrator.
Type the following command in the Command Prompt window:
setx /M MP_FORCE_USE_SANDBOX 1
You should then see a message reading SUCCESS: Specified value was saved. A reboot is required, and the sandbox feature is automatically enabled in Windows Defender antivirus.
How to disable the antivirus sandbox features
If enabling the sandbox feature in Windows Defender comes down to just a single command ran in an elevated Command Prompt, not the same thing is possible when disabling it.
In this case, you need to manually remove the new rule, and to do this, you have to launch the classic Control Panel. You probably noticed that there’s no Control Panel shortcut in the Start menu, so just type its name and hit Enter.
In Control Panel, follow the next path:
Control Panel > System and Security > System > Advanced system settings (left sidebar)
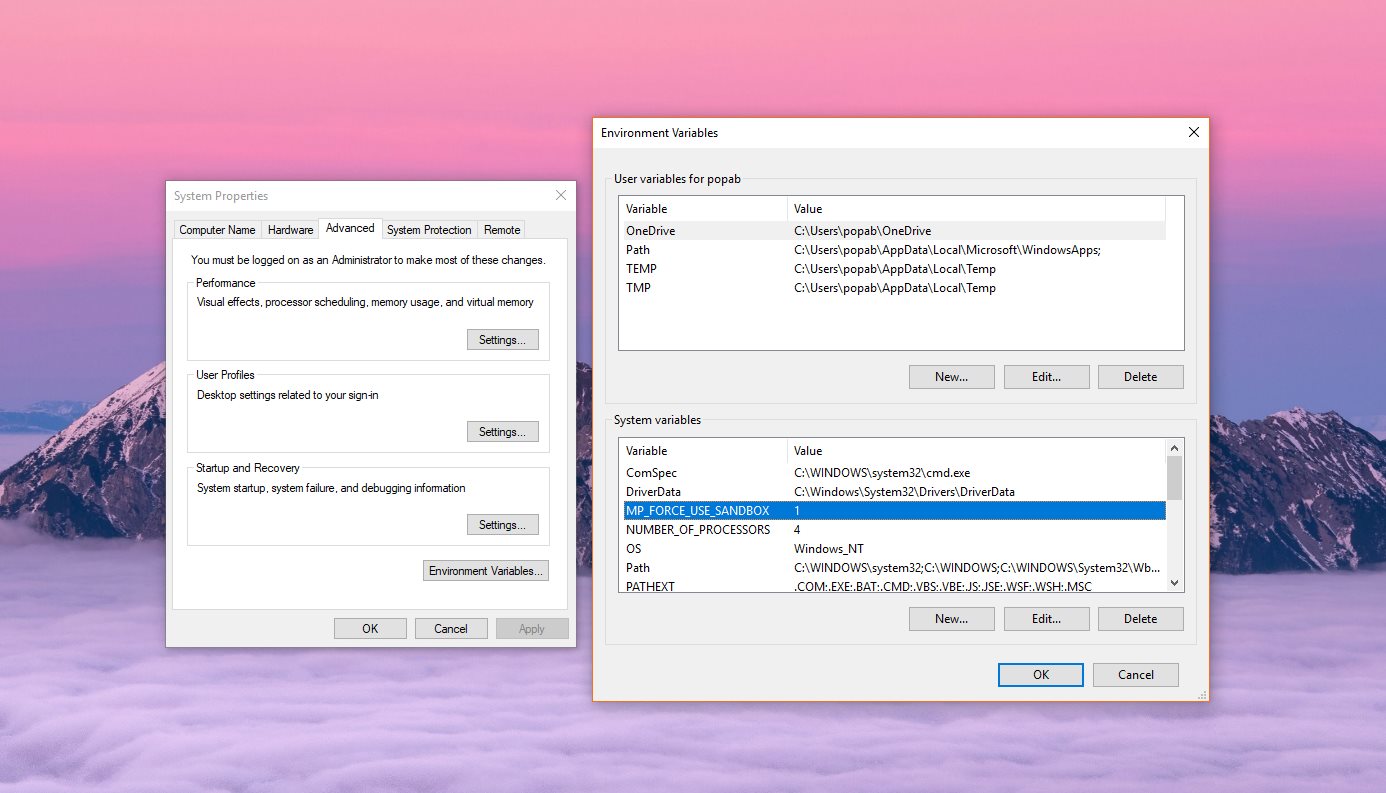
At this point, you should see the System Properties screen with the Advanced tab activated. Next, click the Environment Variables in the Startup and Recovery section. In the System variables box, look for an entry called:
MP_FORCE_USE_SANDBOX
Select this entry and then click the Delete button. Hit OK, close all windows, reboot the computer, and you are good to go.
The next Windows 10 update that will make it easier for this feature to be enabled and disabled, most likely from a dedicated screen in Windows Defender, is due in the spring of 2019. Microsoft has already started work on this release as part of the Windows Insider program, and users should get an early implementation of the sandbox configuration screen shortly.

 14 DAY TRIAL //


