Despite Windows itself evolving substantially in the last few years, some things have never changed, including the way users can edit the content of the Hosts file.
In just a few words, the Hosts file is the one location that allows the operating system to assign host names to IP addresses, in turn enabling users to do all kinds of tricks, like even blocking access to certain websites.
Technically, Hosts is nothing more than a text document placed in a protected system folder, so it shouldn’t be too difficult to edit it, right? Right. However, this isn’t the case, as opening the Hosts file and making modifications isn’t possible simply because it’s placed in a folder requiring administrative privileges.
In other words, you can make any changes to the Hosts file until you specifically open it with administrator rights in Windows 10.
Fortunately, there are several ways to do this, and the same method can be used not only on Windows 10, but also on older Windows versions.
Before anything else, it’s critical to create a backup of the Hosts file. This is necessary especially because making changes to this file could block access to certain websites or network locations, and in case this happens, a backup allows you to restore the original data easily.
In Windows 10, the Hosts file can be found in the following location:
C:\Windows\System32\Drivers\etc
There are two ways to edit the Hosts file and the first one involves copying it to the desktop, making any changes you want, save all of them, and then copy the modified file to the original location. Windows prompts you to grant administrator rights for it, and if allowed, the Hosts file is updated.
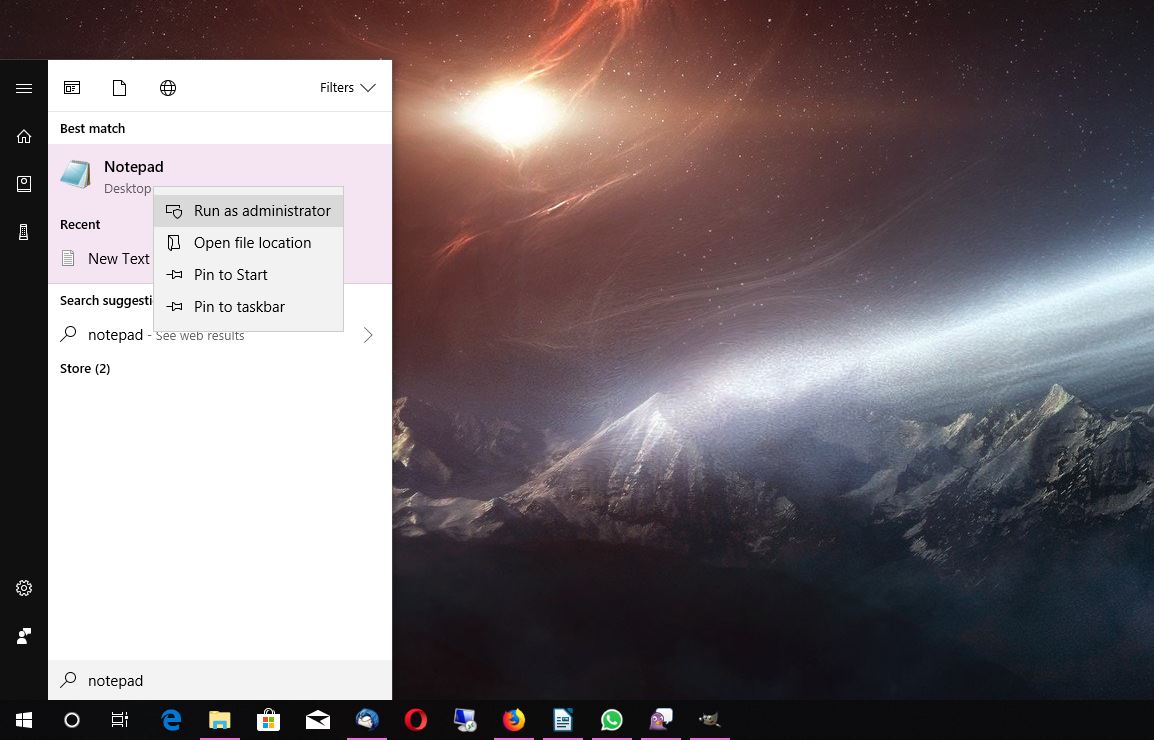
The faster way to make changes to Hosts is to open the file directly with Notepad using administrator rights. To do this, in the Start menu type Notepad, right-click the result and then click Run as administrator. In Notepad, head over to File > Open and navigate to the aforementioned location to open the Hosts file. Make any changes you want and when you’re done, saving it is possible because you already opened it with administrator rights.
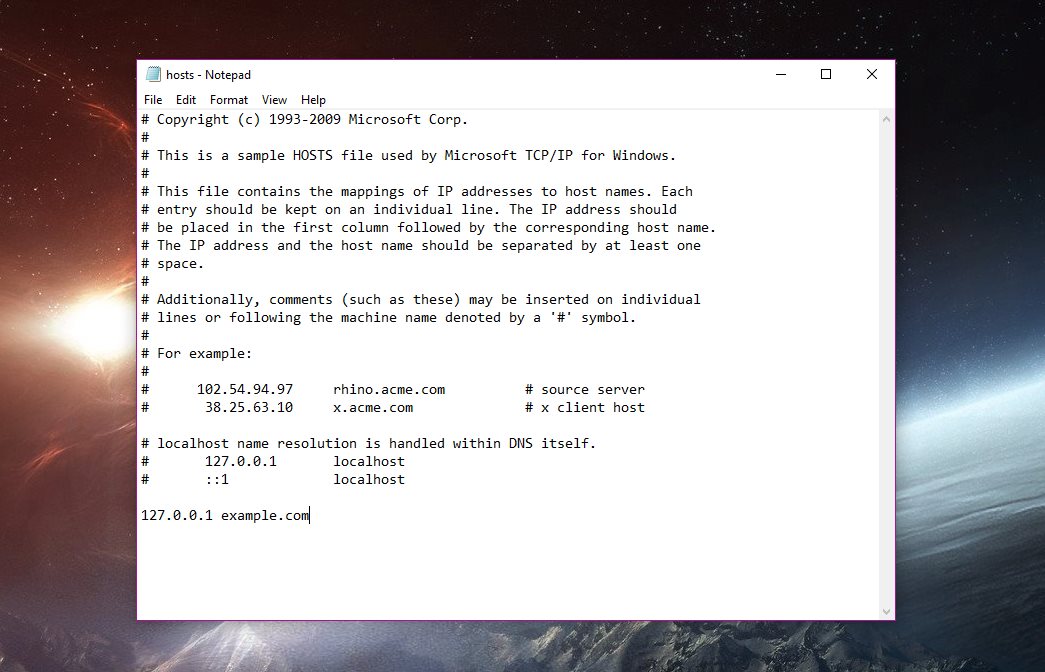
Adding new lines in the Hosts file should only be made by following the pattern that Microsoft has included by default. This means you first need to write down the IP and then the host name that you want it to point to.
Restricting access to a certain site is easy. For instance, in order to block access to a website called example.com, you need to add in the Hosts file the following line:
127.0.0.1 example.com
This means that when entering example.com in your browser address, the application will resolve the site to IP 127.0.0.1, which is actually the localhost (your computer’s local IP).
Removing a certain line from the Hosts file can be done by simply deleting it or by adding a hashtag (#) before it to mark the line as a comment.
What’s important to know is that the Hosts file is often used by malware to infect your system and redirect the system to other malicious website where additional payloads are pushed. This means that checking the Hosts file when trying to get rid of a computer infection could be one of the things you should do, especially if your browser is redirected all of a sudden to websites you never visited.
Again, creating a backup of the Hosts file is critical and could also help you deal with such malware infections. Also rebooting isn’t required when making changes and everything is applied immediately – though browsers may need to be relaunched.

 14 DAY TRIAL //


