14 DAY TRIAL //
 The latest beta version of Rufus comes with a super-useful new feature that makes it possible for users to download ISO images for Windows 8.1 and Windows 10 straight from within the app.
If you think this isn’t such a big deal, let’s take everything one at a time to explain what Rufus now allows you to do.
First and foremost, Rufus is an application that enables you to create bootable media for various operating systems, including here Microsoft’s Windows.
The program originally came with several options in terms of boot options, including a setting that allowed us to use a specific ISO image stored on the local drives for the creation of the bootable media. Needless to say, this was helpful enough for users who wanted to create a bootable USB flash drive, as long as they already had the ISO image stored locally.
But beginning with the latest version, Rufus can even take care of that for you, meaning that it can download the ISO image that you need and then create a bootable USB drive using it.

Before anything, you must make sure that you’re running at least Rufus 3.5.1473 beta – this ISO downloading option should also land in a stable build very soon.
When you launch the app, you first need to select the USB drive that you want to use for the creation of the media. Any USB flash drive should do, but make sure it has at least 8GB in size.
In the boot selection drop-down menu, choose Disk or ISO image (Please select). This particular option will let you choose either a locally-stored ISO image or configure Rufus to download one for you. And this is where the new feature comes into play.
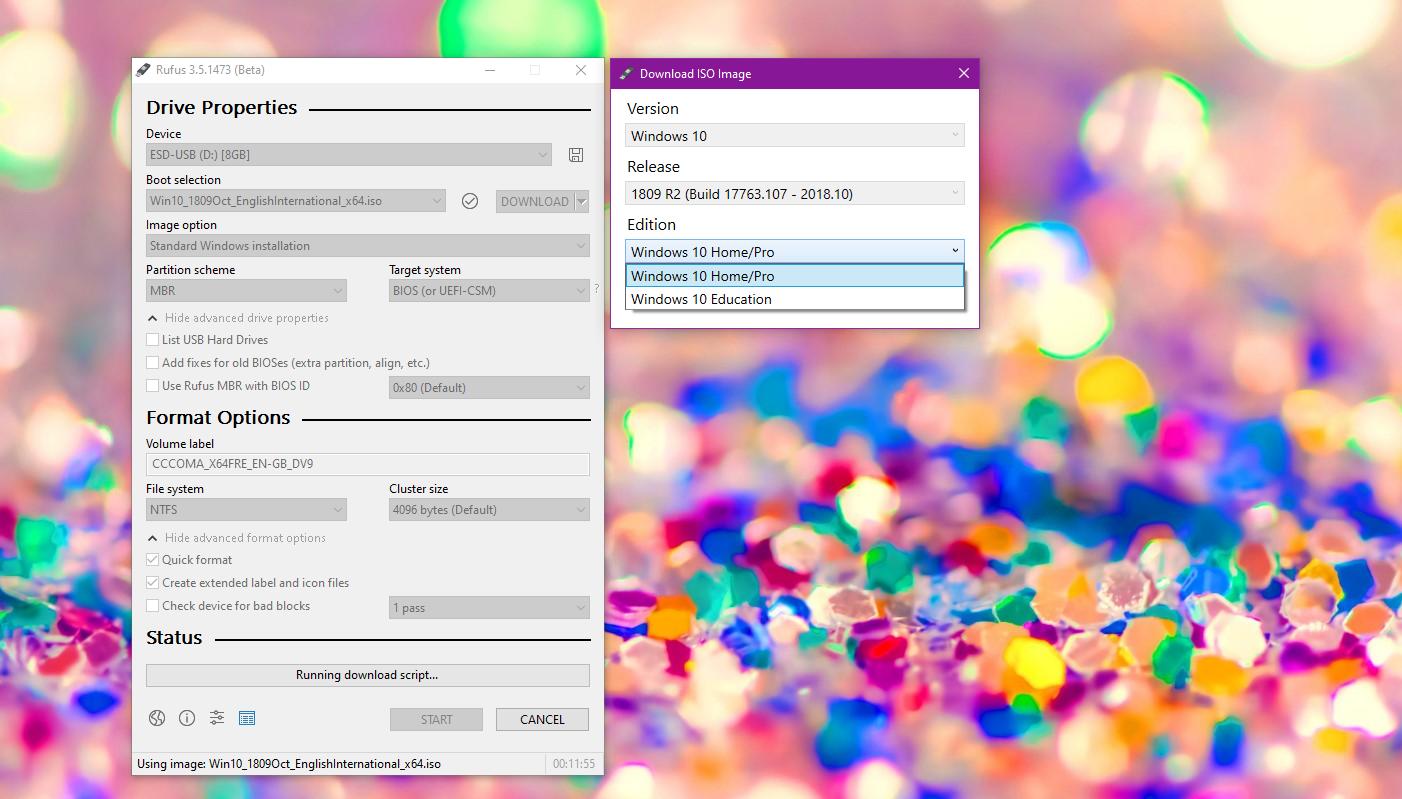
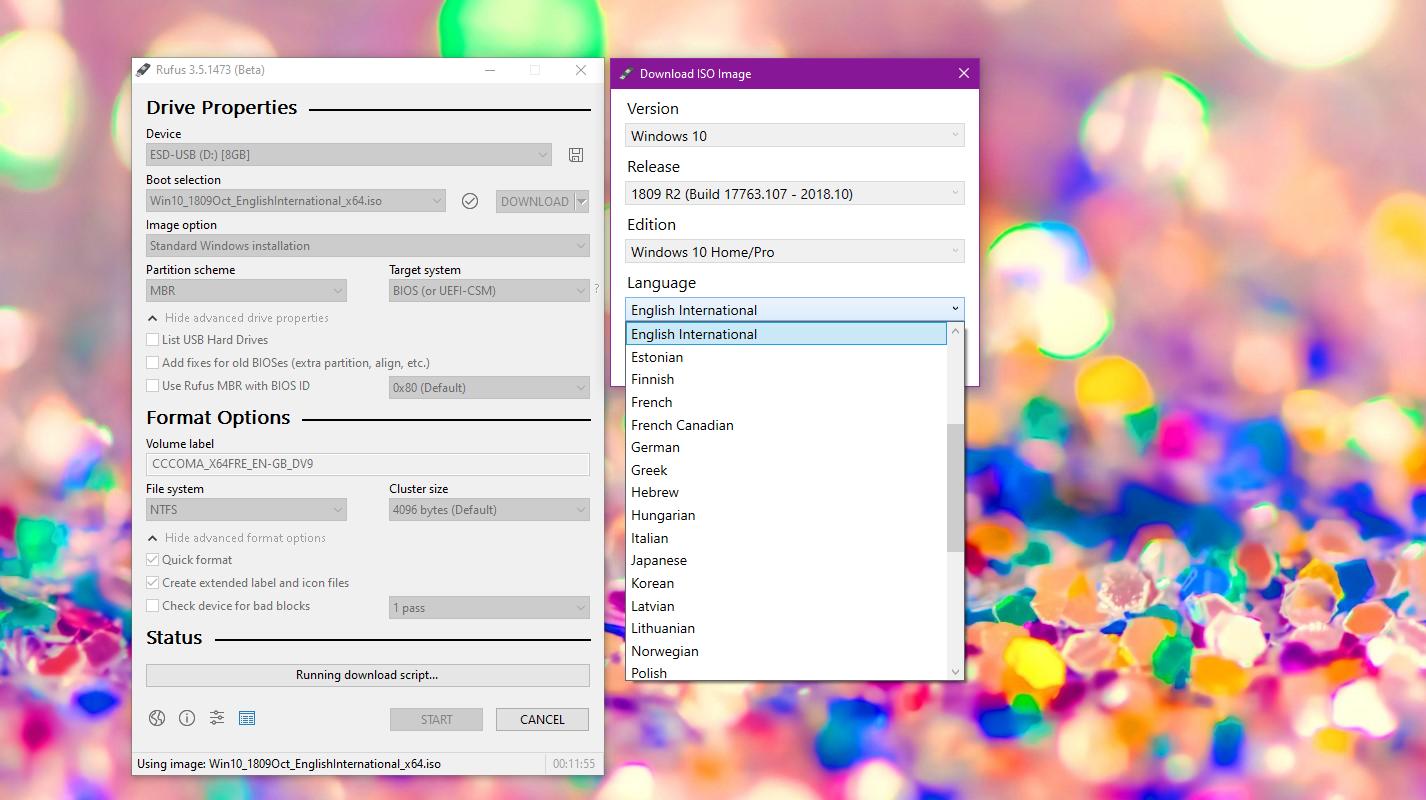
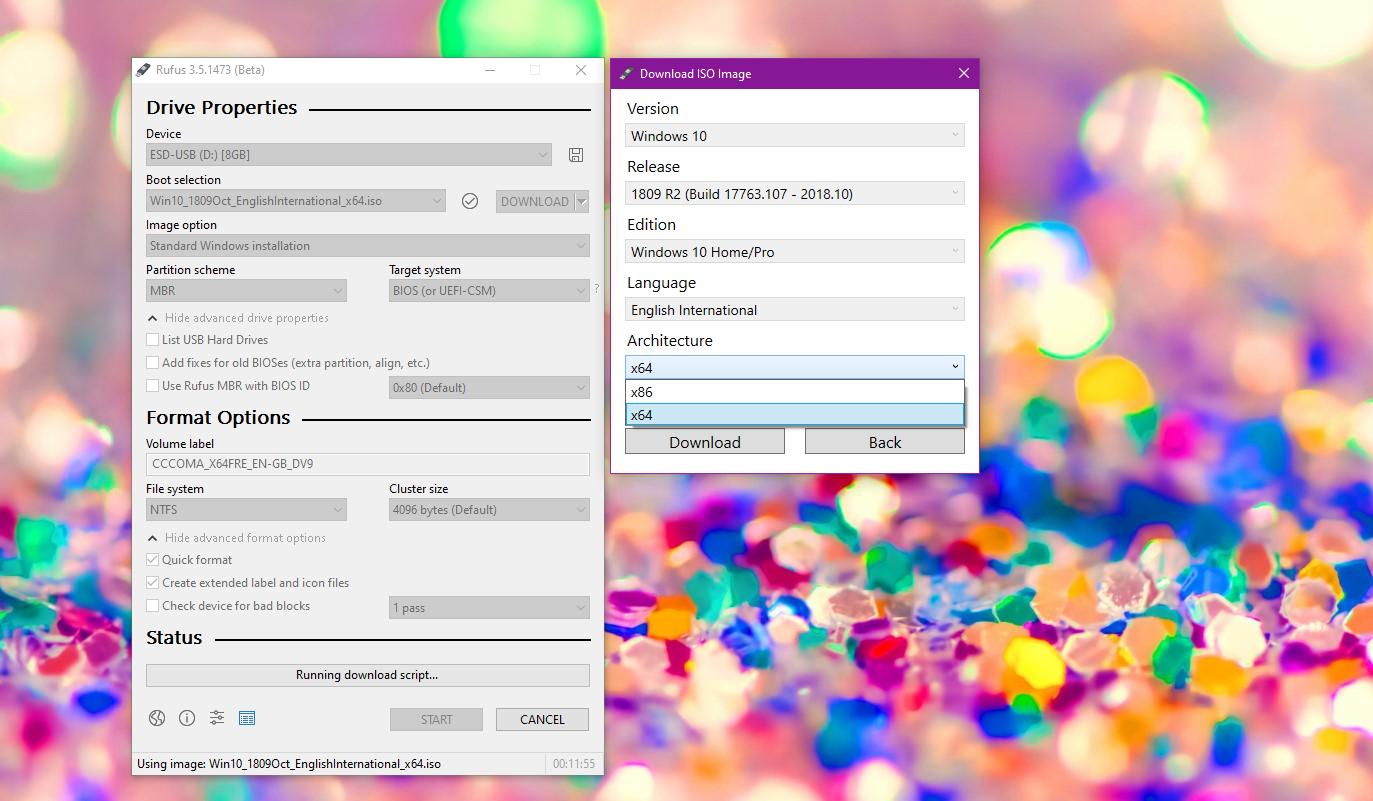
The Select button placed on the right now sports a small arrow which when clicked lets you toggle to a Download mode. Clicking it launches the Windows 10 ISO download interface, which in its turn will download a PowerShell script to handle the process. You’ll have to define all the settings of your Windows 10 ISO image, one by one, in the following order:
Version – Windows 8.1 or Windows 10 Release – the OS version number Edition – Home/Pro/Education Language – English or one of the many others Architecture – x64 or x86

When you’re done, you are prompted to select a location for storing the ISO image and then the process begins. Depending on your Internet connection, it could take anywhere from a few minutes to several hours, but you can always track the progress in the Rufus main screen in the Status section.
When the download is complete, Rufus can begin creating the bootable media drive, with no other changes to the existing configuration being necessary. However, note that the Partition scheme should be set to MBR and the Target system must be BIOS (or UEFI-CSM). The Volume label is defined automatically using the ISO image.
However, you can still set a series of other options, like formatting settings. When Rufus starts creating the bootable drive, you can also track the progress in the same Status section.
Without a doubt, the new version of Rufus comes in handy to lots of users, especially for those who want to clean-install an older version of Windows.
On the other hand, those who just want to install the latest version of Windows 10 can use Microsoft’s Media Creation Tool, which also lets them create a bootable USB drive after previously downloading the necessary files from the company’s servers. In the case of Microsoft’s application, the whole process is designed as a wizard, so you just have to follow a few steps to create the media.
Rufus, on the other hand, can also be used for Windows 8.1, but also older Windows 10 versions, including even the original build 10240.