14 DAY TRIAL //
 Windows 10 finally got equipped with multiple desktops, but it’s no fun when using them on a single monitor. But what if your second desktop is actually another computer with its own hardware components?
This method can’t be put in motion with conventional Windows features, but like most activities, there’s an app for that. The guys over at Microsoft put some thought into this idea and made their own application, but there are others as well.
In the end, you get to use two different computers with only a single pair of input devices. This might sound familiar, since it’s something similar to remote controlling another PC from a distance. However, this method works over local networks, while the mouse reaches the second computer as it would an extended desktop on another monitor.
In order for everything to run smoothly, a simple local connection is required, at least two computers placed side by side, one mouse, one keyboard, and one of the following applications. Below are the required steps to make everything work.
Using two computers with a single pair of input devices
| The Microsoft Product |
|---|
| Although not included in the default set of Windows features, the application in question is available free of charge, and is even compatible with the latest iteration of Windows. Entitled Mouse without Borders, it lets you configure up to four different computers in the vicinity, using them either as extended monitors, or an advanced second desktop, with its own hardware components. More info on Mouse without Borders and download link here. |
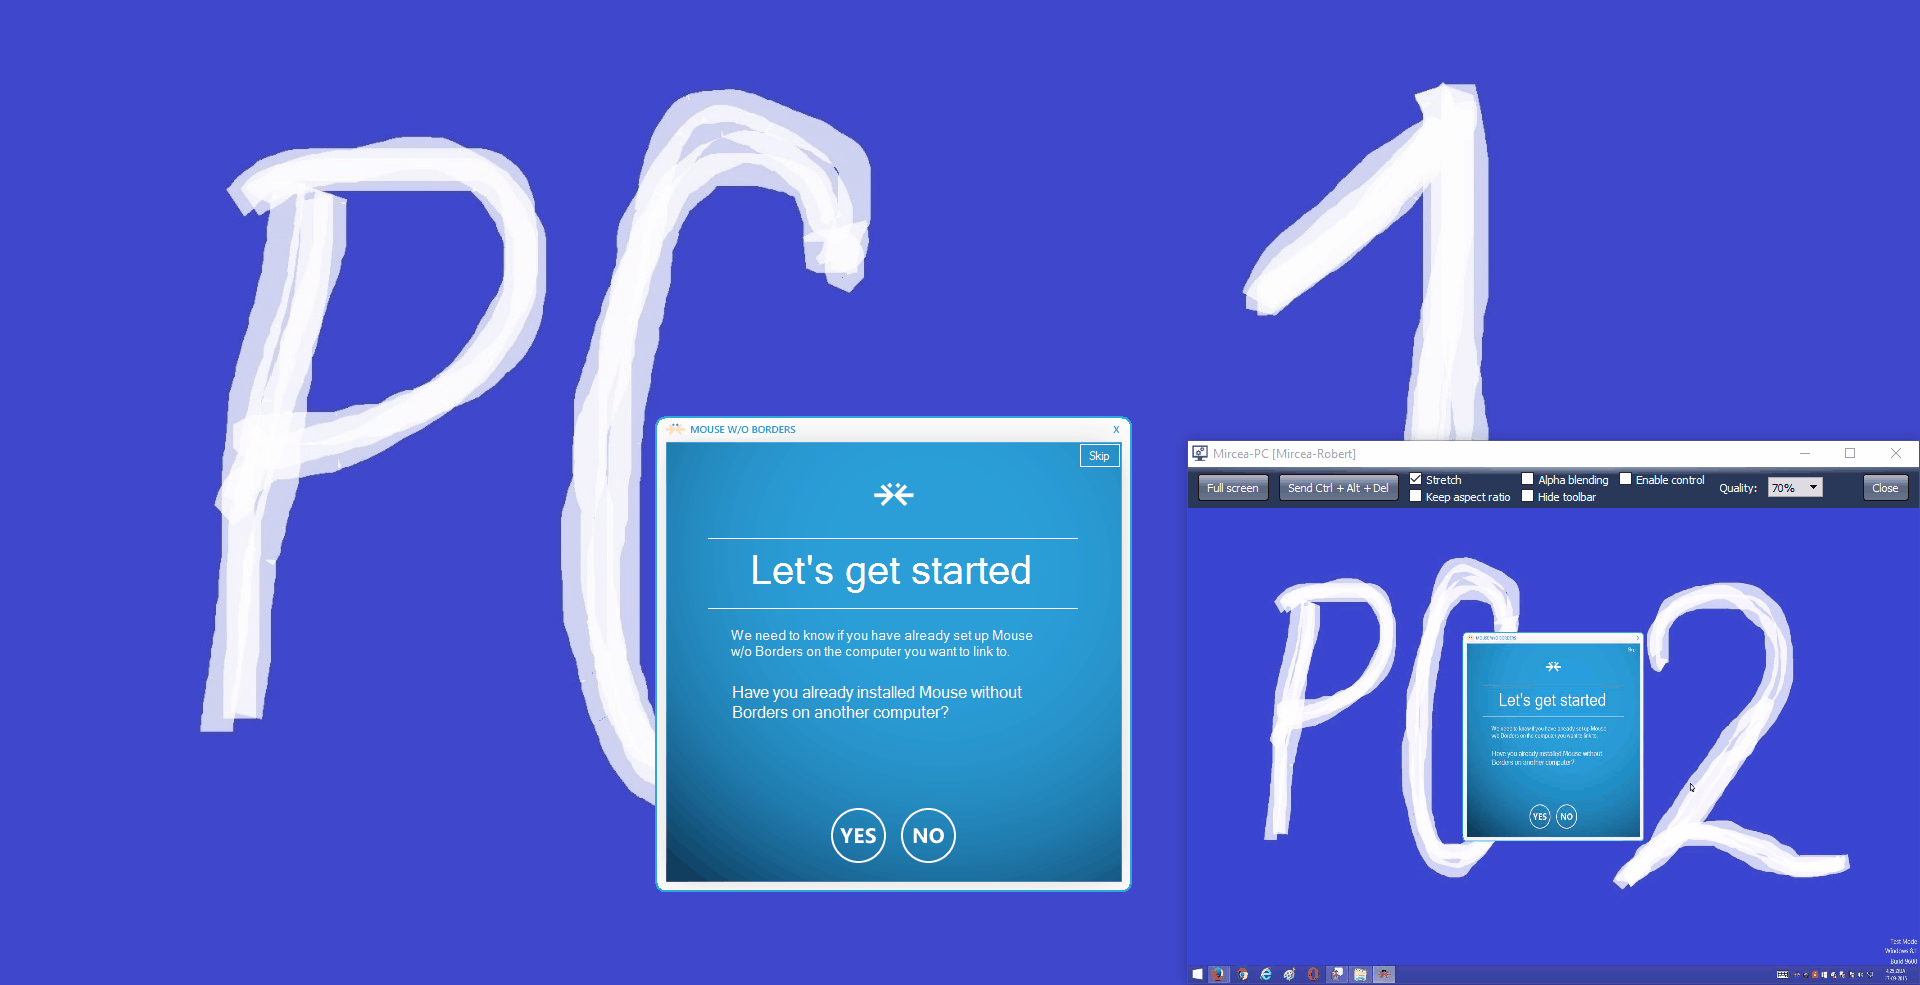
Step 2: Move to the main one. When asked whether you have already set up the application on the other computer, choose No.
Step 3: A new prompt appears with a security code and the computer’s name. These can’t be copied, so either write them down in a temporary text document, or leave the prompt activated. Now, move your attention to the target PC.
Step 4: The same question encountered in Step 2 is on the target PC, but now you need to press Yes.
Step 5: Fill in the Security Code and Other Computer’s Name fields with details from the first PC and press Link.
Step 6: Wait a few seconds until connection is established. Press OK on both PCs. The main window appears on both computers, and you can now only use a single mouse and keyboard to control both of them.
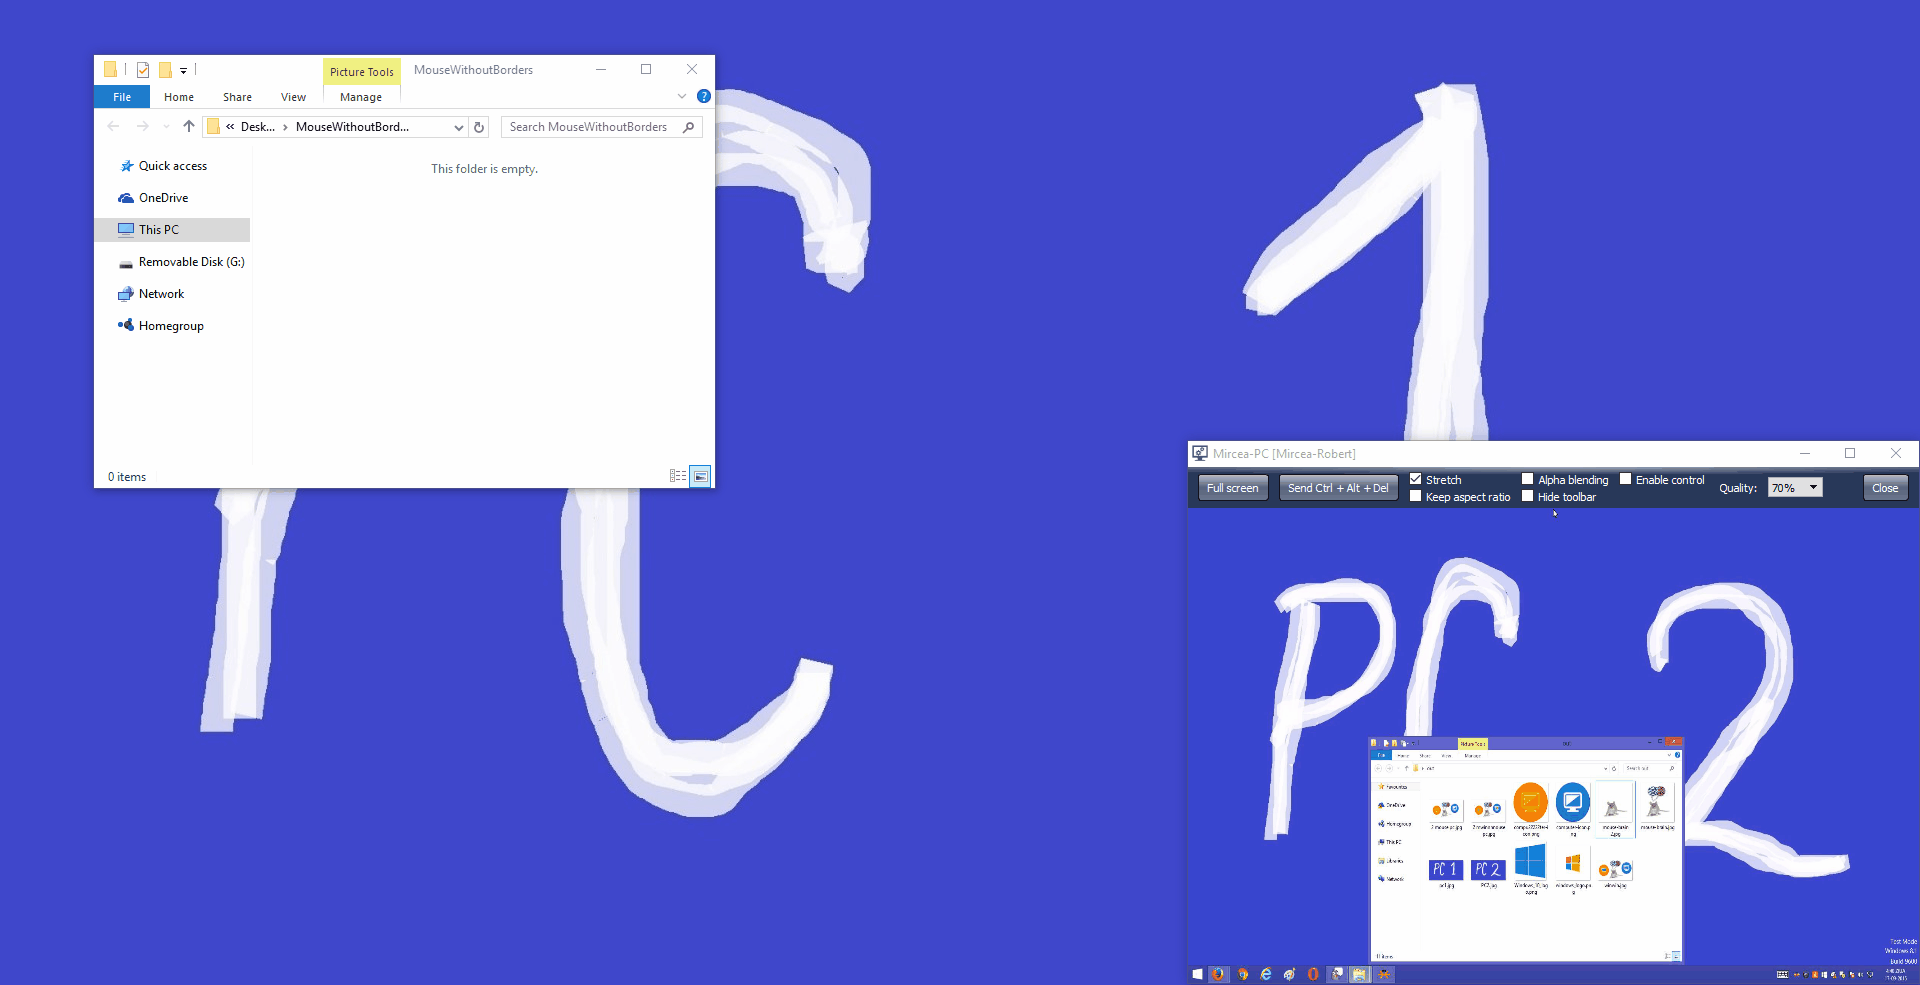
These are only the basic steps required to make the connection, but you’re free to explore other settings. You can connect up to four different computers. Drag and drop is possible, making file transfer incredibly easy.
Hint: Arrange computers in the main window just as they are on your desk. This makes it possible to switch to the second one simply by exiting the screen through the proper edge.
The application is set to automatically start with Windows, and connection is established on the spot. This means you only need to power on both computers, because the rest is taken care of by the program.
| The third-party alternative |
|---|
| In case you don’t find Microsoft’s own utility appealing or suitable to your needs, there’s a different application, called Synergy, that functions in the same manner. The steps below describe what it takes to set it up, so read more about Synergy and download it here when you’re ready. |
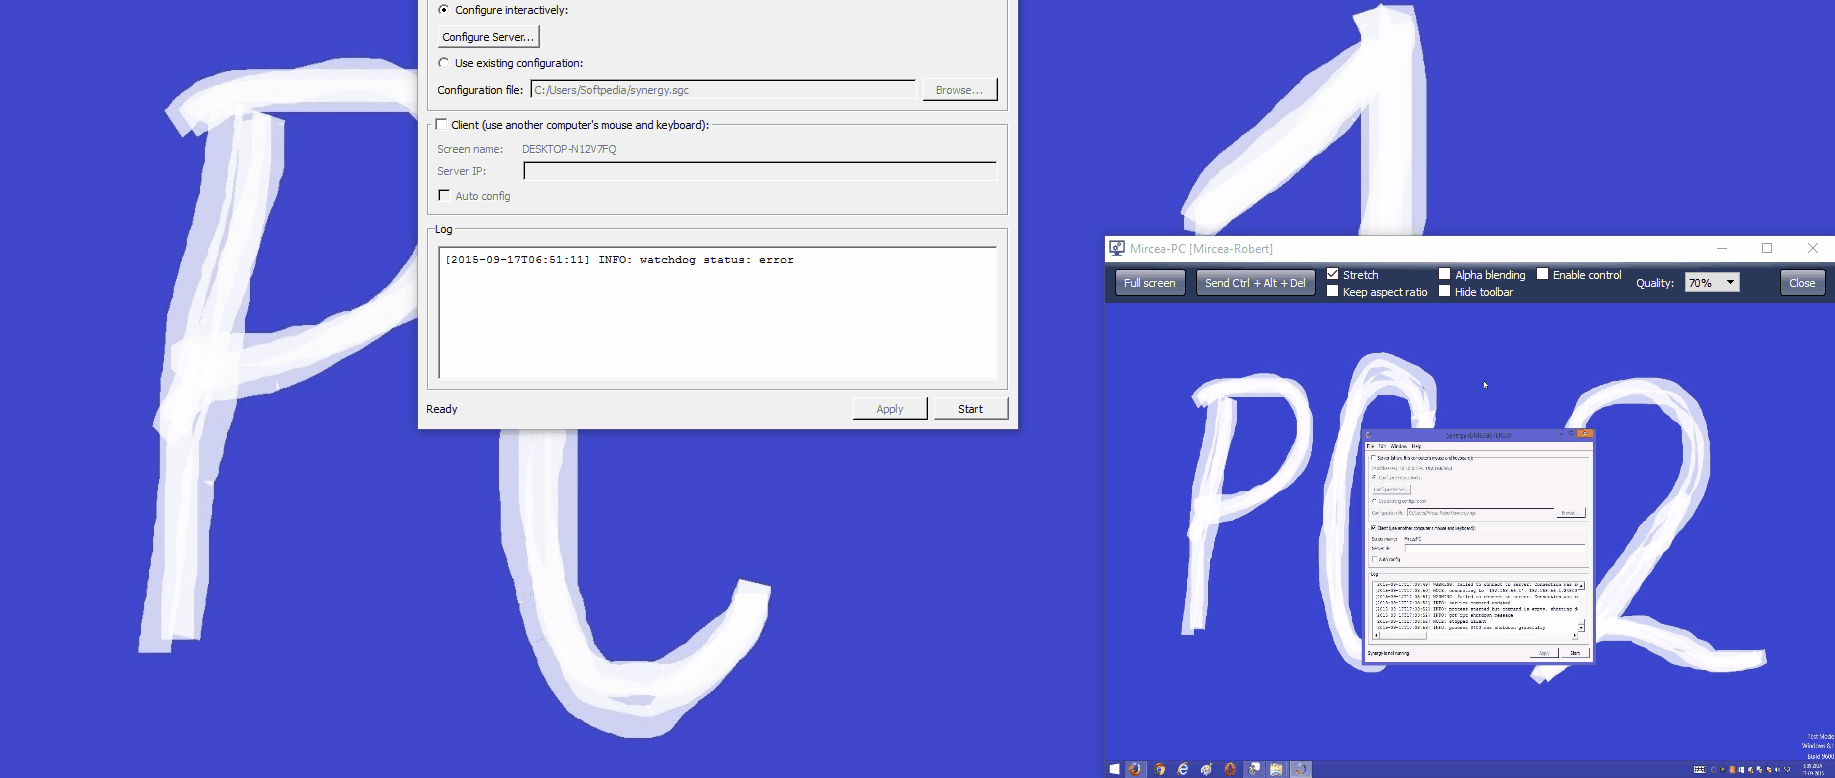
Step 2: Turn your attention to computer number 1, and make sure Server (share this computer’s mouse and keyboard) is selected in the main window. Now, choose to Configure Server.
Step 3: Drag the monitor icon from the top right corner on the grid next to the main PC. It’s best to arrange them the same way they’re on the desk.
Step 4: Double-click the icon you just placed. In the Screen Name field at the top of the prompt that appears, write down the second PC’s name (not the IP address), and press OK. Hit OK again to finish the Server Configuration.
Hint: The computer’s Screen Name can be viewed in the main window, under the Client section, just above the Screen IP field.
Step 5: On the second PC, make sure Client (use another computer’s mouse and keyboard) is checked.
Step 6: Write down the first PC’s IP address, which is shown in the Server section of the main window.
Step 7: Press Start on both computers, wait for connection to be established, and you’re ready to go.
A few last words
All in all, using this method to extend your desktop, or even use it somehow as a second monitor might mean you have to pay a bit extra on the next electricity bill, it can be easily used with your old PC, even if they’re running different iterations of Windows.