
 14 DAY TRIAL //
 The following tutorial will teach Ubuntu 11.04 (Natty Narwhal) users how to customize the new interface developed by Canonical for the Ubuntu operating system, Unity.
The new Ubuntu 11.04 (Natty Narwhal) operating system introduced a different user interface, designed by Canonical, called Unity. But the development team did not offered some easy to understand and learn tricks, to make Unity usable by human beings.
With these trips and tricks, users should familiarize with Unity and find it very useful and user friendly. Without any ado, we'll let you now test these nice tricks.
But first, you will need the Compiz Fusion Settings Manager Tool installed in your Ubuntu 11.04 operating system. To install it, click the link below:
Install CompizConfig Settings Manager
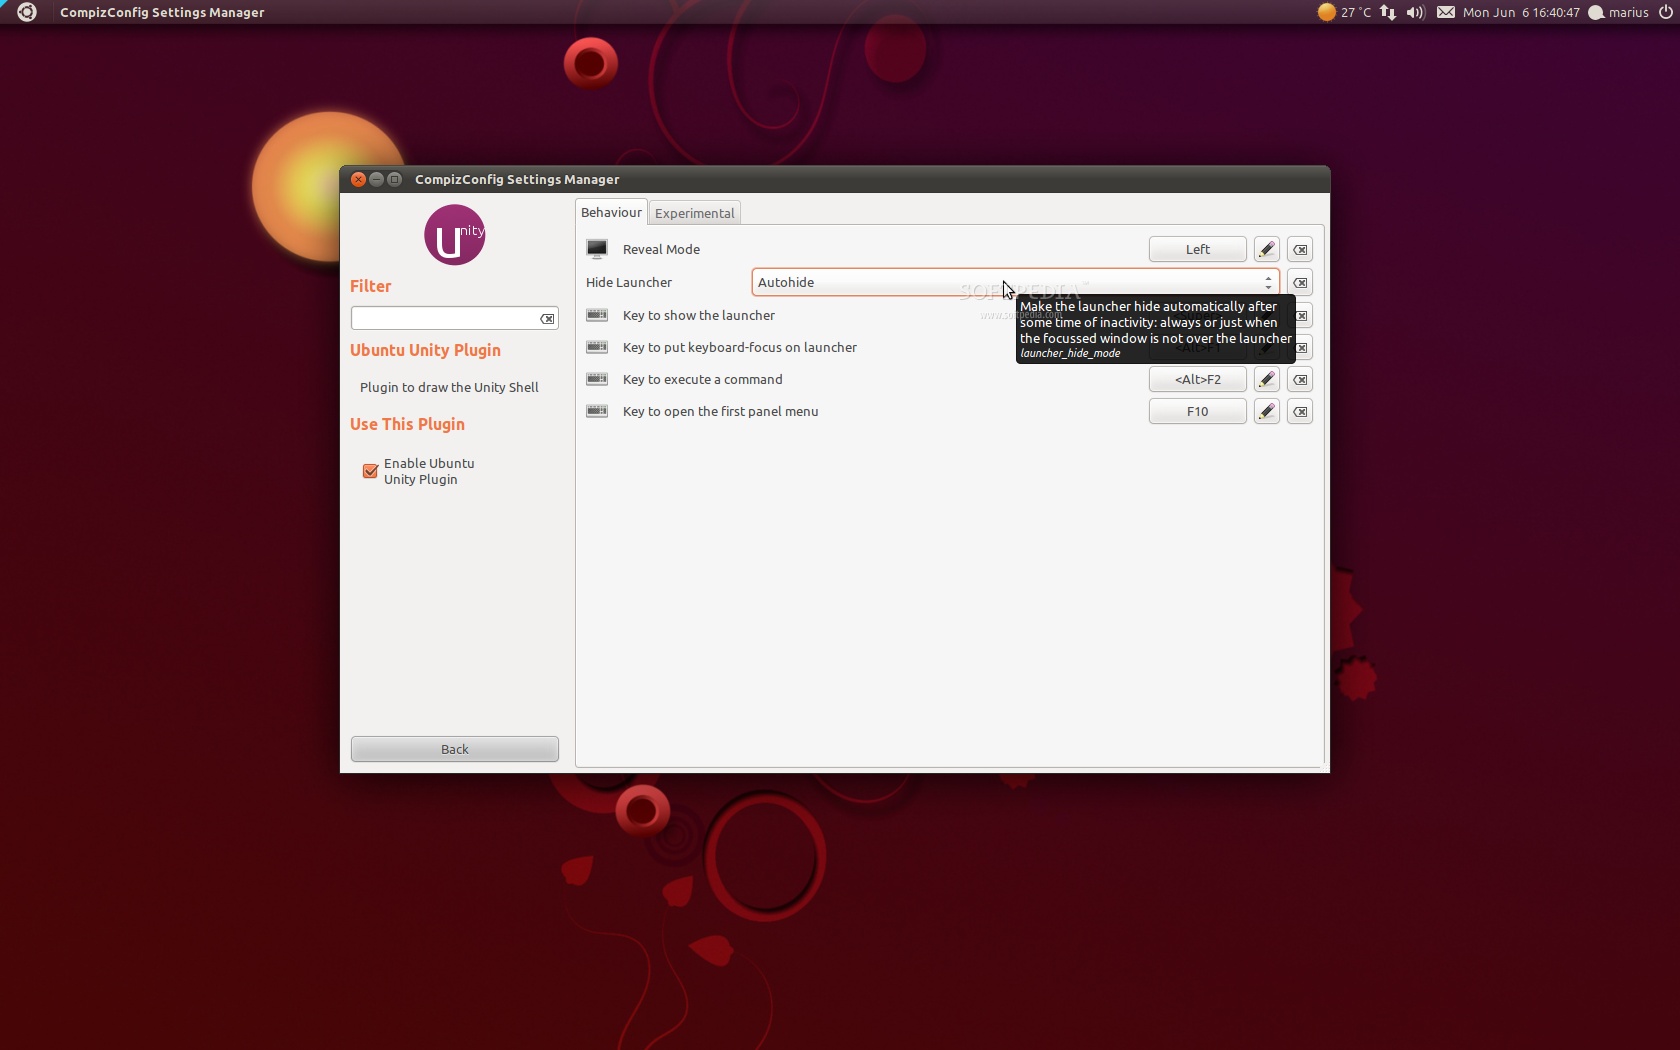
Unity Autohide
We bet that few of you knew that Unity can be hidden during your entire session. To do this, press the Windows key and search for compiz. Click the CompizConfig Settings Manager icon and search for the 'Ubuntu Unity Plugin' entry. All you have to do now is to set the "Hide Launcher" option on "Autohide".
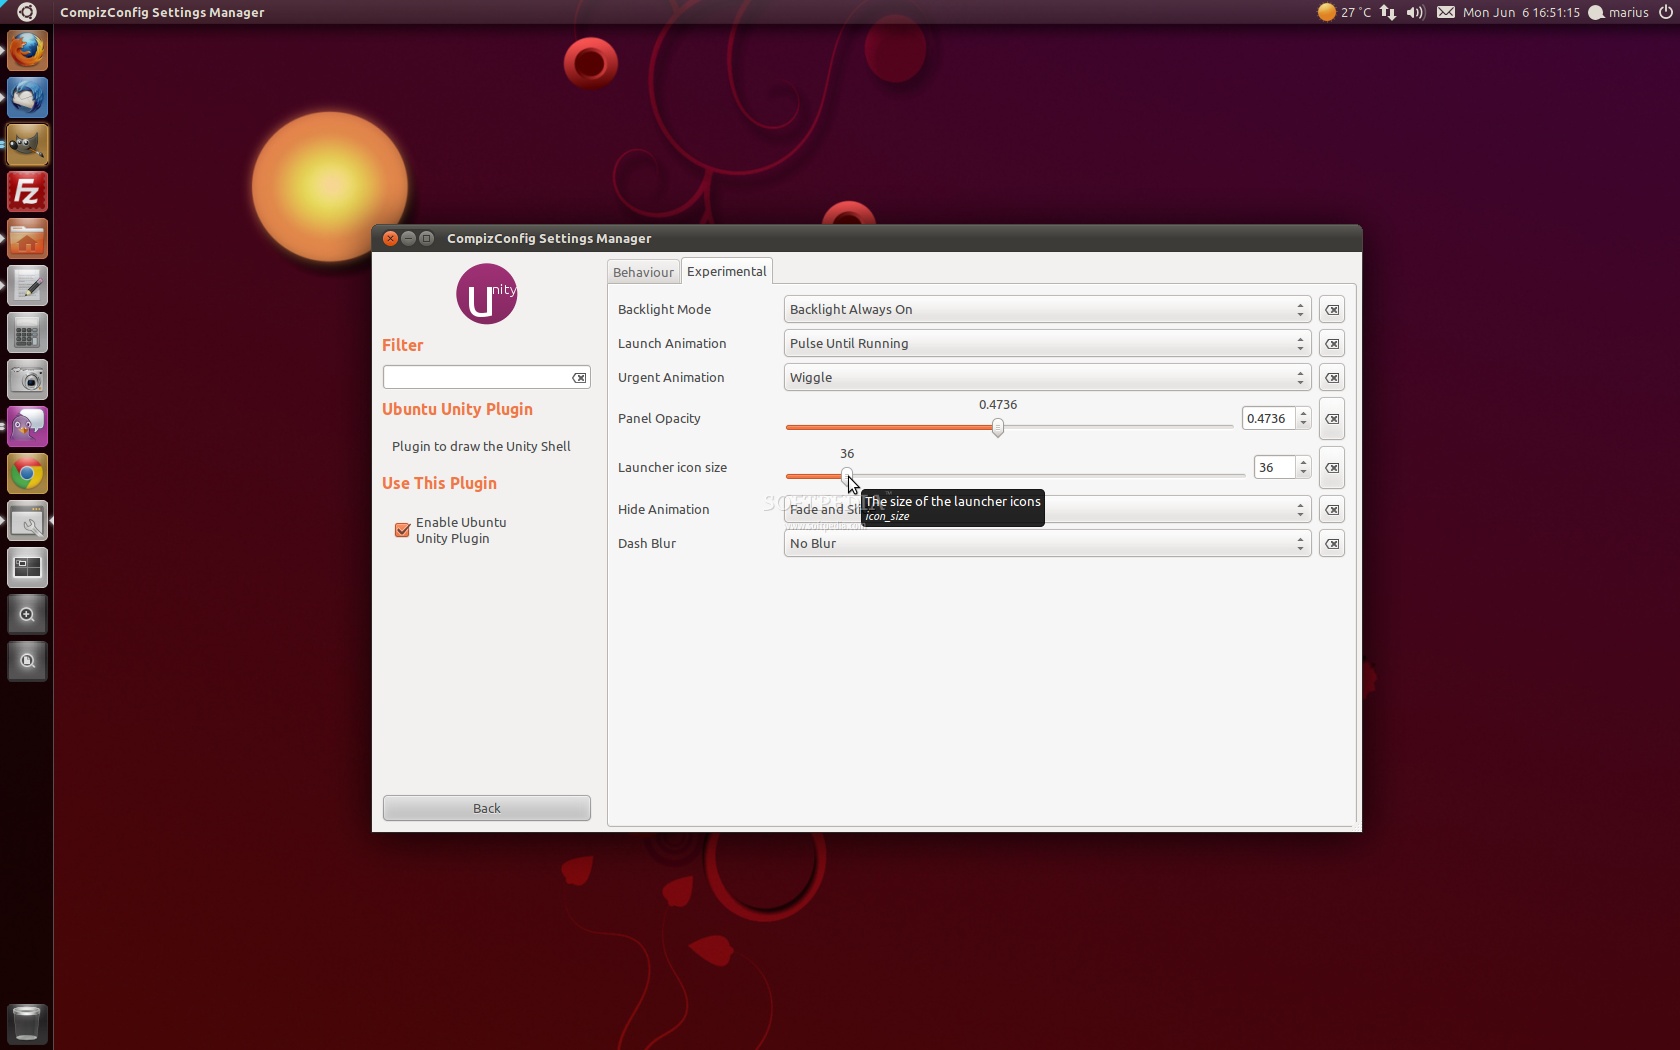
Smaller Icons for Unity
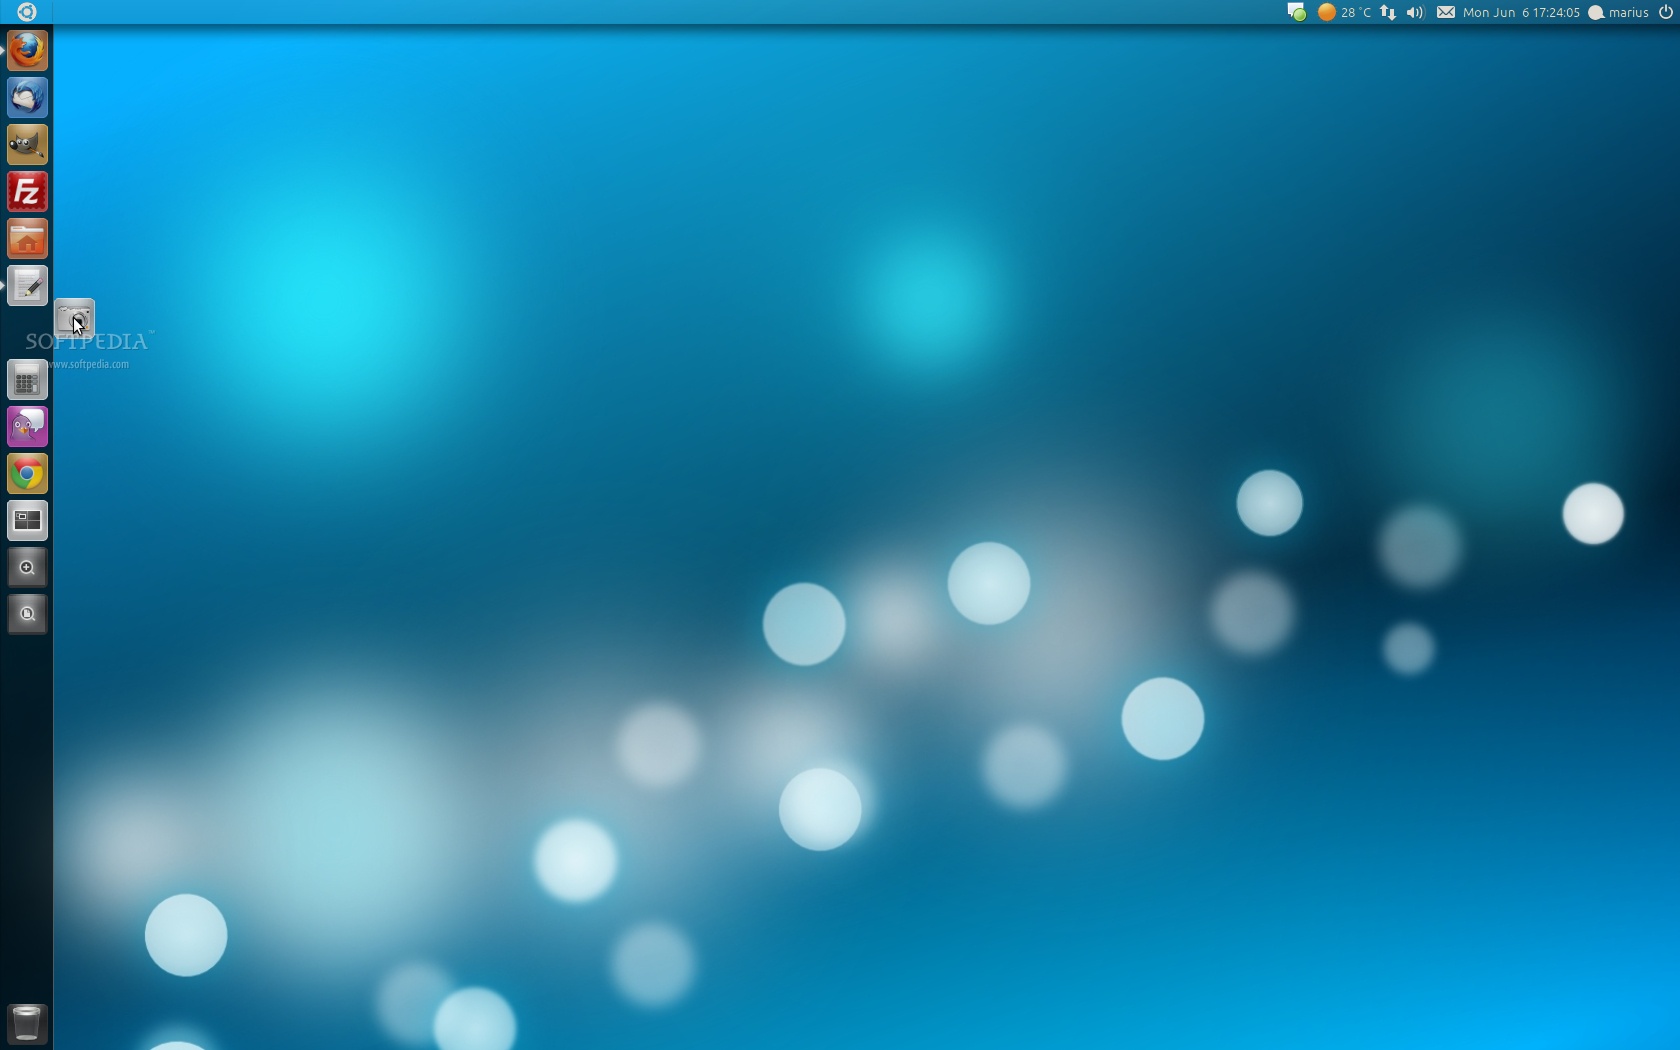
We bet you didn't know this either, but the Unity launcher can be smaller. Same as above, press the Windows key and search for compiz. Click the CompizConfig Settings Manager icon and search for the 'Ubuntu Unity Plugin' entry. All you have to do now is to go to the "Experimental" tab and drag the "Launcher icon size" slider to the desired size. We've put ours on 36 px and it looks very nice...
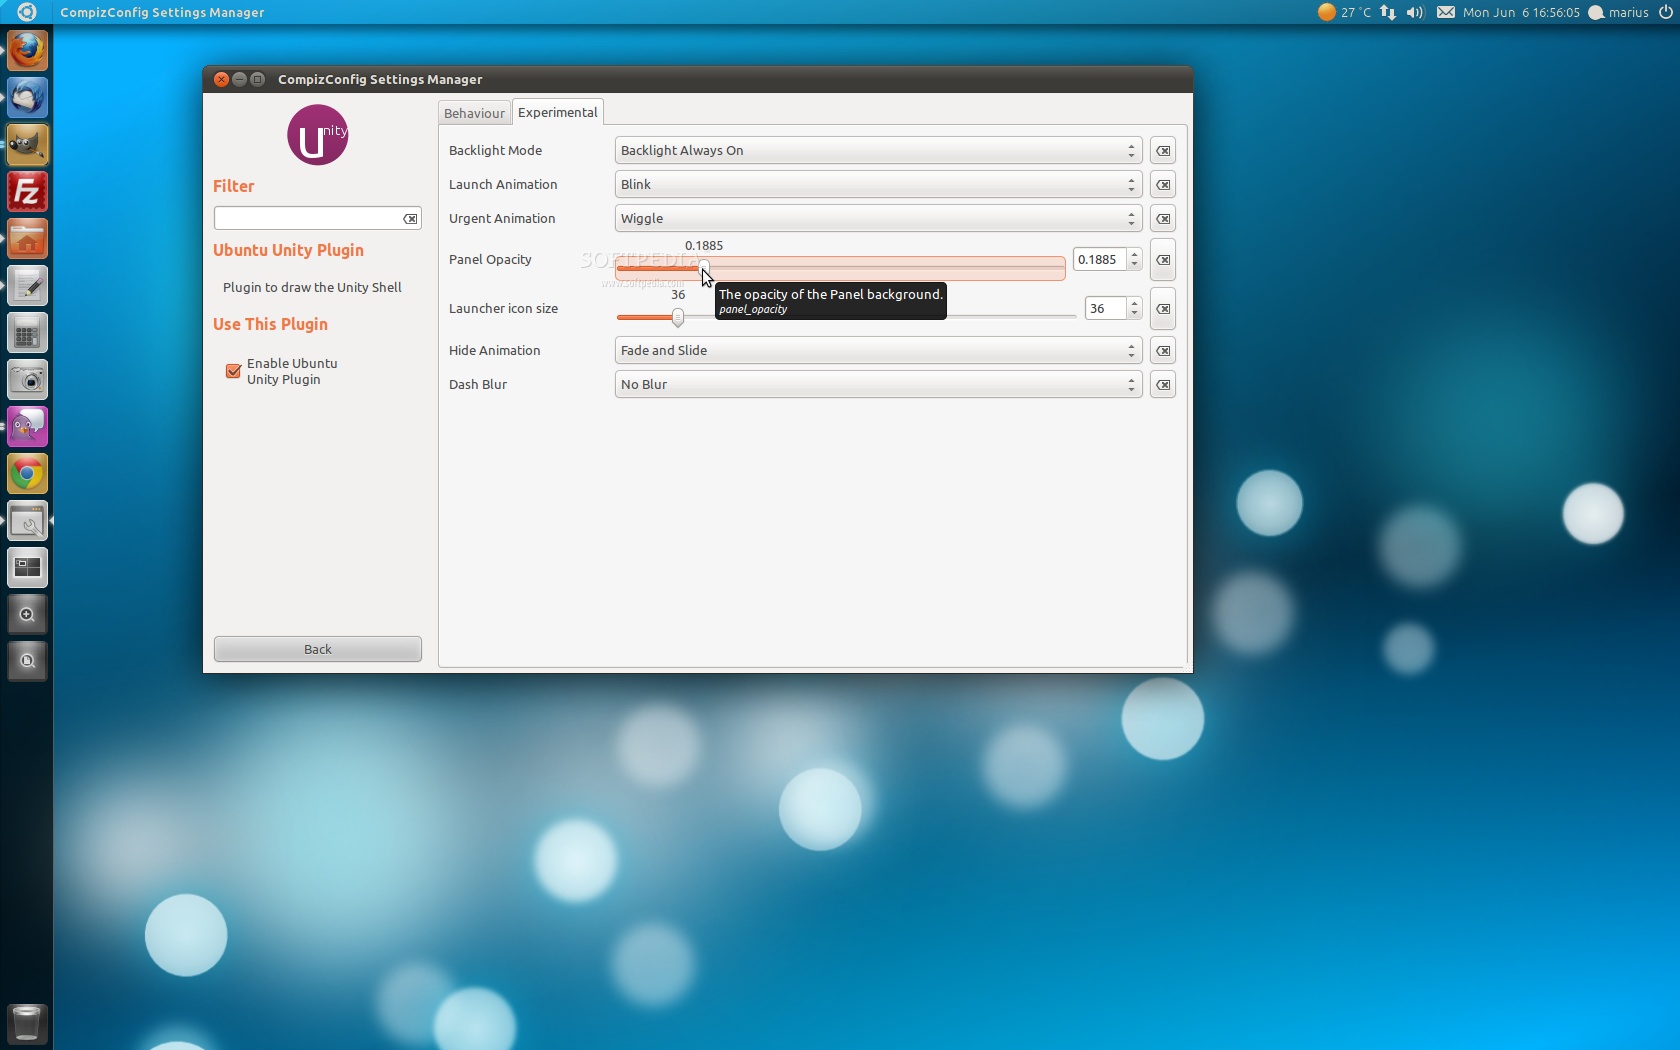
If you don't like the solid color of the Unity panel, you can easily make it partial or completely transparent. How? Easy, just press the Windows key and search for compiz. Click the CompizConfig Settings Manager icon and search for the 'Ubuntu Unity Plugin' entry. Now go to the "Experimental" tab and drag the "Panel Opacity" slider to the desired value. This is how we like it...
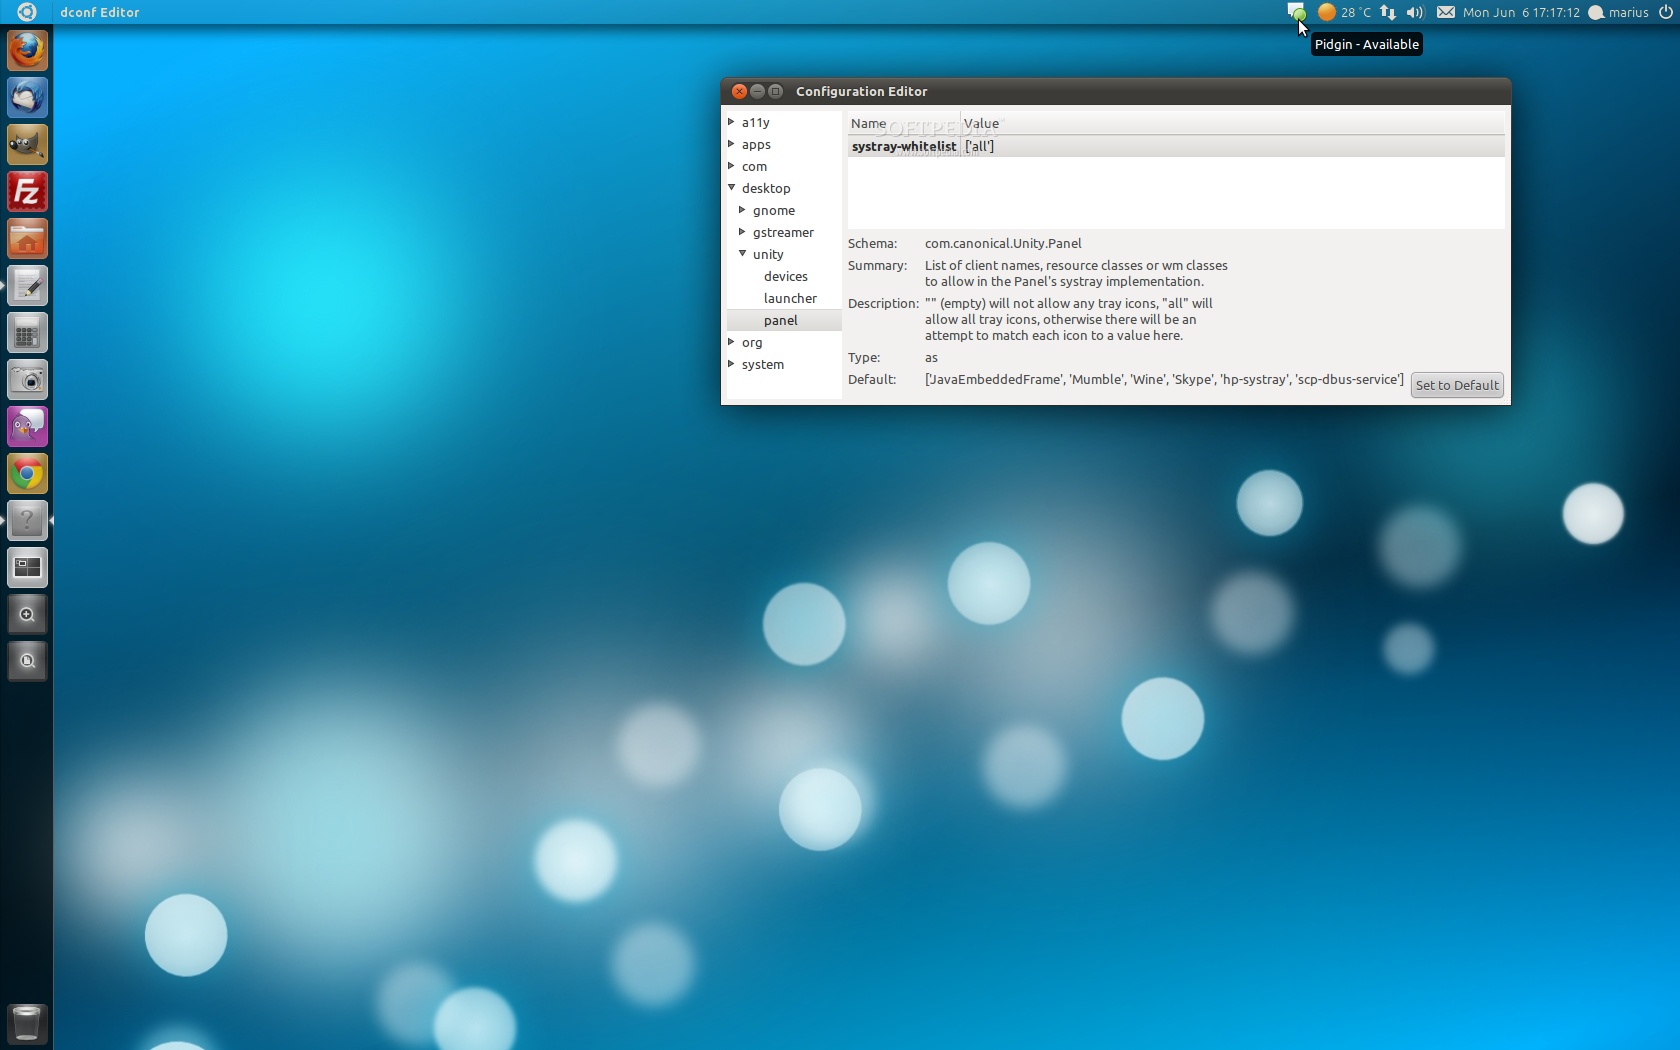
We know you want this, so here it is... the good old system tray re-enabled, to show your apps in the systray area. To do this, you need to install the dconf-editor tool, so click the link below.
Now hit the ALT+F2 key combination and type dconf-editor. Click the Dconf-editor icon. When the "Configuration Editor" window appears go to "desktop -> unity -> panel", click the value line on the systray-whitelist option and replace everything on that line with 'all'. Log out and log back in. See the below screenshot, we now have Pidgin on system tray, yes!
This is an easy one! Just hold the left mouse click on the desired shortcut and drag it outside the Unity launcher. Now place it wherever you want.
· modify the Unity launcher's icon animation; · modify the Unity launcher's hide animation; · modify various Unity launcher key shortcuts.
We do hope that with this article you've learned something useful and that it will make your life much easier with the new Unity interface of the Ubuntu 11.04 (Natty Narwhal) operating system.
If you know other Unity tricks, or get stuck somewhere in the article, don't hesitate to use our commenting system below.