
 14 DAY TRIAL //
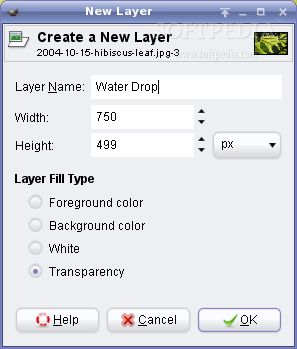
 In today's tutorial you will learn how to create rain (water) drops with GIMP. Open GIMP, drag and drop the photo you want to apply water drops to, go to File -> Dialogs -> Layers and click the "New Layer" button (first button, left bottom corner). On the new layer window, type a name for the new layer (e.g. Water Drop Layer) and click OK. Now that the new layer is created, you can add elements to the image.

Select the elliptical tool (press E key on your keyboard) and draw a little ellipse somewhere on your photo (where you want the raindrop to be). Activate the gradient tool (press L key on your keyboard), hold the CTRL key and with the mouse drag a straight line over the middle of the ellipse you've just drawn. Next, go to the Layers window and select the 'Overlay' mode.


Let's create a nice shadow for the ellipse, by going to Script-Fu -> Shadow -> Drop-Shadow. In the 'Drop-Shadow' window, put the "Offset X" and "Offset Y" options to 3. Then drag the 'Opacity' slider to 70% and hit the OK button. Open again the 'Drop-Shadow' window and this time set the "Offset X" and "Offset Y" options to -3 and drag the 'Opacity' slider to 30%. Click OK.


Go to the 'Layers' window, click on the 'Drop-Shadow#1' layer, then activate the move tool (press M key on your keyboard) and drag the layer a little to make a very nice shadow effect. Go to "View" menu and click the "Show Selection" option. Take a look at the images below to see how the water drop effect should look at this moment.

On the 'Layer' window, create a new layer and give it a name (e.g. Sparkle Layer). Activate the brush tool (press the P key on your keyboard) and select the "Circle Fuzzy (15)" brush. Make sure you have 'White' as the foreground color and apply the brush in a corner of the ellipse. This will make it look like the sun is reflected in the raindrop.


And here is the final result!
