
 14 DAY TRIAL //
 Today you will learn how to make a userbar to be put in forum signature. Userbars are small rectangular images that are often used to show the user's interests, hobbies, or graphical skills. The below tutorial is just a simple and basic one, but nothing stops you to be more creative and make the best-looking userbar out there. Here are two examples:


Before we make the userbar, I will teach you how to create scanlines. The scanlines can be used as background for userbars to make them look much better (see picture below).

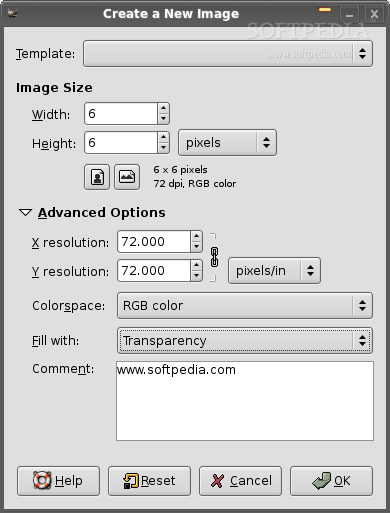
Let's create a new image (Ctrl+N) and set both width and height to 6. Then click on the "Advanced Options" and set the "Fill with" option to Transparency and click OK.
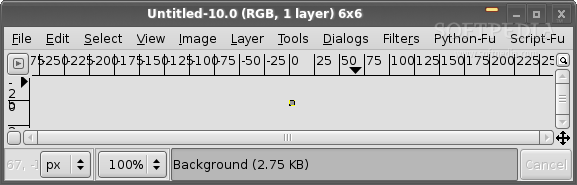
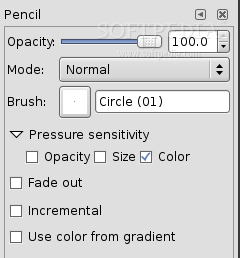
Because the newly opened image is too small to work with, we must enlarge the image; so go to View -> Zoom -> 16:1 (1600%). Then select the Pencil Tool by pressing the N key on your keyboard and on the advanced options (third part of GIMP's main window) select the brush named "Circle (01) (1 x 1) and click where it says "Pressure sensitivity" and uncheck "Opacity" (if it is checked) and check the "Color" option. (see picture below).

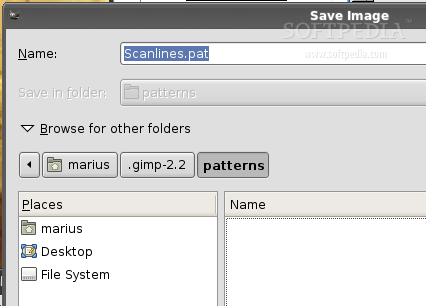
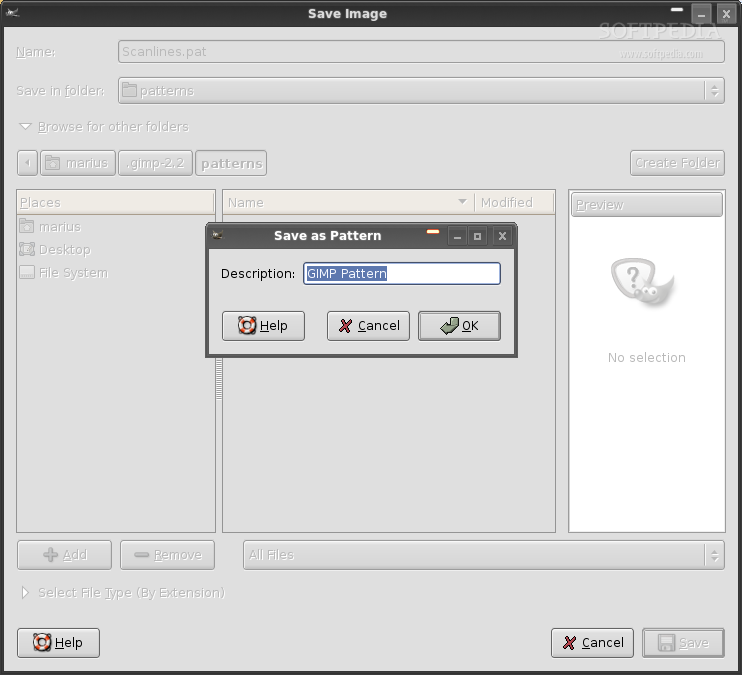
Click Ctrl+Shift+S and save the image with the following name (Scanlines.pat) in your /home/yourusername/.gimp-2.2/patterns. It will ask you for a name before it will be saved, so rename it to something like Scanlines.
Note: replace /home/yourusername/ from the above path with your username, e.g. /home/marius)
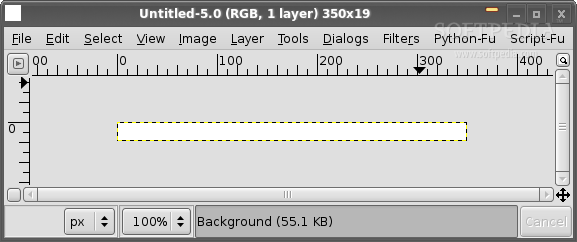
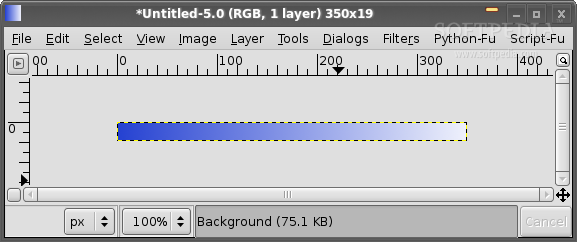
If you did the above tutorial, close and open up GIMP again, and let's begin with the userbar tutorial by creating a new image (Ctrl+N) and set the width to 350 and the height to 19. Don't forget to click on the "Advanced Options" and set the "Fill with" to White. Click OK when you finished (see picture below).

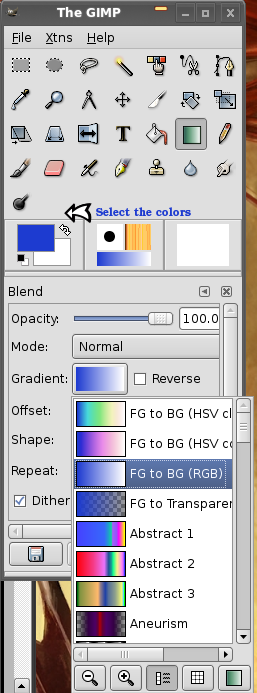
Now select the gradient tool by pressing the L key on your keyboard and the third part of GIMP's main window, at the advanced options, set the Gradient to FG to BG (RGB). Also select the colors you plan to use from the middle part of GIMP's main window (see picture below).
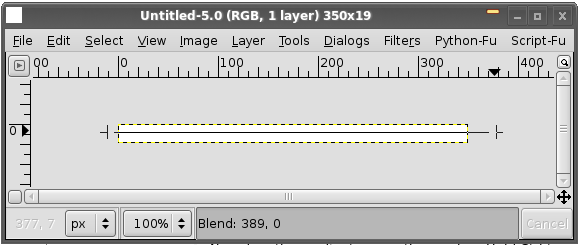
Now hold the Shift key and with the mouse drag a straight line across the middle of the picture (see pictures below). You can also drag a vertical line, from top to bottom.
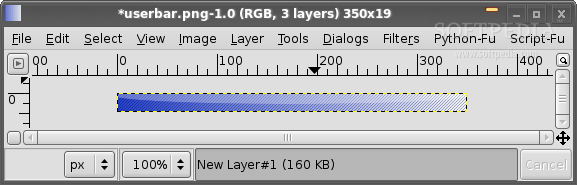
If you want to add scanlines (see the above tutorial) to your userbar to get a cooler look, open the Layers window with (Ctrl+L) and click on the little white icon on the left-down part of the window (see picture below).


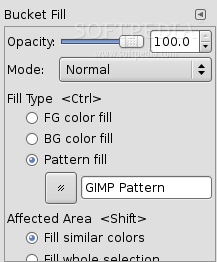
Now select the Bucket Tool (Shift+B) and in the advanced options select the "Pattern fill" option and search for your patter (Scanlines or whatever name you gave it). Then click on the image and it should look like the one below.
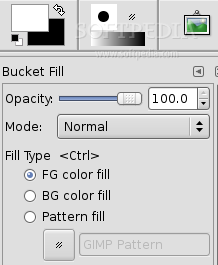
Then on the Layers window, make sure the second layer is selected and set the "Opacity" to something like 30.0 or 35.0, you decide what looks better. Create a new layer, then activate the Elliptical Marquee Tool (E key) and create an ellipse from one corner to the other, like in the picture below. Now select the Bucket Tool and change the Fill Type back to "FG color fill" and click on the ellipse selection to fill it with white. (Don't forget to change the foreground color to white). Take a look at the picture below to understand it better.


Go again to the Layers window, make sure the third layer is selected and reduce the "Opacity" somewhere around 30.0-50.0, you decide what's best for your userbar.
Now the userbar is ready for some artwork and text and if you paid attention to our lessons until now, you should not have problems adding more layers and text to the userbar. The standard font for these userbars is the Visitor font.
Note: add the font to /home/yourusername/gimp-2.2/fonts (replace /home/yourusername/ from the above path with your username, e.g. /home/marius) and restart GIMP.
Important Note: If you don't want to lose all your work at any time because you have to close GIMP or restart it, save the image with the .xcf extension. This is the default GIMP format and it's just like the .PSD format for Photoshop, in other words it will keep all your layers.
Tip: You can save the userbar at this point as a PNG image an create separately the text (with shadow) and other artwork you want to add to the userbar.

