
 14 DAY TRIAL //
 Are you one of those users with an MF636DB USB 3G modem from Orange, and you want to make it run under Ubuntu OS? Look no further, as today's tutorial will teach you step-by-step who to make it work!
We've tested the MF636DB USB stick on an eMachines 350 netbook powered by the Ubuntu 10.04 LTS (Lucid Lynx) operating system. After we've search the Internet for various solutions, we've finally find a good combination to make this MF636 USB stick act like a 3G modem.
This tutorial was also tested on a MF626 USB modem manufactured for Telstra Australia. Thanks to Graham Blackshaw for the information!
The Problem
The main problem is that the modem is mounted in Ubuntu as a CD-ROM device, and we need to do some tricks to unmount it as a CD-ROM and mount it as a USB modem device.
WARNING: Using GNOME PPP to connect to the Internet with the ZTE MF636 modem, some applications, such as Firefox or Pidgin, may not receive Internet connection. But you can use Chrome, Deluge, Thunderbird, and other applications.
The Solution
Step 1 - Tweaking the USB modem:
- Go to Applications -> Accessories -> Terminal, and type the following command:
lsusb
Hit the Enter key... and, at this moment you should see some text in the terminal window. Look for the 19d2:0033 entry, the ZTE modem!
Now, hit the ALT+F2 key combination and paste the following command:
gksu gedit /etc/udev/rules.d/ZTEMF637.rules
Click the OK button and you will be asked for your password. Enter it and click OK. When the text editor opens, paste the following lines...
ACTION!="add", GOTO="ZTE_End" # SUBSYSTEM=="usb", SYSFS{idProduct}=="2000", SYSFS{idVendor}=="19d2", GOTO="ZTE_ZeroCD" # SUBSYSTEM=="usb", SYSFS{idProduct}=="0033", SYSFS{idVendor}=="19d2", GOTO="ZTE_Modem" LABEL="ZTE_ZeroCD" RUN+="/usr/bin/eject /media/cdrom1/" # LABEL="ZTE_Modem" RUN+="/sbin/modprobe usbserial vendor=0x19d2 product=0x0033", MODE="660", GROUP="dialout" # LABEL="ZTE_End"
Make sure the numbers highlighted with red are the same with the numbers outputed by the lsusb command!
Save and close the text file. Just in case, reboot your machine!
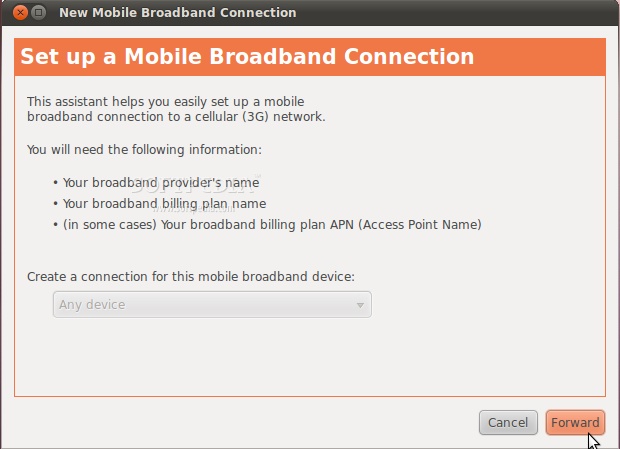
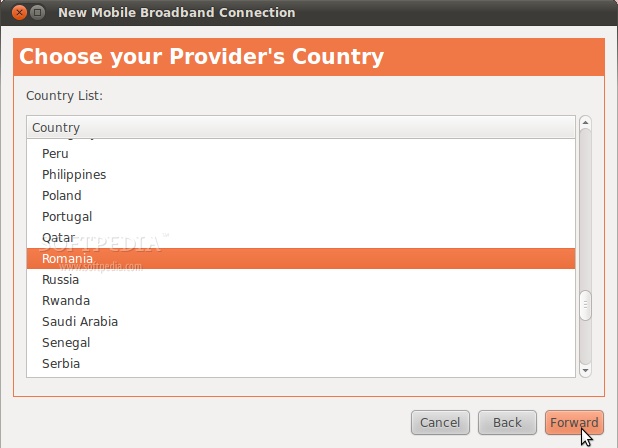
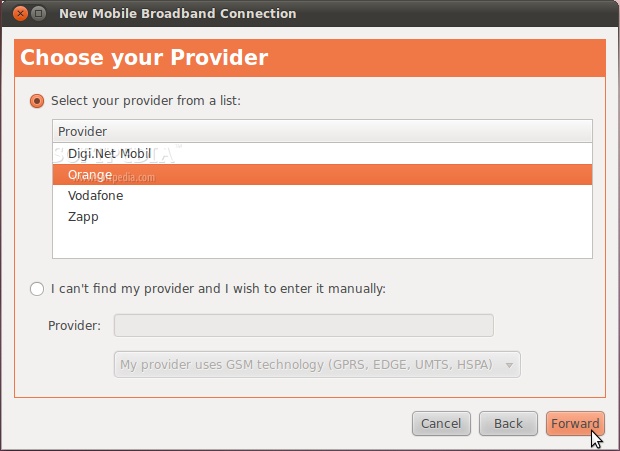
Step 2 - Creating a Mobile Broadband connection:
WARNING: If you have a Mobile Broadband connection created, please skip to Step 3! Also, you can skip this step for now... and go directly to the next step (see the first warning). But it's OK to have a Mobile Broadband connection created, just in case!
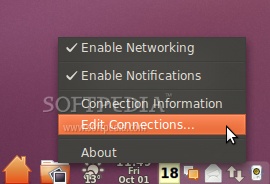
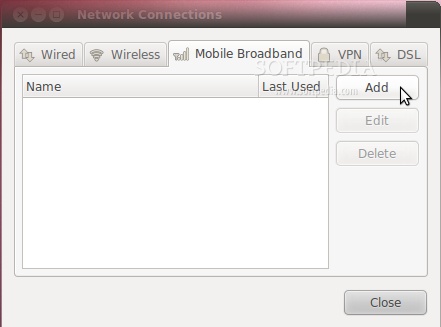
We need now to create a default Mobile Broadband connection, before anything else. So, right click on the network icon in your system tray area and select Edit Connections...
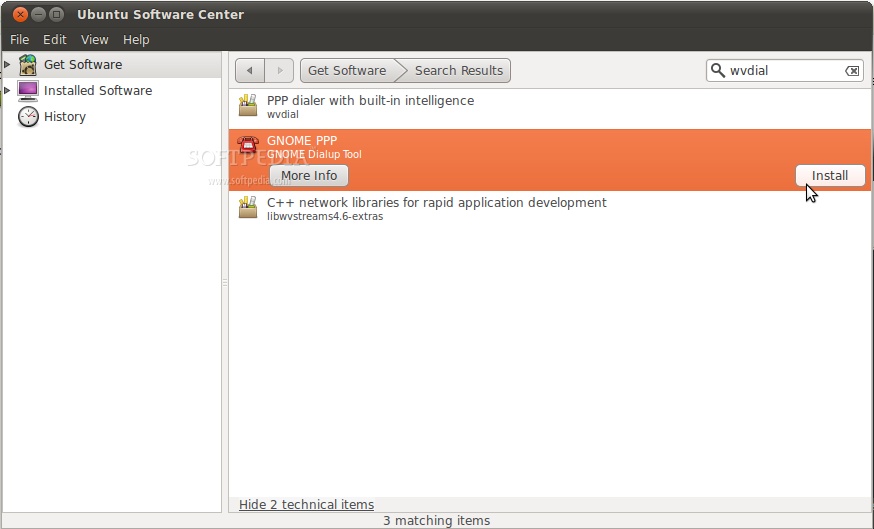
Step 3 - Installing GNOME PPP and final settings:
Search and install the GNOME PPP application with Ubuntu Software Center...
WARNING: It will not work if it is executed from your current user. It must be run as root!
So, hit the ALT+F2 key combination and type the following command:
gksu gnome-ppp
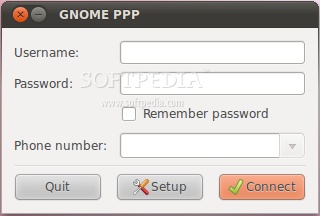
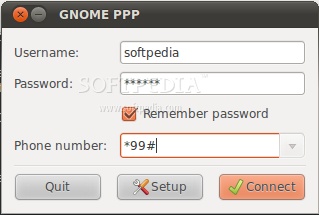
...enter your password when asked and hit Enter. GNOME-PPP will start... and you should see the following dialog...
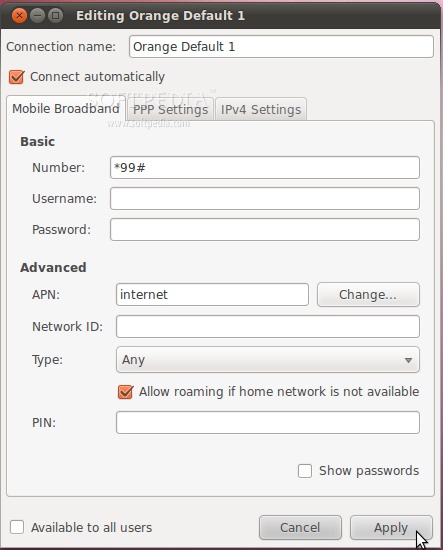
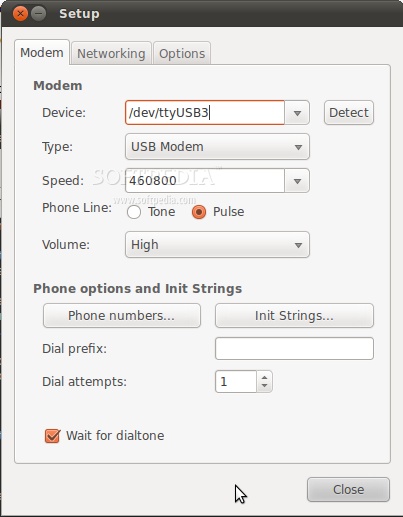
- the device from the drop-down box. Ours was the last one (/dev/ttyUSB3). It's always the last one in the list! - USB Modem from the Type list; - select 460800 for the Speed; - select the Pulse mode;
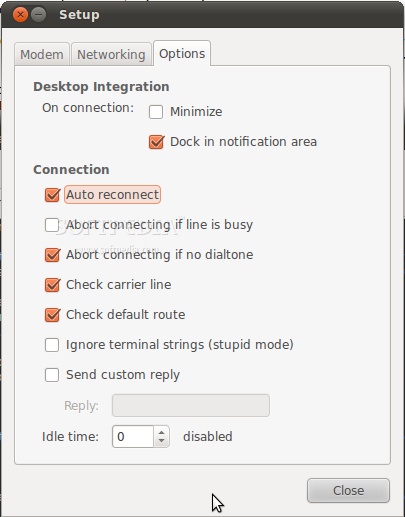
- check the Dock in notification area box; - check the Auto reconnect box.
Enter a username and a password (any username and password you want, it doesn't matter... but you have to enter something), and the phone number *99#.
Also, check the "Remember password" box. Click the "Connect" button. The modem should connect now to your provider!
Editor's note: As an end note, if you use Ubuntu or any other Linux-based operating system, my suggestion is to get the Huawei E160E HSDAP USB Stick from your mobile provider. This one works flawlessly!