14 DAY TRIAL //
 In theory, a developer’s general task is to create a practical and comprehensive utility for end users. As a result, the virtual market is populated with a large variety of different apps, each specialized for a particular task.
Microsoft is pretty modest when it comes to the set of features it bundles in Windows, and most of them are well hidden, but not on purpose. For instance, you probably didn’t realize that you can create tutorials with a built-in screen recorder tool.
The utility in question is called Problem Steps Recorder, and although its purpose is to help you explain your issues to technicians or experts, there aren’t any limitations so you can record pretty much everything.
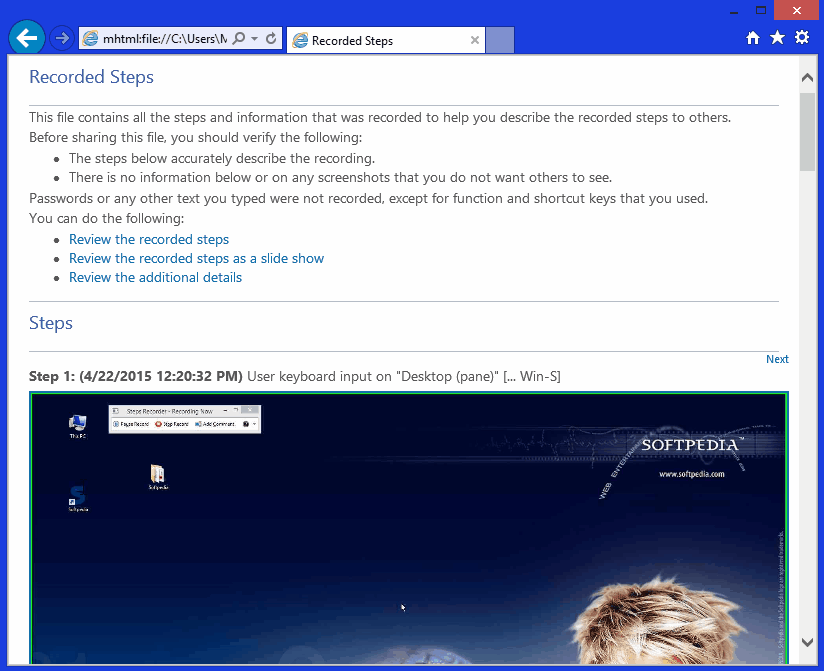
The only thing you need to keep in mind is that the result is not a video, but a sequence of images fitted with thorough descriptions. To better exemplify what can be done, we created this tutorial using Problem Steps Recorder, well, most of it.
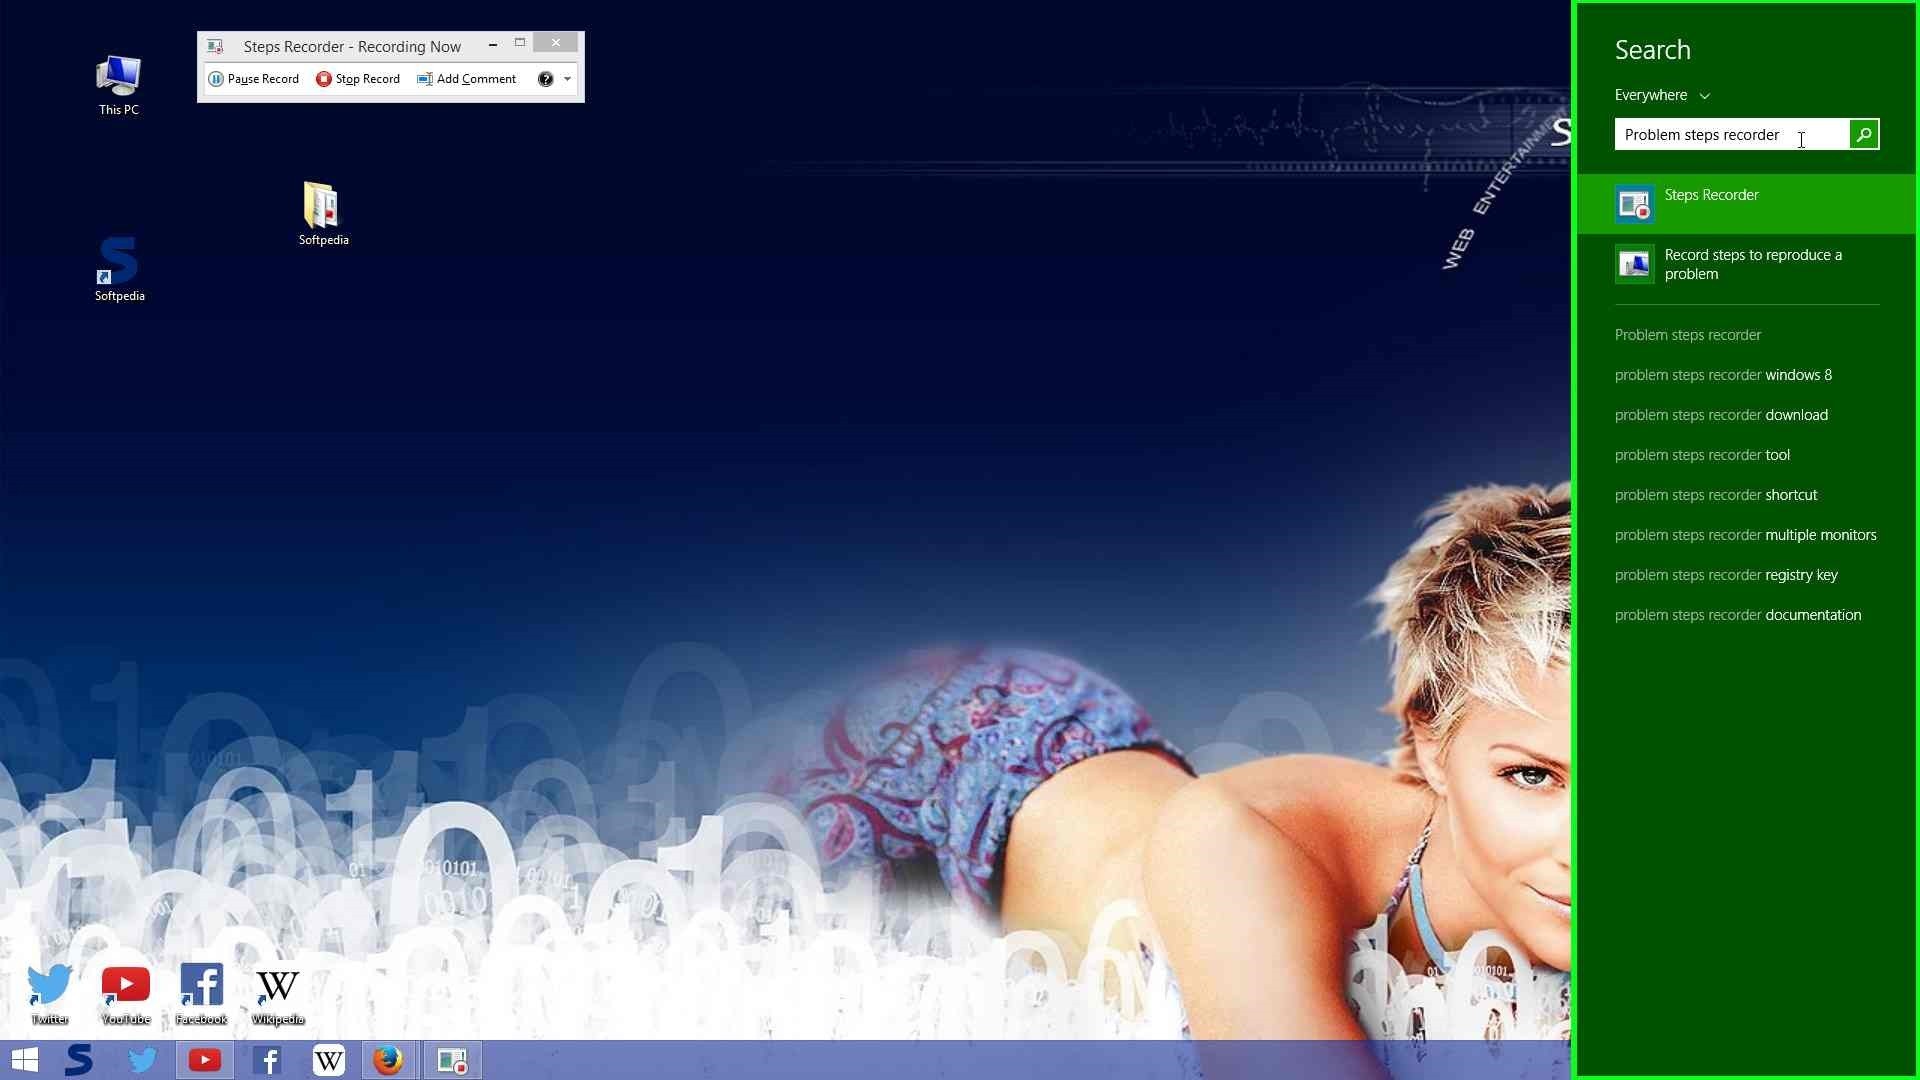
Example tutorial and how to quickly launch it
Step 1: User keyboard input on "Desktop (pane)" [... Win + S]
Step 2: User left click on "Search box, search Everywhere, enter to submit query, ESC to clear box. (edit)" in "Search Pane."
Step 3: User keyboard input on "Search Pane (window)" in "Search Pane" - write down Problem Steps Recorder.
Step 4: User left click on "Search box, search Everywhere, enter to submit query, ESC to clear box. (edit)" in "Search Pane."
Step 5: User left click on "Search Pane (window)" in "Search Pane" - this is to select the utility.
To be honest, we added a little more info, but the utility automatically provides most of the given details, which is pretty neat. All data is saved in a ZIP archive that contains an MHT file. Running it displays all you need to know in Internet Explorer, with options to grab and further edit images.
It might be difficult to access, but here’s how you can bring it on your desktop, for more comfort.
Step 1: Follow the steps above until the tool is displayed, but don’t run it.
Step 2: Right-click it and choose Open File Location.
Step 3: Simply drag it on your desktop or taskbar for quick launch.
The feature has been introduced since Windows 7, and we hope it won’t go away soon, but rather get enhanced with more capabilities. Thanks to the guys at Techradar, we can spread the message even further about the things you can do in Windows, such as this one.
Note: More features are found in specialized screen capture applications. Some bills from your pocket let you benefit from the powerful features GiliSoft Screen Recorder offers, or you can take advantage of the imperative SCREEN RECORDER that does a lot for free.