14 DAY TRIAL //
 How about crafting your own iPhone accessories for a change? Mr. Bernat Alsina saw great potential in the sleeves of the USB cables that come from Apple, but also in the plastic base that holds the iPhone in the box it ships in. Why don't you take a look at these images, or even check out Bernat's guide to make your own iPhone & iPod Touch car stand.
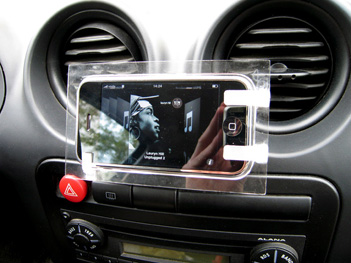
Anyone is able to make their own iPhone & iPod Touch car stand, Bernat claims. All you need is the translucent plastic base in the box the iPhone ships with, 3 sleeves of USB cables that cover Apple USB cables upon shipment (there are other objects that can substitute for them, Bernat notes) and velcro for heavy objects. The rest of the stuff you need is right at hand in any home, such as adhesive for plastic materials, a cutter, some tape and a drill. I'm sure the drill can be substituted too, but Bernat doesn't suggest it.
Anyway, as you can see in the second image down, this is the sleeve Bernat is talking about. You'll need three of them and, while other objects can substitute, the author claims they "must be elastic items," so it's better if you just go with the materials he claims are best suited for the job. You will need to cut parts of the sleeves in a specific manner so be sure to check out Bernat's guide for visual and contextual instructions.
Upon gluing the sleeves together, you should keep in mind, however, that a strong adhesive tends to leave white spots around the area on which it's applied on. So be careful to apply it properly the first time you try it, so you don't render the translucent plastic unusable. Also, you will have to use tape to do a mask, to be extra safe.
Of course, you can follow these instructions and then make a few adjustments yourself, customizing it a bit, if you will. For example, the first time I looked at the iPhone & iPod Touch car stand I thought, "Wow! That's a pretty clean job for something done with household items!" Then I analyzed it a little more and realized that it's a bit sharp on the edges, plus a little square too. I think it would be very easy to round out those corners just a bit, or even reduce the whole size of the plastic base by grinding it a bit.
Here's the guide. Good luck, and come back with some pictures if you were able to do it too.