14 DAY TRIAL //
 Most programs require you to go through a setup process to get them ready. This is because advanced features need to access specific info on your computer, requiring permissions and other components.
Developers can build installation kits from scratch to make a proper impression or include all necessary details, but it can take some time through code writing. Luckily, this hustle is not mandatory, especially because of third-party tools that bundle all your project files in an installer you build without any programming at all.
Building a simple installer
Step 1: Download, install, and run Advanced Installer.
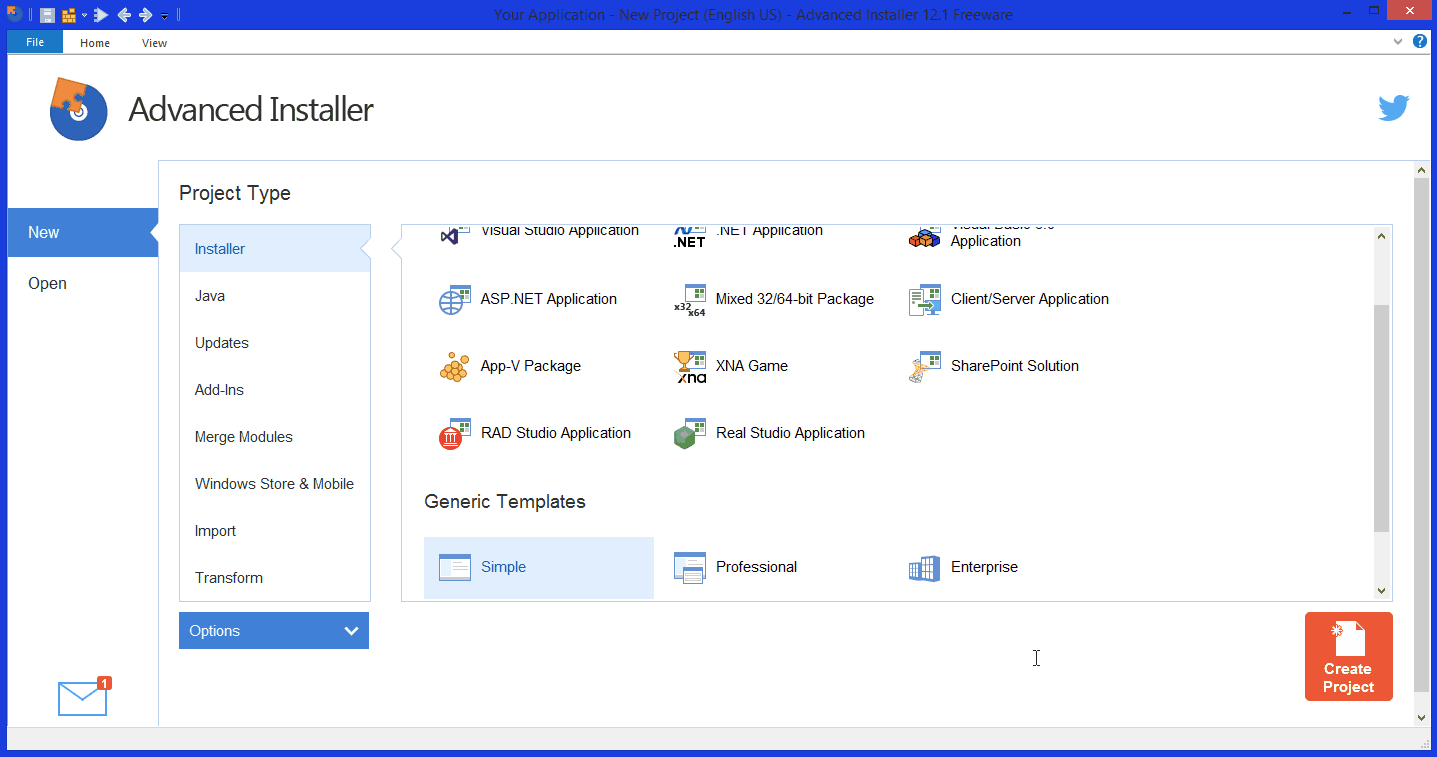
Step 2: From the dashboard, select Installer, and scroll all the way to the bottom to pick the Simple Generic Template.
Step 3: Click on the blue Options button and check to Use the wizard to create the project. Then hit the Create Project button.
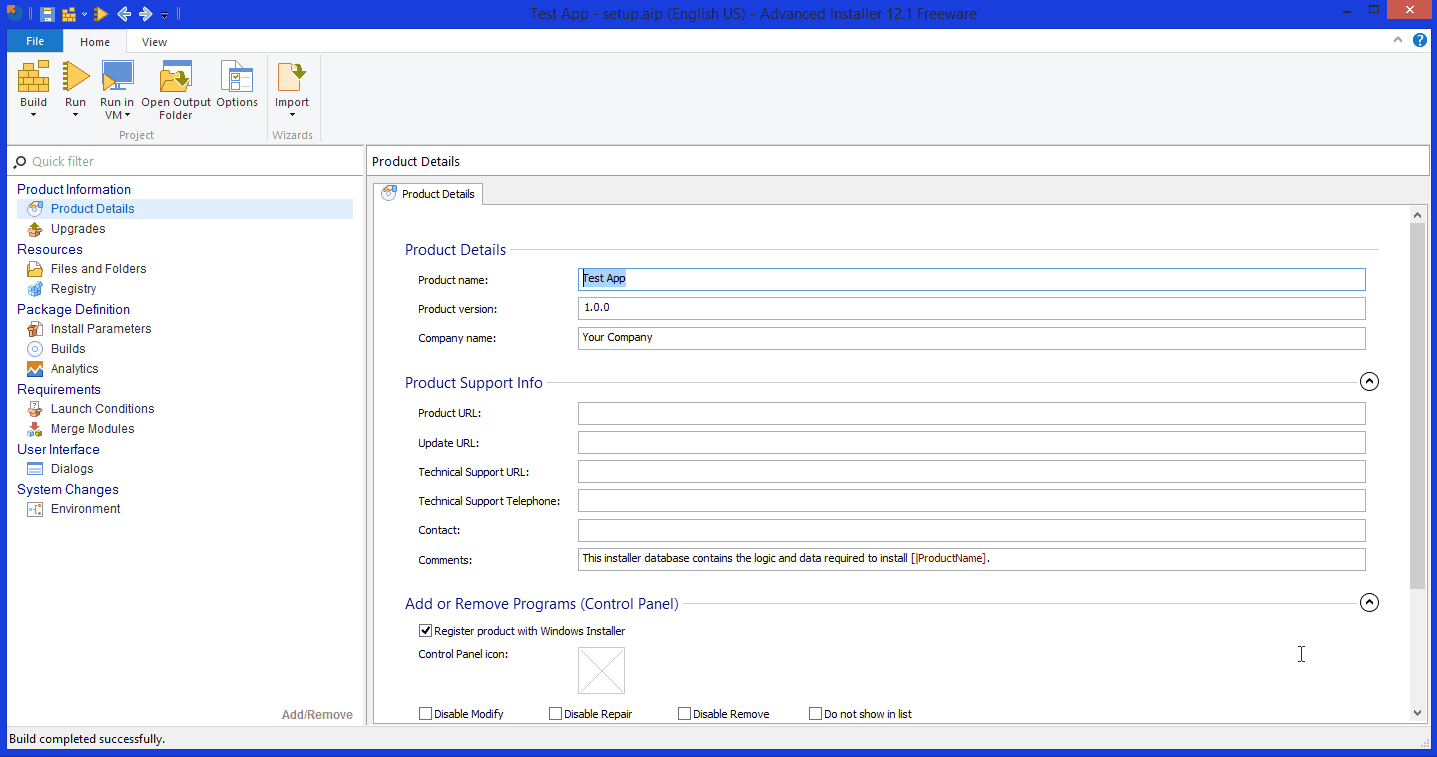
Step 4: Write down Product and Company names and press Next.
Step 5: Choose an output folder for the installer, as well as a name for the file, and press Next.
Step 6: Click the Browse button and select the folder that contains all files you want to include in the installer.
Step 7: Fill in any additional Product Support Info and Control Panel options.
Step 8: Click on the Installation Parameters link under the Package Definition section in the left pane to specify installation requirements.
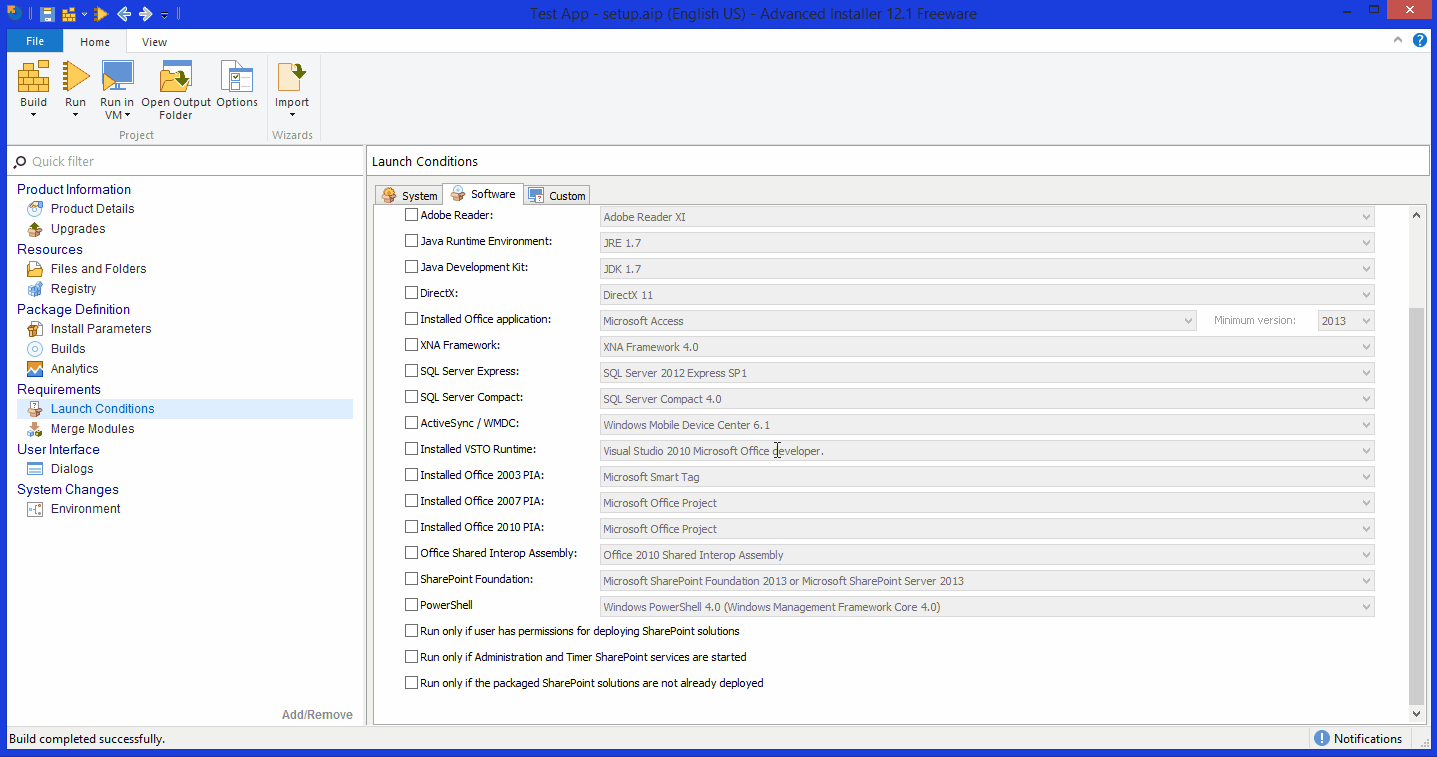
Step 9: Switch to the Launch Conditions link in the left pane. Here you can select system and software components that your program needs to properly run.
Step 10: Click the Build button in the Home ribbon menu to finish the project.
Bonus tip: In the Home menu, press Options. Switch to the Project Type tab and select Architect. This enables you to fully customize the installer interface in the Dialogs section.