One of Microsoft’s long-term goals in Windows 10 is killing off Control Panel, with all options being migrated to the modern Settings app.
By replacing Control Panel with Settings, Microsoft wants to make the latter the one destination for pretty much anything that’s related to customizing a Windows 10 device, embracing a more intuitive and straightforward approach that should also appeal to rookies.
And while options are gradually migrated to the Settings app, the Control Panel becomes harder to find in Windows 10, especially as Microsoft has removed the shortcuts from the Start menu and the Win + X menu.
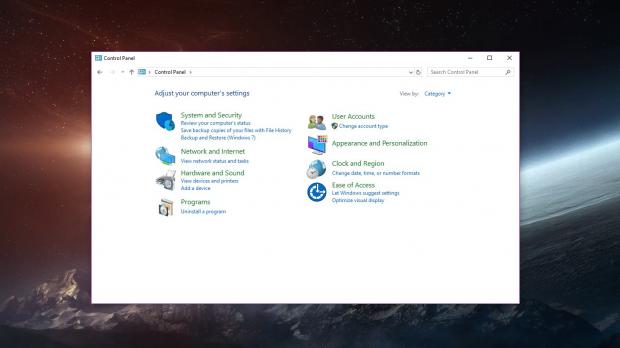
The classic Control Panel is still there in Windows 10 version 1803 (April 2018 Update), and even though it comes with fewer settings because many have already been migrated, it continues to be the preferred choice for some configuration options.
Fortunately, there are multiple ways to access the Control Panel in Windows 10 version 1803, and we’re going to detail three of them in the following paragraphs.
#1. From Start menu / File Explorer / Run dialog
Technically, even though Microsoft has removed the Control Panel shortcuts from the Start menu, you can still launch it from this location, only that an extra step is required.
For example, click the Start menu and type Control Panel. You should notice that the Settings app is the top result for your search, and you need to click the second one to open Control Panel.
In File Explorer, you can easily launch Control Panel by typing its name in the address bar. Doing this and pressing Enter instantly takes you to the Control Panel in File Explorer.
The Run dialog provides similar options. Press Windows key + R and type either Control Panel or control.exe. Both of them launch Control Panel when clicking the OK button.
#2. Using a desktop shortcut
As an alternative, if you use the classic Control Panel on a regular basis, you may find it more useful to create a desktop shortcut. This particular shortcut can be then pinned to the taskbar or moved to any location you want.
To create a shortcut, right-click the desktop and go to New > Shortcut. In the first dialog, type Control Panel and press Next. You should notice that the wizard automatically fills in the required information to set up a Control Panel shortcut, and even selects the official icon.
This shortcut can be removed at any moment from the desktop, and you can also change its icon from the Properties screen > Change icon.
#3. Add a Control Panel entry to the Context Menu
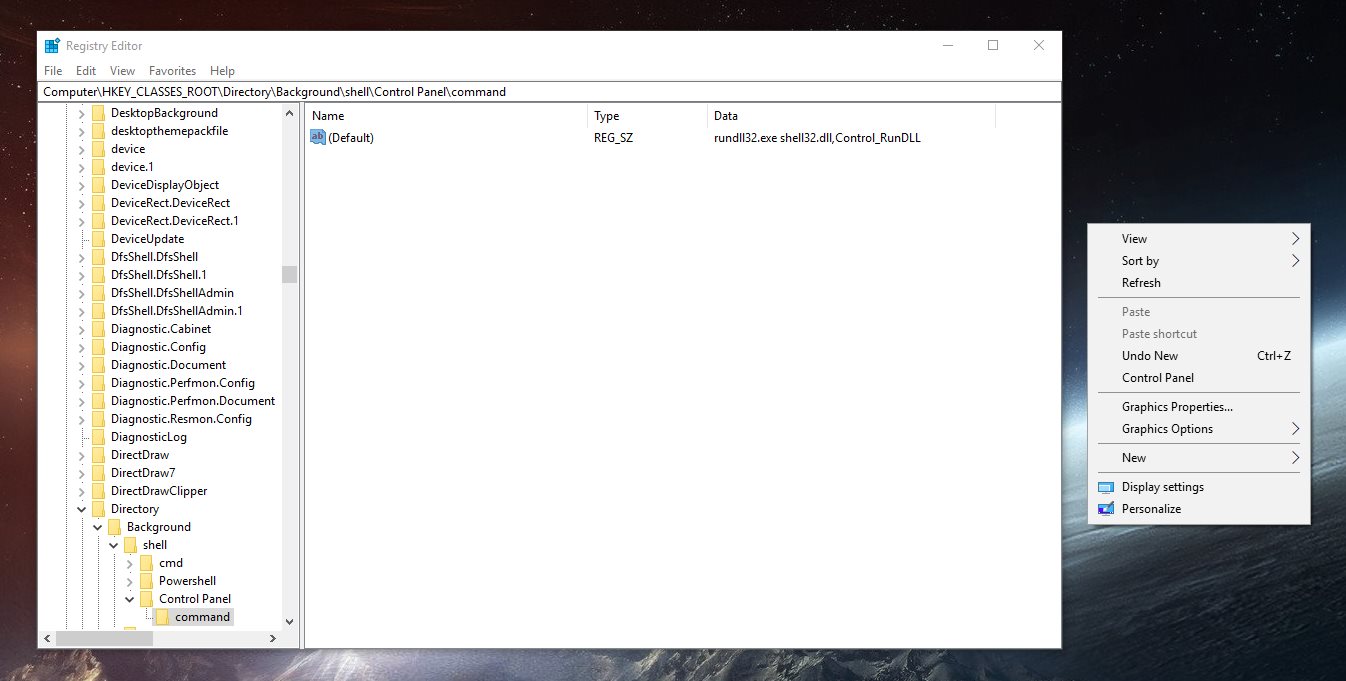
Additionally, you can also add Control Panel to the Context Menu and simply launch it by right-clicking on the desktop. To do this, open Registry Editor by typing its name in the Start menu or by pressing Windows key + R and typing regedit.exe. Navigate to the following path in the Registry Editor:
HKEY_CLASSES_ROOT\Directory\Background\shell
Once you are here, right-click the shell key and go to New > Key. You need to create a new key that is called Control Panel – it is displayed with a regular folder icon. Right-click this new key called Control Panel and again go to New > Key and name this new key command.
Open the command key and in the right pane, you should notice an entry called (Default). Double-click it to the change its value and type the following strings:
rundll32.exe shell32.dll,Control_RunDLL
Click OK, close all windows, and then head over to the desktop to see the changes in action. Just right-click the desktop and a new entry called Control Panel should be there, letting you to launch the classic configuration screen with just a single click.

 14 DAY TRIAL //


