Share Experiences is a Windows 10 feature that makes it possible to start working on one device and then continue from where you left off on another, all using the same Microsoft account.
By bringing devices in sync, Share Experiences, previously known as Cross-Defined Experiences, provides users with a seamless transition from a laptop to PC or to another machine running Windows 10
Needless to say, for many users, this is quite a helpful feature that comes in handy when switching between devices. But for those with just one computer, it doesn’t make much sense, so they look for a way to turn it off.
Fortunately, in Windows 10 version 1809 there’s not just one way to do this, but three different methods that let you turn off Shared Experiences. The first one is specifically aimed at users who just want to disable this feature on their only computer, while the other two can be used by IT administrators for better control over the systems in their networks.
Method #1 – Settings app
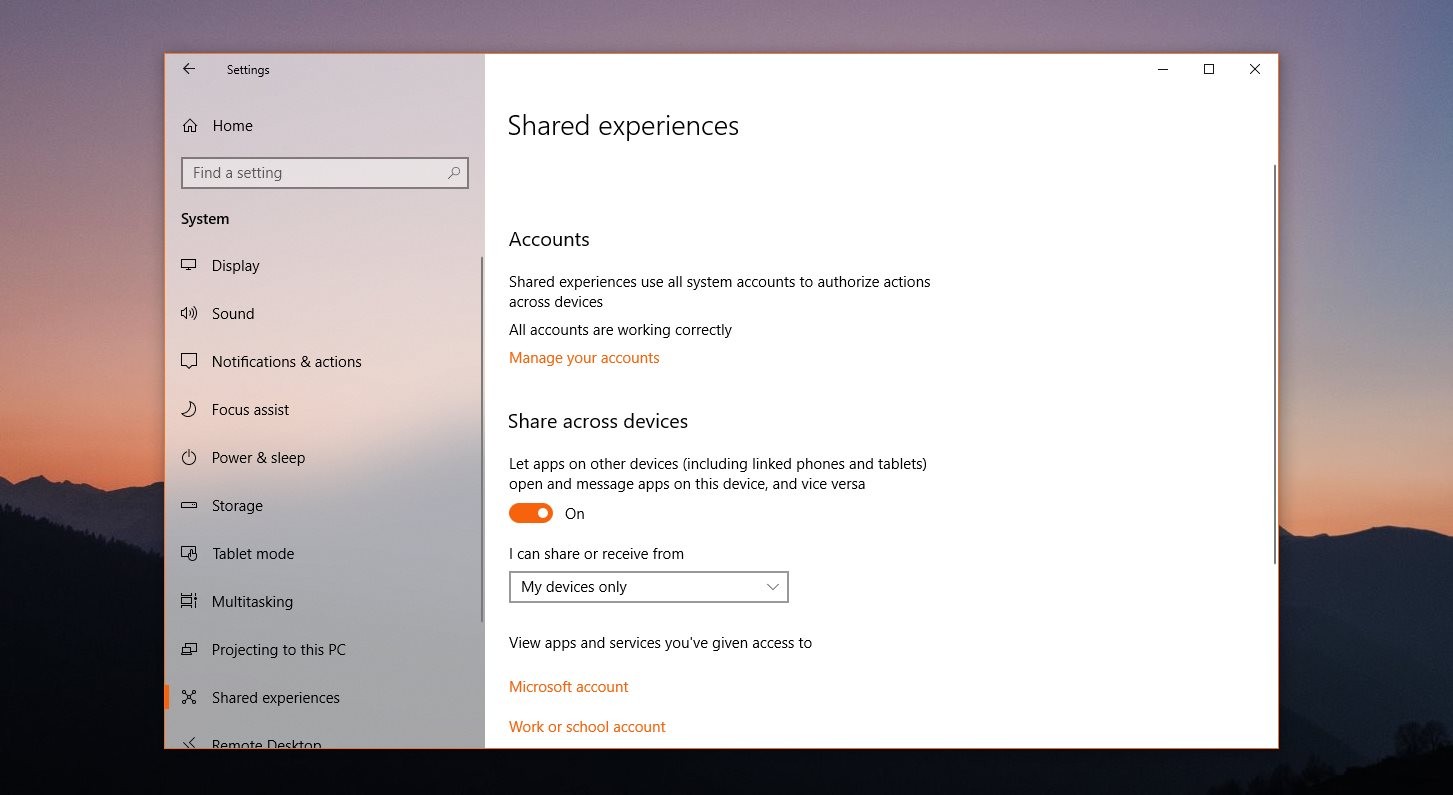
The easiest way to turn off Shared Experiences is obviously the Settings app, as Microsoft has added a dedicated toggle that lets you do this.
As a result, what, you need to do is to open the Settings app and then navigate to the following location:
Settings > System > Shared experiences > Share across devices
In this screen look for a toggle that reads:
Let apps on other devices (included linked phones and tablets) open and message apps on this device, and vice versa
Just click the toggle to set it to off and that’s pretty much all about it. The same screen also lets you choose which device can share and send you info.
Method #2 – Group Policy Editor
This method comes in particularly handy to IT pros who want to disable the Shared Experiences on more than just one computer in their network or for all users on a certain system.
First and foremost, launch the Group Policy Editor by pressing Windows key + R and then typing:
gpedit.msc
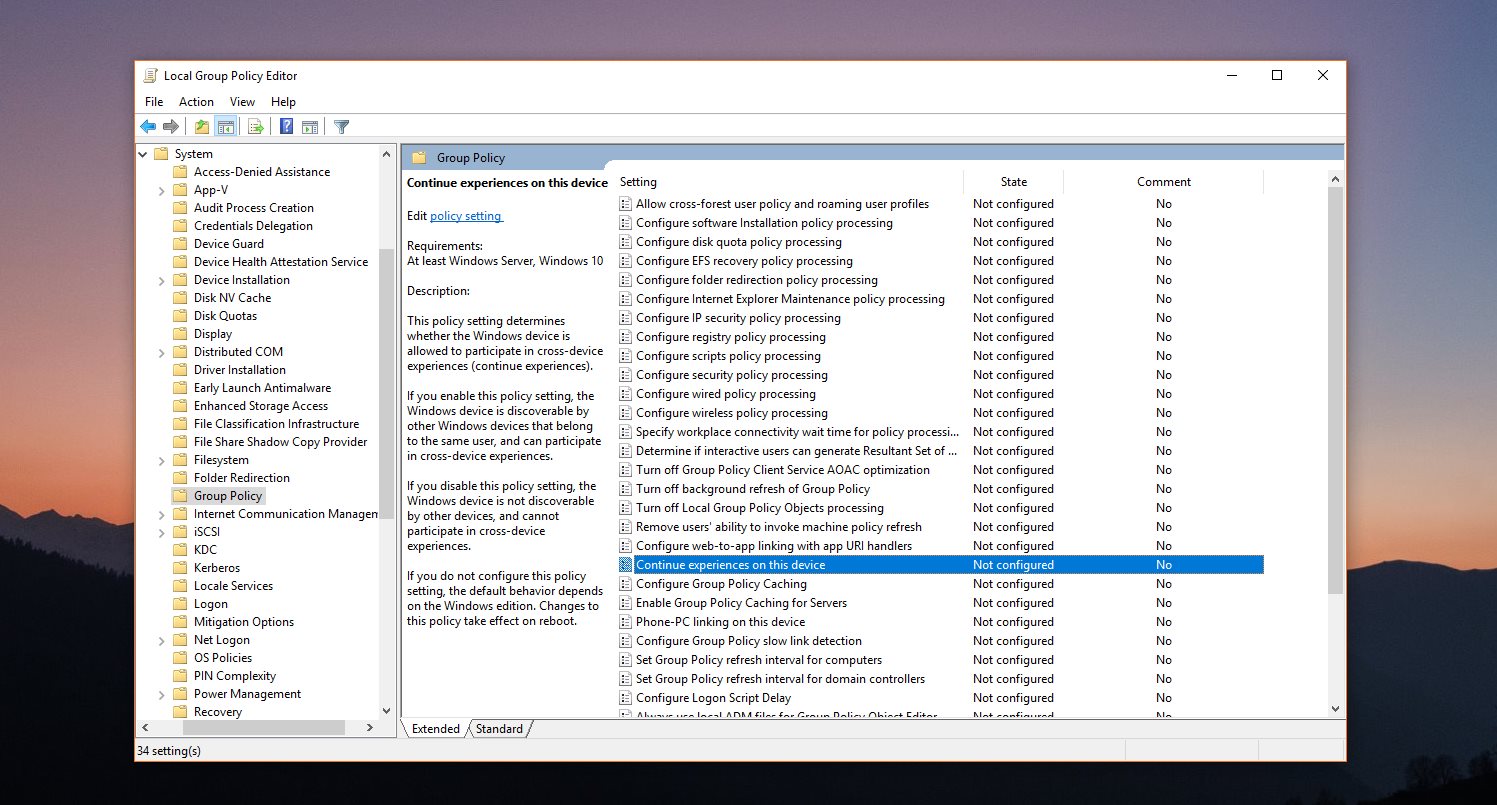
Navigate to the following location in the Group Policy Editor:
Computer Configuration > Administrative Templates > System > Group Policy
In the right side of the screen, look for a policy that is called:
Continue experiences on this device
By default, this policy is set to Not Configured, so double-click it and then select the Disabled option. Click OK and that’s pretty much about it. As the policy description explains:
“This policy setting determines whether the Windows device is allowed to participate in cross-device experiences (continue experiences). If you disable this policy setting, the Windows device is not discoverable by other devices, and cannot participate in cross-device experiences.”
Method #3 – Registry Editor
On Windows 10 Home where the Group Policy Editor, users can block Shared Experiences using the Registry Editor, only that the policy needs to be defined manually.
To do this, launch the Registry Editor by pressing Windows key + R and then typing:
regedit.exe
In the Registry Editor, navigate to the following location:
HKEY_LOCAL_MACHINE\SOFTWARE\Policies\Microsoft\Windows
If this path does not exist, create each subkey manually by right-clicking the previous key > New key. Make sure you enter the name of the keys correctly.
Once you’re there, you need to create a new value that would set up the policy. To do this, right-click on the right side of the screen and go to New > DWORD (32-bit) Value. Enter this new value:
EnableCdp
Depending on the value you set, the policy is enabled or disabled. To disable Shared Experiences, double-click it and enter value 1. To re-enable it, set it to value 0.

 14 DAY TRIAL //


