Windows 10 version 1903, or the April 2019 Update, comes not only with several new features, but also with a plethora of smaller refinements under the hood, so the experience overall should be much improved even though you may not notice it at first.
One of these changes is a new format that File Explorer uses to display dates within the application.
When browsing files stored on your device with the built-in file manager, you can see information like file type, size, and date modified.
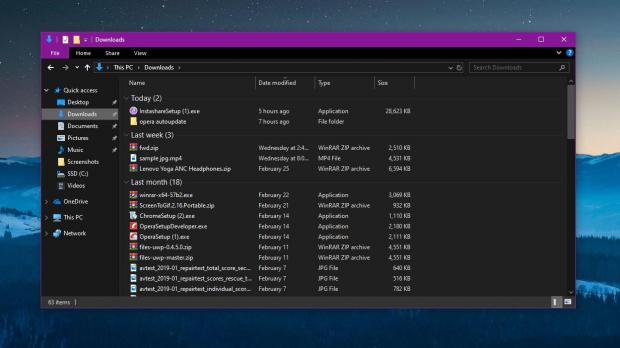
Beginning with the release of this new OS feature update, Microsoft has implemented a new format that the company calls “friendly dates” and whose purpose is to make it easier to see when a specific file was most recently modified.
So, for example, instead of seeing something like…
3/4/2019: 9:29 AM
5 hours ago
As with every little tweak that Microsoft makes in Windows 10, it’s important for users to be able to restore the old model, and fortunately, this is possible in the case of friendly dates. There are several ways to do this, and today I’m going to discuss three of them.
Method #1 – The easiest
Disabling friendly dates is much easier than you think. All you have to do is to launch File Explorer, open a folder to see the last modified data, and then right-click the folder columns.
There’s a new option in there that is simply called “friendly dates,” and by default, it’s enabled in Windows 10 version 1903. Just uncheck it, and you’re done. So basically, this method comes down to:
File Explorer > Open folder > Right-click columns > Uncheck “Friendly Dates”
Method #2 – The more complex
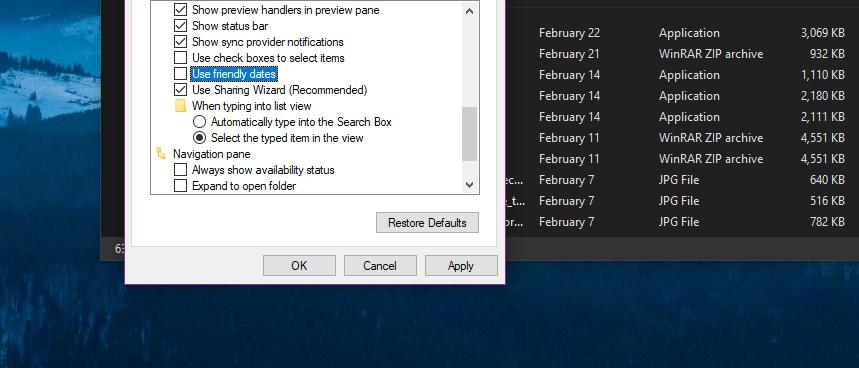
The second method comes down to disabling friendly dates from the Folder Options menu. In this case, you need to launch File Explorer, expand the ribbon and click options and then look for an entry called “Friendly dates” in the “View” tab.
Again, this method requires you to follow the next steps:
File Explorer > Options > View > Use friendly dates
Method #3 – The most difficult
If you don’t like to do things easily, this third method involves the Registry Editor, which you can launch with an administrator account by typing regedit.exe in the Start menu.
Then, navigate to this path in the Registry Editor:
HKEY_CURRENT_USER\Software\Microsoft\Windows\CurrentVersion\Explorer\Advanced
FriendlyDates
Value 0 = Disabled
Value 1 = Enabled
If you want to restore the friendly dates after disabling them using any of the aforementioned methods, you can just follow the same steps to revert your changes. All methods work in Windows 10 version 1903 and newer (unless Microsoft makes further updates in the next releases).

 14 DAY TRIAL //


