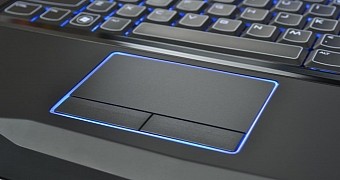
Ever since people realized the computer is an incredibly powerful tool, methods to make its capabilities more flexible have been researched, thus giving birth to portable devices and laptops. For complete portability, laptops have built-in keyboards and even touchpads to control the cursor without hooking up a mouse.
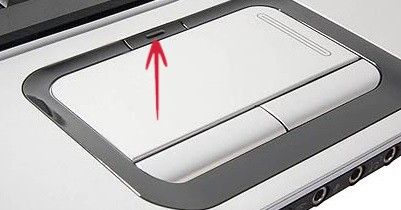
Experimenting in design and bundling of some features structured laptops into several categories, depending on the number and type of I/O devices. One design implementation in particular can cause a lot of frustration, because it makes you lose window focus while typing. Some touchpads can be disabled temporarily at the press of a button, while others are permanently enabled.
Laptop manufacturers came up with different hotkeys for models to toggle the touchpad functionality and avoid this issue, while others can only be managed through specific software components. With a little digging over the web, we found out that it can be a bit of a struggle, and we put up several steps in case you are facing the same problem too.
Toggling the touchpad on your laptop
| FROM THE DEVICE MANAGER |
|---|
Step 1: Regardless of the Windows version you’re using, considering you’re not stuck with XP, right-click on This PC / Computer to access Properties.
Step 2: From the left navigation pane, choose to access the Device Manager.
Step 3: Once there, expand the Mice and Other Pointing Devices section.
Note: If there’s no USB mouse connected, you should only see a single entry. Otherwise, simply disconnect any external pointing devices, with the list automatically getting refreshed and leaving the integrated touchpad as the single option.
Step 4: Double-click on the PS/2 Compatible Mouse entry to access its Properties.
Note: To know exactly if that’s the touchpad component, it needs to state in the General tab that the Location is Plugged Into PS/2 Mouse Port.
Step 5: Switch to the Driver tab and hit the Disable button to apply it to the Selected Device.
Note: There’s a high chance that your system doesn’t allow the driver to be disabled, and you can tell this if the button is grayed out. Also, try to connect an external mouse and see if you’re allowed. In case there’s absolutely no way to make the Disable button active, move on with the following methods.
| THROUGH DEVICE DRIVERS |
|---|
Since we’re talking about the touchpad, you need to know that it’s got a driver of its own, but each manufacturer uses a different one. Follow these links to get it:
| LAPTOP MANUFACTURERS |
|---|
| -> lenovo <- |
| -> Dell <- |
| -> HP <- |
| -> Sony <- |
| -> Toshiba <- |
Step 1: Look for the driver tray icon that is automatically added after system restart.
Step 2: Right-click it and access Pointing Device Properties.
Step 3: Look for and switch to the Device Settings tab.
Step 4: Identify the Disable button and press it.
Step 5: Confirm all changes by hitting corresponding Yes, Apply, and OK buttons.
Note: Instructions here are given for a lenovo laptop. However, driver management is similar for the rest of the makes and models as well.
| THE UNIVERSAL METHOD |
|---|
Step 1: Download and install Touchpad Blocker.
Step 2 (optional): Restart your system so that changes properly apply.
Step 3: Right-click the Touchpad Blocker system tray icon and go to Settings.
Step 4: Under the Keyboard Shortcuts section, check the box to Enable/Disable Touchpad.
Step 5 (optional): Click the text field to change the default hotkey configuration with your own.
Step 6: Close the Settings panel and press the hotkey to see if it works.
Step 7 (alternative): Right-click the tray icon and choose to Disable Touchpad.
| BUILT-IN FUNCTIONS |
|---|
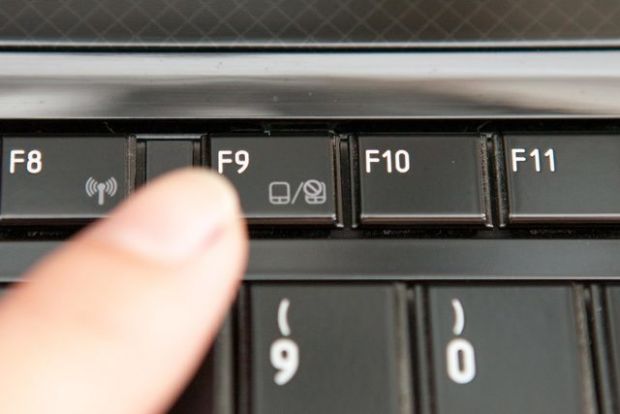
However, there’s not a general pattern for all laptops, so you need to identify the one for your make and model. Usually found from F1 to F12, it varies a lot, but the touchpad icon should be neatly drawn on the corresponding key.
In conclusion
You get a lot more flexibility when working on a laptop, and it’s just a shame not to benefit from all advantages it offers. Sure enough, the touchpad eliminates the need for an external mouse, which also saves some space, but it can considerably affect typing. Now you can easily toggle your touchpad’s functionality for a more relaxing overall experience.

 14 DAY TRIAL //


