Microsoft has improved the way Windows cleans up the disk in the latest OS feature updates, and the built-in Storage Sense can now perform automatic maintenance based on user-defined settings.
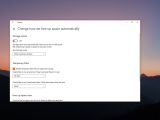
Windows 10 version 1809, for instance, lets you configure when to run Storage Sense, and in addition to daily, weekly, and monthly schedules, you can also let Windows decide when it’s best to do it.
Additionally, you can configure the operating system to take care of your temporary files and delete them daily or every 14, 30, or 60 days all automatically without you moving a single finger. The same settings can also be enabled for content in the Downloads folder.
Needless to say, all these improvements make disk management a more straightforward process, and given that Windows takes care of everything for you, there’s little to worry about when it comes to unnecessary files eating up your disk space.
While Microsoft is currently in the process of deprecating the disk cleanup tool in Windows 10, mostly because it’s moving all its features to Storage Sense, you can still use it to remove files you don’t need as part of a single process.
And at the same time, you can rely on the classic Disk Cleanup to set up automated tasks that are performed at a user-defined time. And it all comes down to the built-in Task Scheduler.
Setting up a new task in Task Scheduler begins with launching the app. To do this, type its name in the Start menu and then create the option that reads Create basic task in the right pane.
Enter a name and description for your task (it can be anything you like but I suggest using a name that would help figure out its purpose) and then hit the Next button.
Choose when to run the task, and this time you are provided with many more options, including daily, weekly, monthly, one time, when the computer starts, at login, or when a specific event is logged. Pick the option that you want and click Next once again to set up additional time settings.
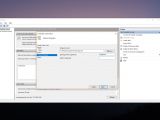
When you’re ready, you have to configure the task to begin the disk cleanup, and to do this, choose the option that reads Start a program and then input the following settings:
Program/script - C:\Windows\system32\cleanmgr.exe
Arguments - /sagerun:1
The sagerun parameter allows Disk Cleanup to launch and perform a cleaning based on defined settings without displaying any prompts.
To configure what it cleans, you need to launch an elevated Command Prompt window (type cmd.exe in the Start menu > right-click Command Prompt > Run as administrator) and type the following command:
cleanmgr /sageset:1
This command will launch the Disk Cleanup interface and let you decide what to clean, including temporary Internet files, logs, and previous Windows installations, user file history, and other unnecessary files that eat up space on your hard drive.
Choose what you want to delete with your automated task and then click the OK button to save your settings. Doing this configures the number “1” profile that is launched with the sagerun command, so whenever the aforementioned command is sent, Disk Cleanup removes the files you selected here.
You can change your settings at any moment using the steps above, and I suggest you check the selected files twice because once Disk Cleanup removes them, there’s no way to bring them back.

 14 DAY TRIAL //


