The hibernation mode in Windows 10 is a super-useful feature that comes in handy especially on laptops, as it allows you to save power, while at the same time not shutting down the device to lose your work.
Technically, it’s a more advanced sleep mode, and it comes in handy specifically when you know you’ll be away for much longer.
Microsoft itself says that hibernate was designed for laptop, and this is one of the reasons that some PCs do not have it. As the company explains:
“Hibernate uses less power than sleep and when you start up the PC again, you’re back to where you left off (though not as fast as sleep). Use hibernation when you know that you won't use your laptop or tablet for an extended period and won't have an opportunity to charge the battery during that time. First check to see if this option is available on your PC and if it is, turn it on.”
As you may have noticed, the hibernate option doesn’t show up by default in Windows 10 and you need to manually enable it. However, the process isn’t as straightforward as you’d expect it to be, and this doesn’t change in Windows 10 October 2018 Update (version 1809).
Basically, the same trick works on all Windows 10 versions, though note that Microsoft could change it in a future OS feature update.
How to enable hibernation
What you need to do to enable the hibernation mode is actually add the hibernate button in the Start menu. Doing this is possible from the Control Panel, which is the menu that Microsoft is working so hard to remove and replace with the Settings app.
The options to enable hibernate, however, haven’t been migrated to Settings just yet, and are still there in the classic Control Panel. You can enable the button in two different ways.
First, you can launch the Control Panel manually – this is harder now in the October 2018 Update. You can type Control Panel either directly in the Start menu or in the File Explorer address bar because the direct shortcut has been removed from everywhere else. In Control Panel, navigate to the following path:
System and Security > Power Options > Choose what the power buttons do (left sidebar)
As an alternative, you can reach the same location from the Settings app, only that in this case you need to follow the next path:
Settings > System > Power & sleep > Additional power settings > Choose what the power buttons do (left sidebar)
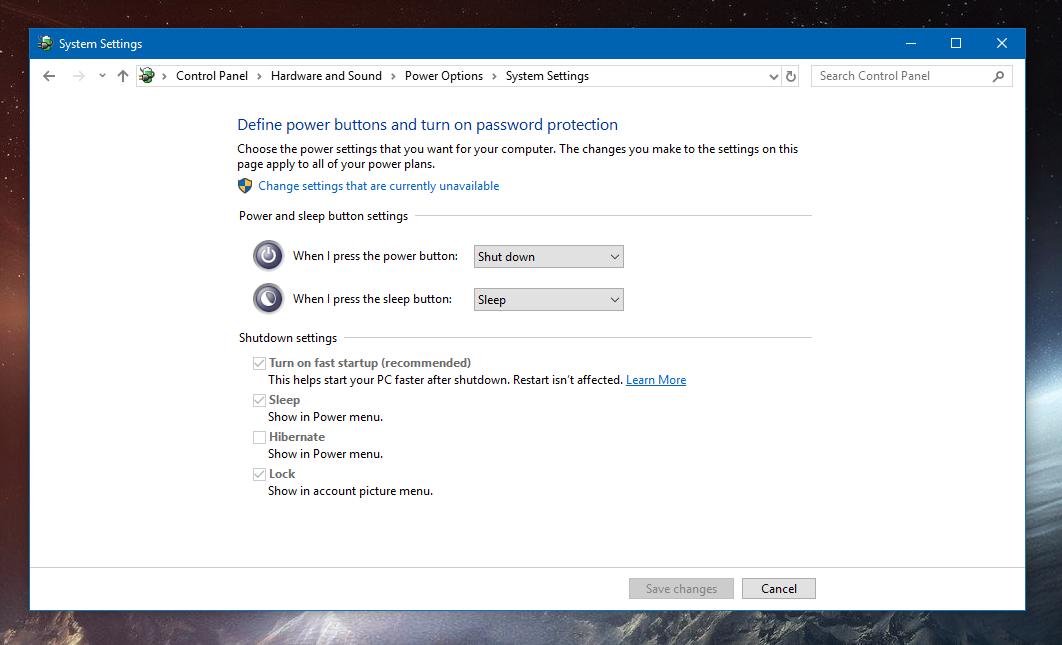
This screen allows you to define power buttons and turn on password protection, and at the bottom of the window, there’s a dedicated section called Shutdown settings. By default, the Hibernate button is disabled, and all options are greyed out.
To enable editing, you need to click the option that reads Change settings that are currently unavailable in the upper part of the screen. You’re going to need an administrator account for that and, if required, to provide the password before making any changes.
Once the options can be changes, enable the Hibernate option, click Save changes and that’s pretty much it.
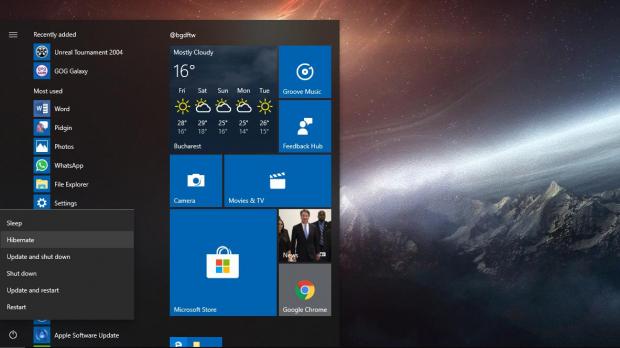
The next time you want to push your computer to hibernation mode, just click the Start menu and the power button and the hibernate option should be there alongside restart and shut down.
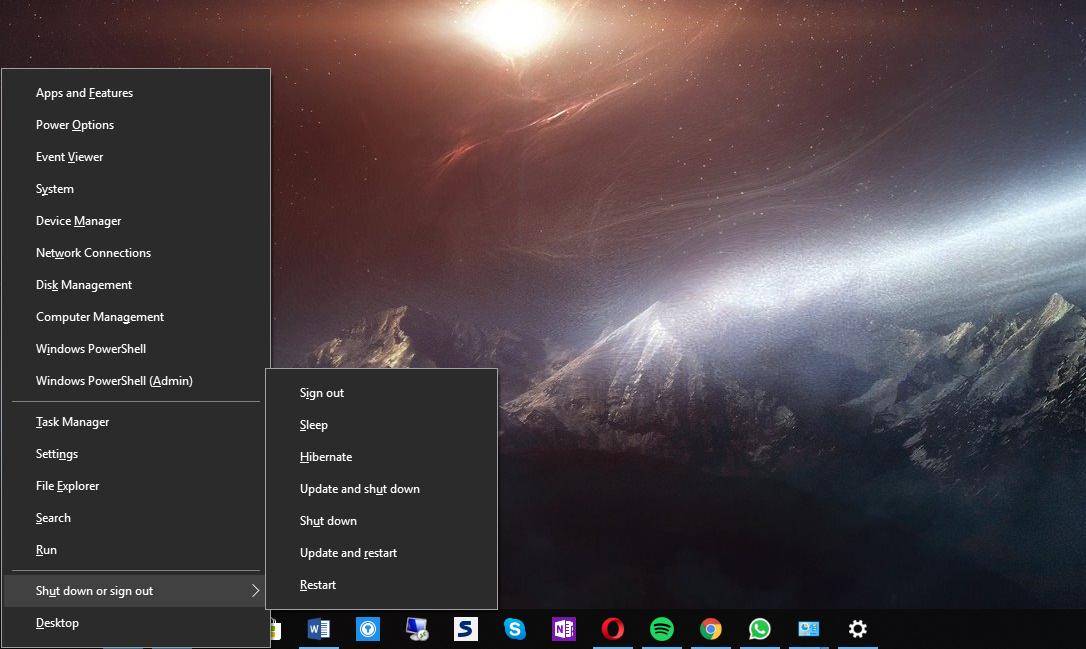
Additionally, you can just press the Windows key + X and then head over to Shut down or sign out > Hibernate. Both methods have the same results and send your system to hibernate mode instantly.

 14 DAY TRIAL //


