14 DAY TRIAL //
 Caffeine is a great tool if you want to keep your device awake at any cost, despite Android’s efforts to conserve battery and other such annoyances.
There are some scenarios where Android users might need to keep their display’s device alive, and the implemented option in Android for this feature is simply not enough. Some hardware builders might go a little bit further and offer a few extra options, but it’s not usually something that’s high on the list of developers.
It comes a time when you want to make sure that your device stays open, for whatever reason, and you’re going to look online for a way to make that happen. Inevitably, one of the responses from users will make a reference to Caffeine, and with good reason. It’s probably the best app of its kind, and it’s completely free.
Normally, there are two ways to keep the display of a phone or tablet on. From the Display settings, you can choose the length of time until the screen shuts off, and one of the options is Never. It’s a rather brute approach and is not really helping.
A second method can only be accessed from the Developers Options, which is a menu that can be enabled by going into About Phone entry in Settings and tapping the build number for seven times.
In Developer Options, there is a switch named Keep Device Awake, but it only applies when the phone is charging, and that’s not helpful either. In any case, both of these functions lack any kind of customizations and are a temporary solution. This is the main reason why users would need Caffeine.
Since there are so many versions of Android, it stands to reason that some people out there might have better control over this feature. For example, Samsung has an option that allows the display to remain turned on as long as you look at it. But that’s not really a solution if you want to keep the display on and monitor an application that doesn’t have this option integrated.

It’s also quite possible that Developer Options might not be available for you, depending on the type of device you have, so getting an application such as Caffeine is the only way to go.
How to use Caffeine
The name of the application is pretty clear, and it doesn’t require people to have any type of know-how. It used to be a time when users needed root access for this kind of feature, but that’s no longer the case. In fact, the application even works on the latest versions of Android, which are much more restrictive than the previous iterations.
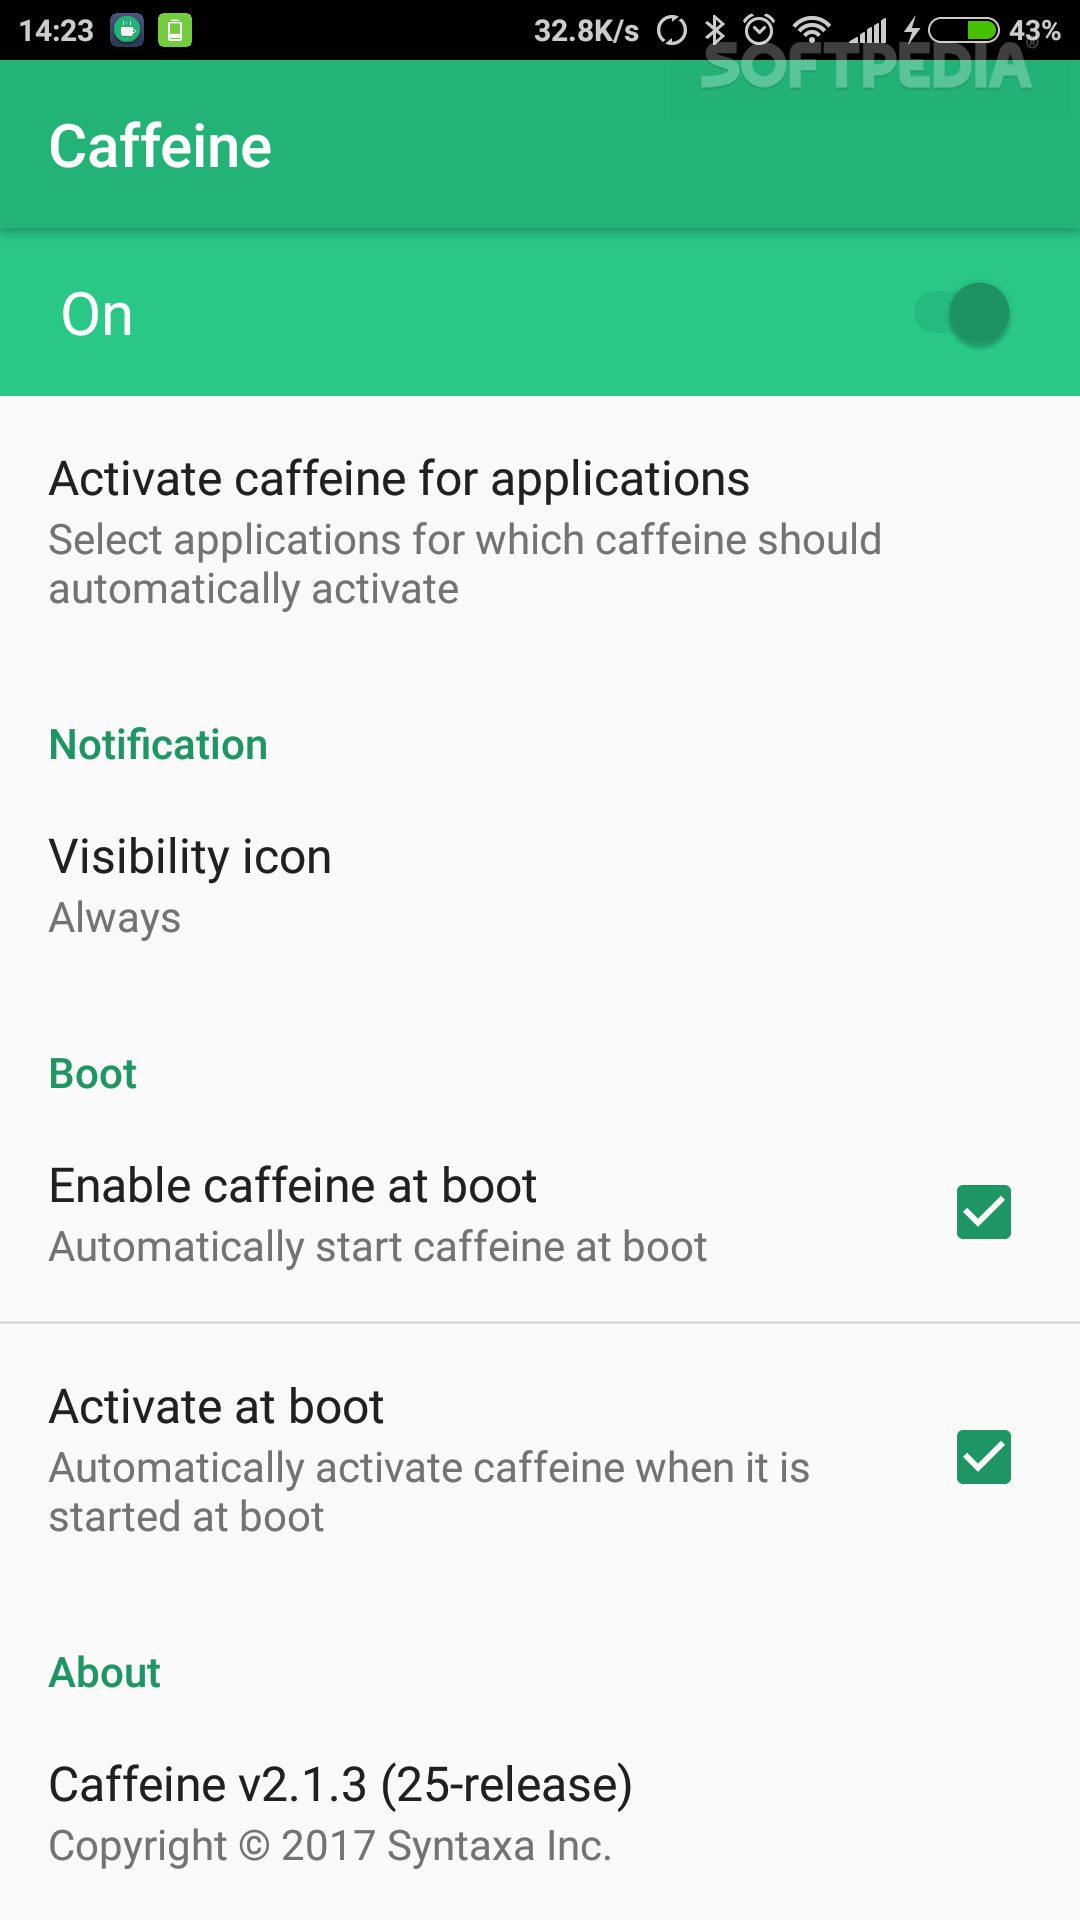
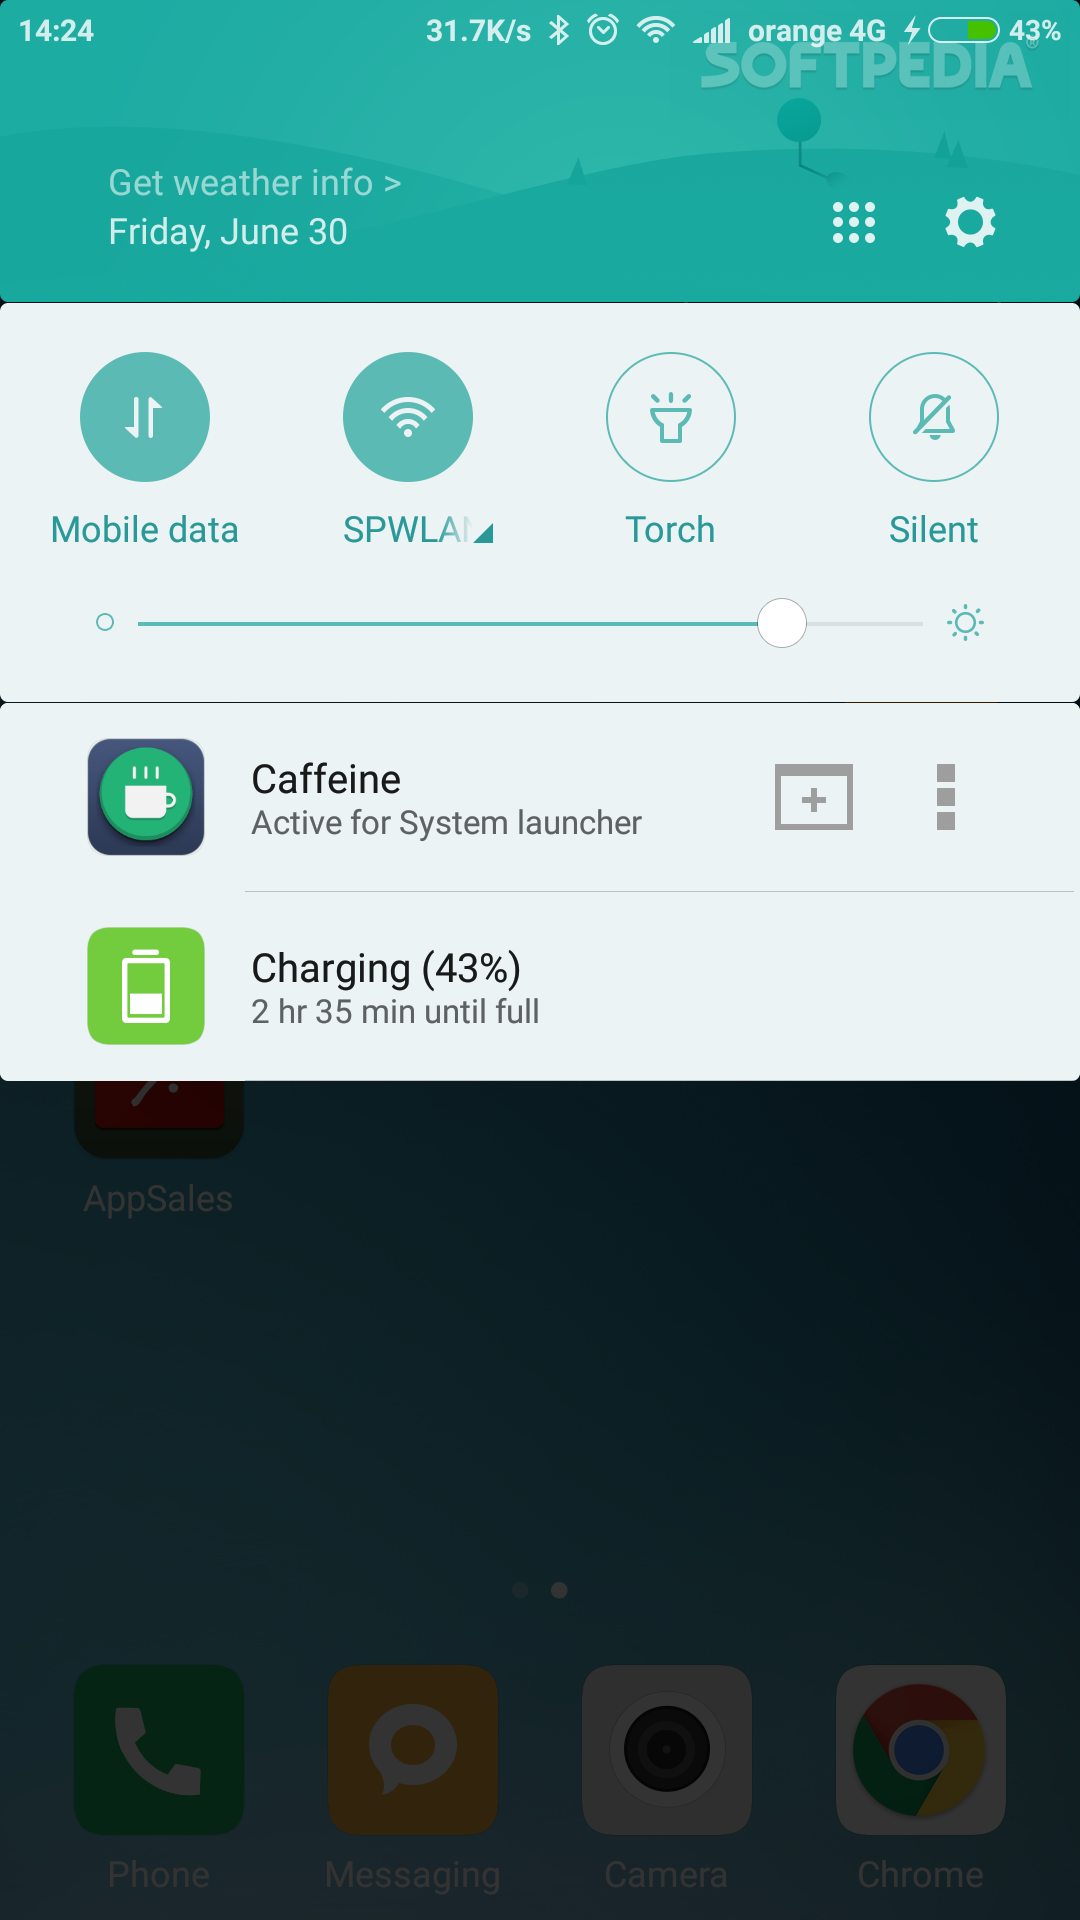
When you first open the application, you will notice a big switch right on top, turned off by default. You’re going to have to turn it on. Right below it, there is another category named Status with a button for keep device awake. For most users, enabling these two options will be enough to maintain the display alive, but the beauty of the application is that it offers a lot of customization options and we’ll go through all of them.
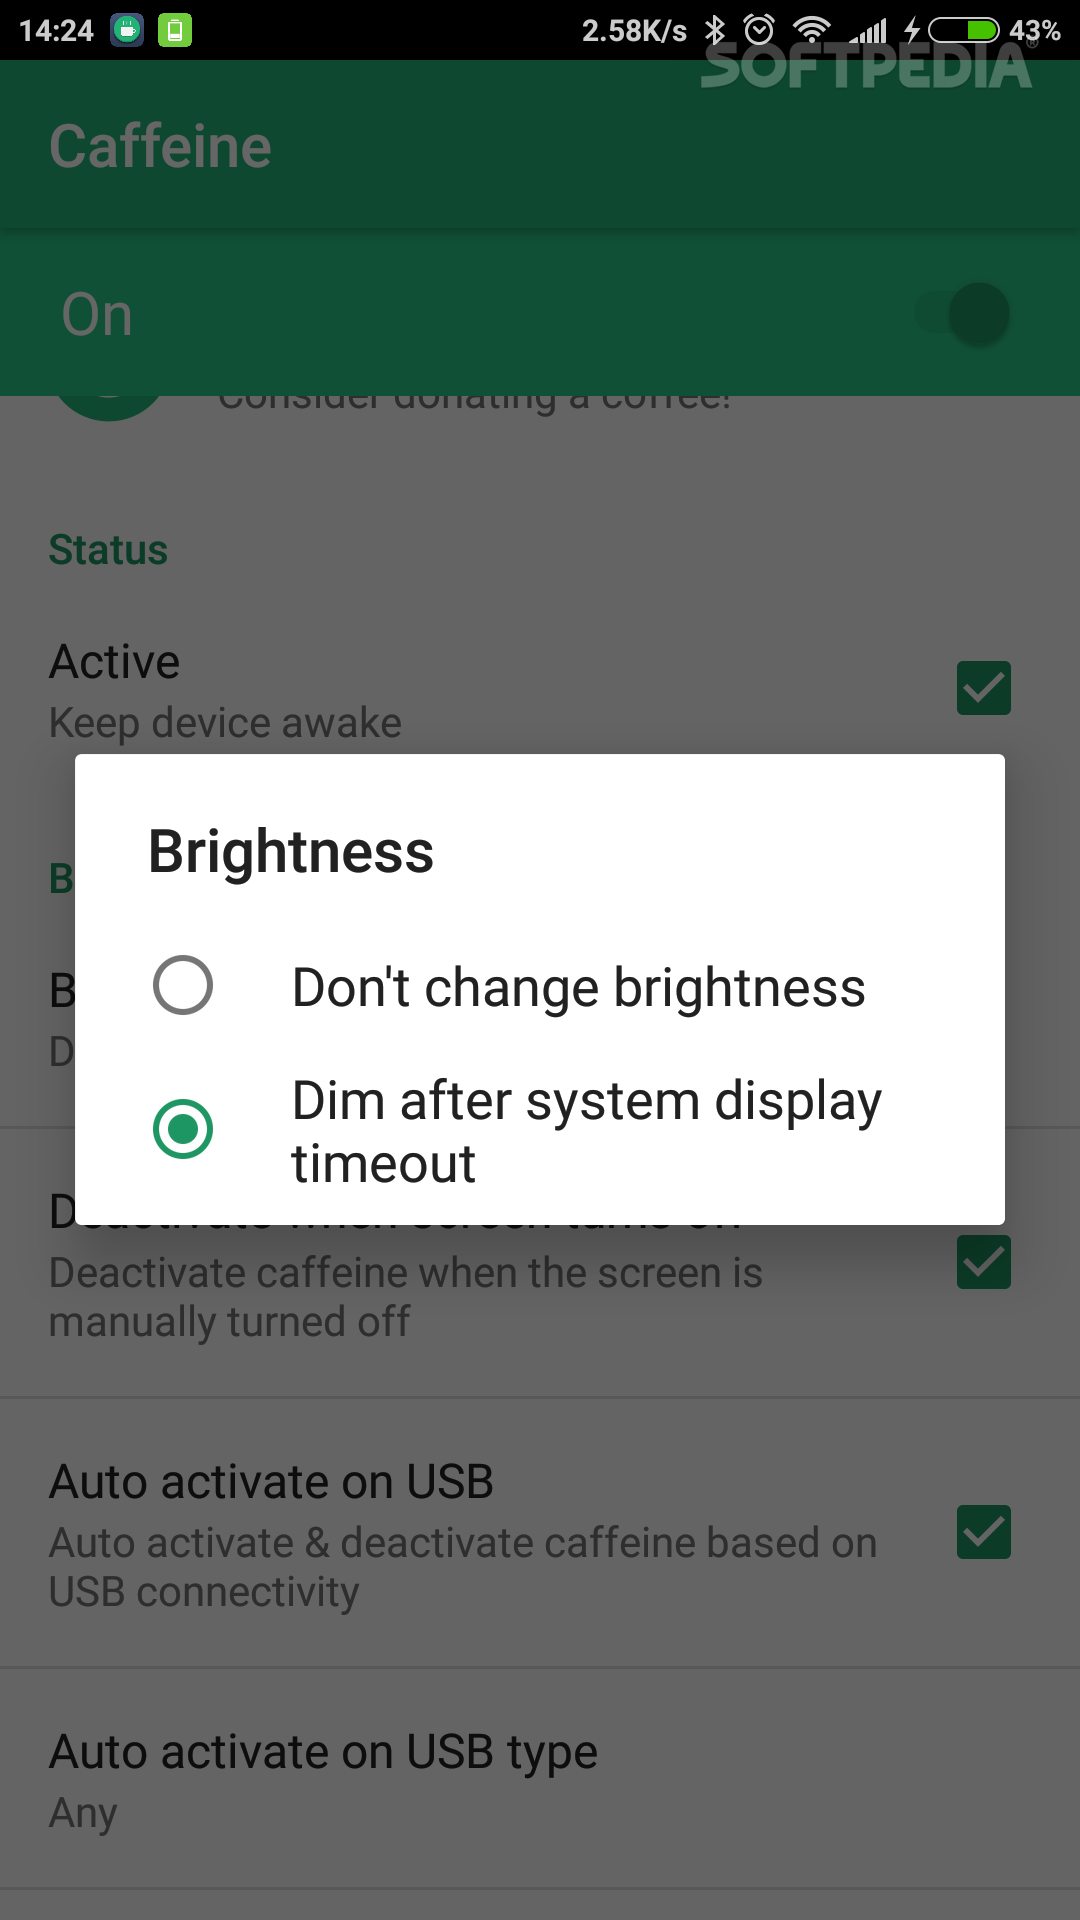
The first thing that people can change is how much brightness you want when you keep the display on. There are two choices: don’t change the brightness and dim after the system display timeout. Using the second option will save some battery charge.
Also, users will have the possibility to deactivate Caffeine when the screen has been turned off manually. This is quite important, and if you enable it, you will have to remember that. When you turn the display back on the application will be disabled.
Another option is the ability to auto-activate when the phone is connected to a USB power source. If you’re worried about battery life, you can enable this option, which means that Caffeine will only work when the device is receiving power. In fact, this is very similar to the option I mentioned about that’s available by default in Developer Option.

The developers have gone even further, and they are providing users with the second level of USB options, allowing them to choose on what type of USB connection the application will stay alive. Maybe you want to get the application to automatically start only when you’re charging from another device, and not from the AC charger.
One of the most important customizations provided by Caffeine that’s likely to give people something that they really need is the ability to set it up so that it works with selected applications. Maybe you want the phone to stay alive only when a particular app is working, and go to sleep for all of the others.
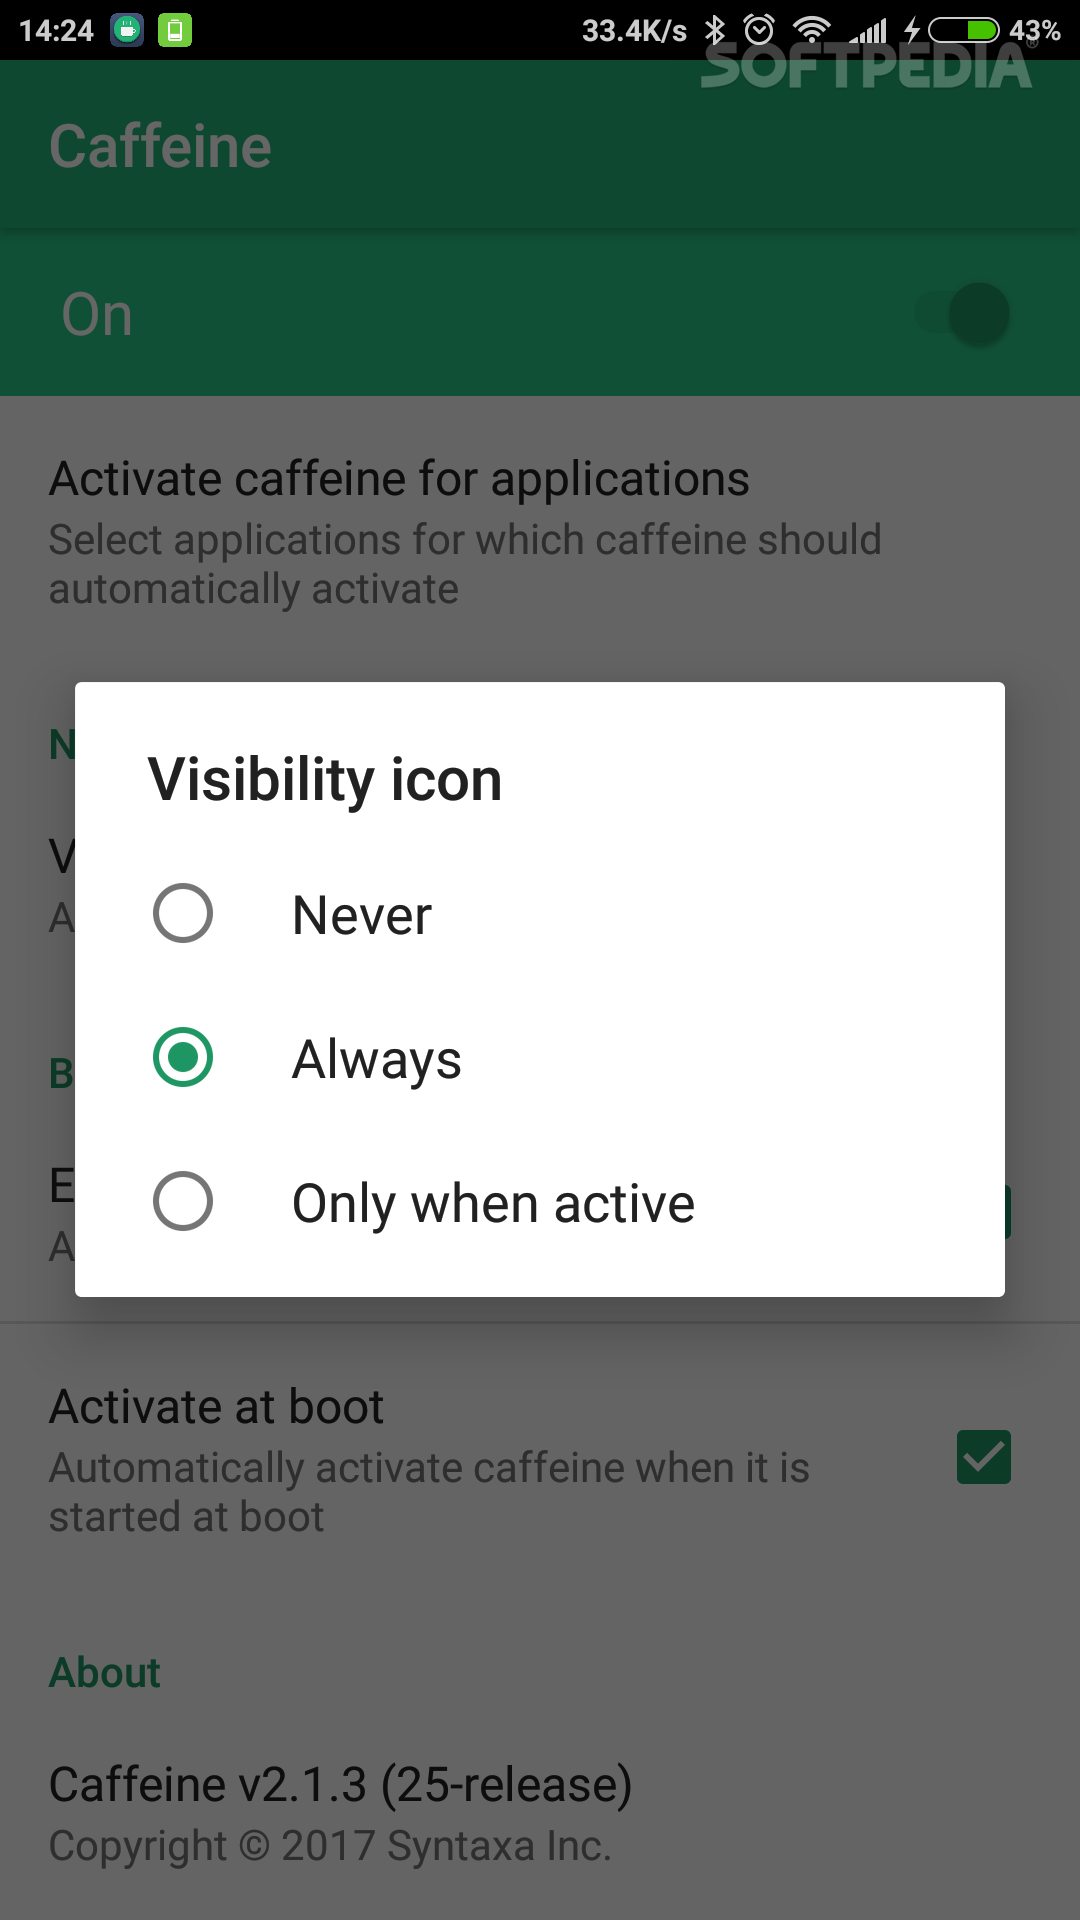
There is also a setting for how intrusive the notification icon is shown, but that’s not all that a big of a deal. It’s not like you don’t want to see the notification, but the option is there if you want to make the changes.
The last couple of options are related to the Boot functionality, and that means choosing whether to start the application at Boot and to activate the application automatically at Boot. These are very different aspects of the app, so it’s important to remember that it’s not enough to just open Caffeine, but it also needs to be activated.

Only one more item has to be mentioned, and that is the level of access that the application needs to have. The good news is that it doesn’t require Root access, which means that it’s not difficult to install or to use.
What some users probably won’t like is the fact that it needs access to Accessibility. This type of permission lets the app retrieve information about the currently and recently running apps. Subsequently, Caffeine will get information about which applications are used on your phone. It’s a big deal, and it’s considered a Privacy risk, enough for Google to mention it for all the apps that require this type of permissions. The access to this particular function has to be enabled on Android 5.x and up.
Conclusion
The biggest problem is power consumption, and it’s most likely the reason why we don’t have the option implemented on a deeper level. It’s quite possible that if this option is made available by default, it will lead to user forgetting about it and draining the battery.
It’s up to apps such as Caffeine to take the burden and to provide this feature to the people that need it. As far as the app itself, it’s hard to imagine finding a better one out there, but that doesn’t mean that it’s a perfect tool. For example, it lacks a Brightness setting, and I’m sure that users will find other faults as well.
All in all, Caffeine is easy to use and to set up, it comes with a handy notification that has a few settings integrated directly into it, and if you don’t mind the fact that it makes use of Accessibility permissions, you will most likely recommend it to everyone else. I know I do.