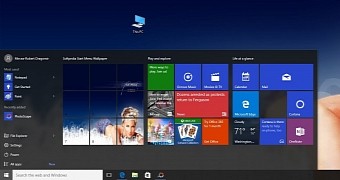
Many were eager to get their hands on Windows 10 when it got launched to see what the final release brought about, while more were just curious. Microsoft did put a lot of effort into developing the new OS, also listening to some fan suggestions, but Windows 10 still leaves more to be desired.
The popular Start Menu made a comeback in this new operating system from Microsoft, and it is one of the features that got the most attention. With customizable tiles and the possibility to resize the Start Menu itself, things looked promising. However, it wasn’t long until everyone realized it was not quite fun and games.
For whatever reason, the development team behind Windows 10 managed to omit a simple yet highly anticipated customization option for the Start Menu, namely the possibility to add a custom picture to tiles. This is rather awkward since apps you install from the Store are fitted with custom images, and you can only change the color for programs you manually pin.
Nonetheless, enthusiasts with programming skill came up with the right solution, and this takes us to the point of this article. Follow through and you might find something of interest.
Changing pictures for Start Menu tiles
Step 1: Fire up the Microsoft Store to download and install TileCreator. You can run it, but there’s still something more to do.
Step 2: Download TileCreatorProxy from one of the following links:
Note: You need to have an account for these specific services in order to download.
Step 3: Go to your downloads location, right-click on TileCreatorProxy, and choose to Run as Administrator.
Step 4: Head over to the folder where TileCreator got installed. It’s usually in C:\TileCreator.
Step 5: Open the ApprovedApps.config file with Notepad. Double-clicking it brings up a box with the programs you can open it with.
Step 6: Now write down a name (Key) for the application you want to add, followed by the exact path that includes the executable file. It needs to look something like this:
CCleaner:C:/Program Files\CCleaner\CCleaner64.exe
Step 7: Repeat the previous step for all the programs you want to pin to the Start Menu.
Note: Don’t forget to save for the changes to take effect.
Step 8: Now it’s safe to run TileCreator, so go ahead and fire it up. If you can’t find it, use Win + S to look for it.
Step 9: Fill in the Tile Name field with the tag you want to appear in the Start Menu. Change its text and tile color from the corresponding drop-down menus.
Step 10: In the Approved Apps Key field, write down the program name you previously added in notepad. In this case, the Key is CCleaner.
Step 11: Choose Image for any of the available size specifications. Selecting a picture for one size automatically creates the rest of the tiles. It’s possible to choose a different picture for each size option.
Step 12: Hit the Pin Tile button and press the Win key to make the Start Menu pop up and see the result.
| The whole process |
|---|
But wait, there’s more
The individual behind TileCreator didn’t let Windows limitations stop him from customizing his workspace, and neither should you. With a bit of imagination, a specific program, and a lot of objects to pin to the Start Menu, you can get a really neat effect, or even a simple puzzle game. Here’s what you can do:
Step 1: Download, install, and run PhotoScape.
Step 2: Access the Splitter component.
Step 3: Press the Add button and load a picture of your choice, preferably of large resolution for good quality.
Step 4: Decide whether you want to cut it based on a custom number of rows and columns, or width and height.
Step 5: When you’re happy with the grid, press Split and save the images to a custom directory.
| A lengthy task |
|---|
Step 6: Repeat Step 6 from the previous section to add a different program for each of the parts you split the picture into.
Step 7: Use TileCreator to add programs to the Start Menu and select a different picture for each.
Step 8: Bring the Start Menu up so that you can build the initial pictures from tiles, or even shuffle it in an attempt to solve it like a puzzle.
If you’re not ready to switch to Windows 10 yet and are still using Windows 8/8.1, there’s a similar program that lets you customize tiles in the Start Screen. In case you’re interested, the program in question is OblyTile.
In conclusion
Customization is one of the aspects that best goes hand-in-hand with creativity and imagination. It’s really a shame not to explore the countless possibilities through which you can bring a bit of personality to your virtual workspace or playground. Sure enough, some can have an impact on overall performance, but if you’re not using the computer for science, or any other heavy-duty activities, at least make it look cool.

 14 DAY TRIAL //

