14 DAY TRIAL //
 Even though Windows 8 was designed to be faster than its predecessors from the get-go, we've heard that many people are actually experiencing performance issues and that the OS is actually a bit slower.
Of course, there are many ways to tweak Windows 8, especially in case you're using a desktop computer, but when it comes to tablets, things are a bit more complicated.
That's why we decided to show you two different and very simple tricks to improve the performance of Windows 8 without spending too much time tweaking things.
Keep in mind that both tutorials are specifically aimed at tablets, including Windows RT devices, but they can very well do the job on laptops and PCs too.
They do not require advanced computer knowledge, but you must own administrator privileges on the system you're working on.
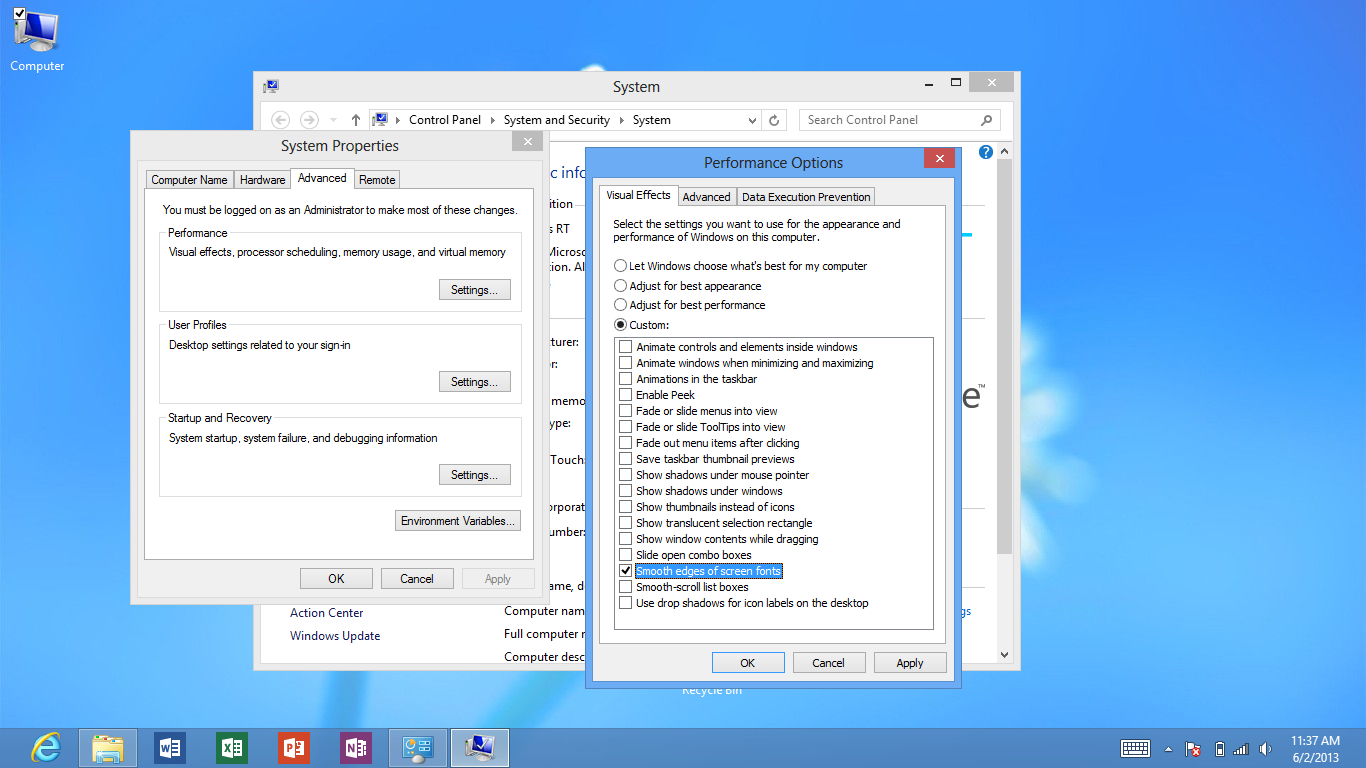
Trick #1: optimize Windows 8 for best performance
Just like its predecessors, Windows 8 comes with dedicated settings to optimize the operating system for either best performance or best appearance.
Of course, you can always let Windows 8 choose what's best for your computer, but in case you're hoping to get a blazing fast device, “best performance” options are the right way to go.
Basically, turning on this option disables some visual effects of your Windows 8 computer, but in return, offers faster loading times and better response. The Start Screen will load quicker, while the live tiles will display information much faster.
To switch Windows 8 to performance mode, here's what you need to do:
Right-click the “Computer” icon on the desktop and hit “Properties.” In the left panel, select “Advanced system settings” and afterwards click on “Settings” in the “Performance” section.
Select “Adjust for best performance” and hit apply. It's also recommended to enable the “Smooth edges of screen fonts” option to keep the modern look of system fonts, especially while browsing the web with Internet Explorer.
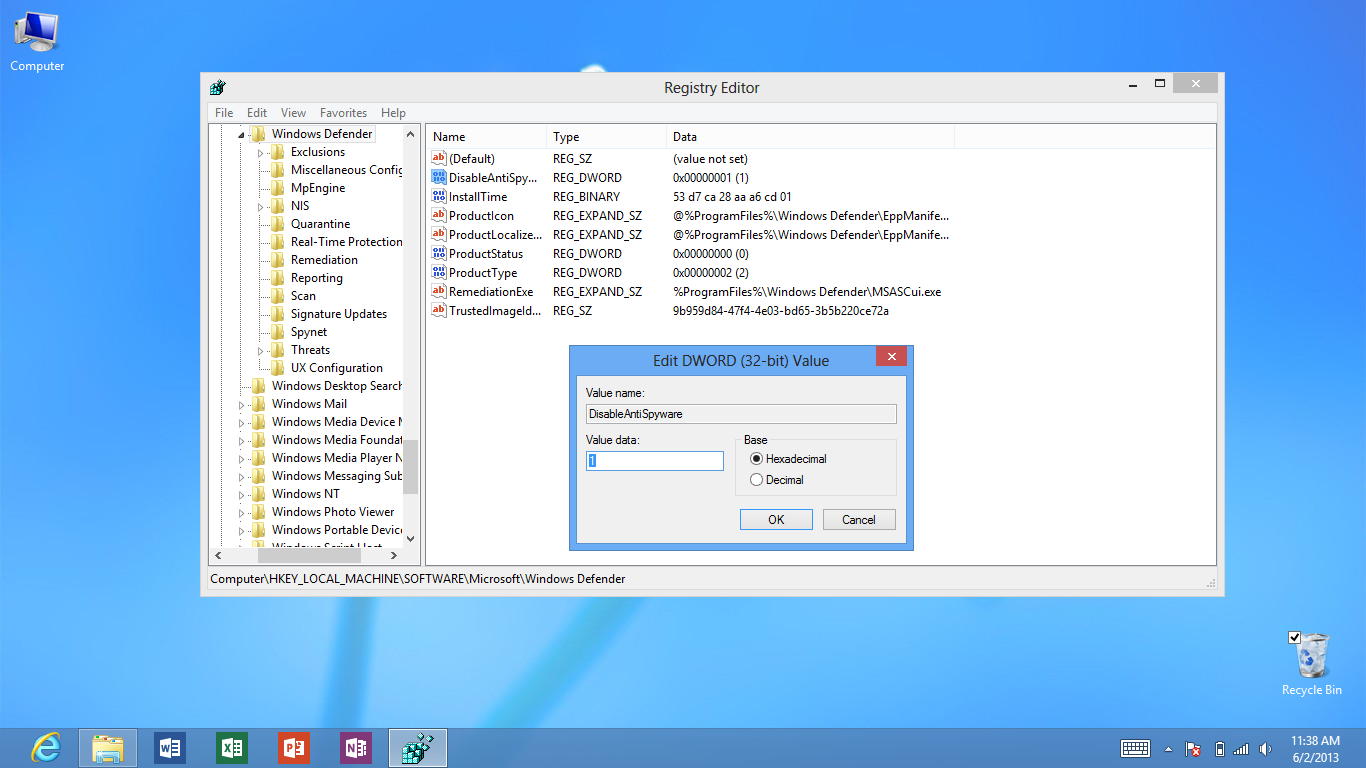
Trick #2: disable the Windows Defender service
Disabling the Windows Defender service could be quite helpful for some Windows 8 devices, but there's something very important that needs to be considered before doing it.
Turning off Windows Defender could expose your files, as this is the app that protects your computer from malware and other threats. In Windows 8, Windows Defender cannot be removed, but only disabled either manually or automatically when you install a third-party security tool.
This particular trick is only recommended on Windows RT tablets, as no malware has been developed to exploit such a device without anti-virus protection.
Here's what you need to do to disable Windows Defender:
Launch the Registry Editor by going over to the Start screen and typing “regedit.exe.” Navigate to the following path:
Look for the “DisableAntispyware” option in the right side of the screen and change its value to 1. Reboot the computer and that should be it.