14 DAY TRIAL //
 Do you remember the day when you first got to play with Apple's new cat? The day when you all went "aaaawww!" after clicking on a stack or using the 3D dock? I certainly do and I have to say that, albeit enjoying most of the changes Apple has introduced in Leopard, like many other people that are using a Mac, I needed to change some of them to the way they were in Tiger or to a better, more unobtrusive look.
For instance, I'm sure that the 3D dock has made lots of fans since day one but there were people out there that did anything they could to change it back to the 2D look they were used to. Another part of the UI that generated lots of controversy is the translucent menu bar, translucency that made the menus difficult to read for some and that simply bothered others just by the looks of it.
What is one to do in such a case? Tweak, of course! And when it comes to tweaking, what else can be more obvious than an interface tweak. In this article, I will present you the most important nine secret Leopard tweaks I have used to make my Mac experience one that I could enjoy even more than if I had used a system with its default settings unchanged.
I call them "secret" because Apple hasn't made them public or included them in an easy to use application that could allow users to customize the OS's interface even more to their liking. I also call them "secret" because they cannot be accessed from any system menu or preference pane and this completely hides them from you or any other less nosey Mac user.
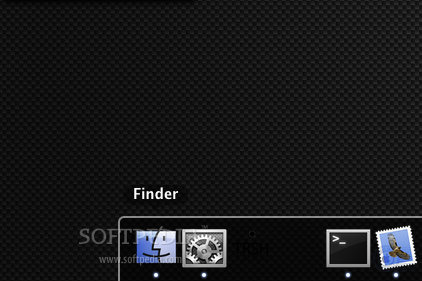
Without anymore talk, let's start the countdown and see how you can easily and quickly force the Finder to display the entire path to a file or directory in the title bar, add movable and removable spacers to the dock, change the login screen background with a single and simple command-line that you can run in your Terminal, customize the look of the menu bar, enable a secret Screen Sharing toolbar, make the good old switch between a 2D and a 3D dock, and disable the Safari option that will auto open the downloads.
1. Force the Finder to display the entire path to a file or directory in the window's title bar Have you ever found yourself wandering around in the Finder to be able to realize out what the active directory path is? Make the Finder window display it by issuing the following commands from the Terminal:
killall Finder
2. Add movable and removable spacers to your Mac's dock The first time I heard about this one, I wondered how spacers could help me with. I'm pretty sure some of you might think exactly as I did but, after trying it, you will find out they are quite handy and that your dock will actually look way better than before. This is especially useful when you have a lot of apps and you want to group them by certain criteria. To enable this tweak, you have to use the following commands:
killall Dock
3. Change the login screen background To be able to do such a thing, there is more than one way to go. Some people suggest replacing the DefaultDesktop.jpg file that one can find in the /System/Library/CoreServices/ directory. Although this might work we, as well experienced Mac users, know better than to mess with files that reside in the /System folder and know that a much more proper way to do this job is to change the appropriate preference from the command-line using the following:
4. Easily customize the look of the menu bar The one thing that totally annoyed me since day one is the new look of the Leopard menu bar (the translucency effect it had). And after a while, I did manage to find a way to get rid of it and have a completely white and nice looking menu bar as in Tiger. To be able to switch between the different looks the menu bar can have, you must use the following commands (as usual, from a Terminal window):
- Gray menu bar:
5. Enable a secret Screen Sharing toolbar For the people that use Screen Sharing each and every day, this tweak can deliver quite a boost to the way they manage things while controlling a remote computer. To enable the toolbar with the extra secret buttons, run this command from a Terminal window:
6. Switch between a 2D and a 3D dock This is probably the tweak that got the most celebration from the Leopard users who are still divided between the 2D and 3D. The ones that like the dock simple and clean as it was in Tiger, and the ones that will go for the 3D dock look and for the innovative modality to display icons using reflections and all the bling bling that we're used too. To enable the 2D look, you have to run these two commands from the command line:
killall Dock
7. Disable the Safari option that will auto open the downloads Although this is not a Leopard specific tweak, it is included in this article because I find it extremely annoying when Safari starts acting like it has a mind of its own. To enable it, use:
There are a lot more Leopard related tweaks available out there but I have decided to write only about these because I find them to be the most important and that will have the biggest impact on your Mac experience in the end. If you think I've left out any important ones or that you find extremely useful and not too many people know about it, feel free to let us all know by inserting a comment below.