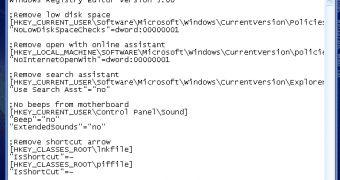
Once again, it's time to enhance your Windows XP operating system exactly the way you want and without paying a cent on expensive programs that do something so simple that even a kid could handle it. This series allows you to make important changes to the look, feel and behavior of your Microsoft Windows XP with just the help of the good ol’ Notepad. These tweaks, performed on the Windows Registry, can be undone, but it’s very important that you follow a few steps and remember that the lines you are about to copy must be carefully selected and/or copied, because a single misplaced / missing / added character may seriously damage your OS.
So, before continuing our journey into the land of magical tweaks, it’s imperative that you read the first article in the series to understand not only the basic rules that must be followed in order to get the job done right, but also... what's the deal with all the bold lines below. Before starting yet another series of desktop tweaks, please allow me to remind you not to leave the tweaks.reg file blank after opening it. Therefore, now that you're viewing it in Notepad and have placed the “Windows Registry Editor Version 5.00” [without the quotes] at the beginning, let's start optimizing.
As you probably know by now if you have read the previous articles in the series, the following enhancements are not achievable from native Microsoft Windows utilities such as the Control Panel. As you've surely noticed, today's topic is Desktop Icons. What about them?, you may ask. Well, most users usually choose to have one to four system icons on their desktop: My Computer, Recycle Bin, My Documents and My Network Places. Of course, as most of the time with Microsoft, it's not really a matter of choice. You never had and, most probably, never will have the choice to place other, very useful system icons on your desktop.
In that case, because Microsoft will not let you choose and doesn't seem to support other desktop shortcuts, we'll help you place them in no time. The procedure doesn't take long, because, as you'll see, it's not very different from one icon to another. Of course, the removal is even easier to perform. Feel free to choose only the icons that would come of great use to you on your desktop. I'll start with the most popular ones and, naturally, end with the least accessed icons in Windows.
[HKEY_LOCAL_MACHINE/SOFTWARE/Microsoft/Windows/CurrentVersion/Explorer/Desktop/NameSpace/{2559A1F0-21D7-11D4-BDAF-00C04F60B9F0}]
Usually, accessing Windows Search in Windows XP would require either to open the Start Menu or to simultaneously press the Windows key and the S key. By adding just the line above to your tweaks.reg file and running it, a new option will become available: running it from your desktop. As opposed to other XP tweaks, this one doesn't even require a reboot and not even logging off. All you have to do is to refresh your desktop, et voila, the Search icon will be there.
[-HKEY_LOCAL_MACHINE/SOFTWARE/Microsoft/Windows/CurrentVersion/Explorer/Desktop/NameSpace/{2559A1F0-21D7-11D4-BDAF-00C04F60B9F0}]
As promised, all added icons can be easily removed. So, all you have to do is to place the above line at the bottom of your optimization file and, after a quick refresh, the Search button will be gone.
[HKEY_LOCAL_MACHINE/SOFTWARE/Microsoft/Windows/CurrentVersion/Explorer/Desktop/NameSpace/{2559A1F3-21D7-11D4-BDAF-00C04F60B9F0}]
All the above is also true for Run... well, except for the fact that Run can be launched by simultaneously pressing the Windows key and the R (and not S) key. As you have surely noticed, the addition is almost identical. The string between the two braces is the only difference from one example to another. Everything else stays exactly the same.
So, now that you've learned “how to fish” and you have the fishing rod in your hand, here's a list of other strings for you to choose from, which can be placed between the two braces (and the icons that will be appear after running tweaks.reg):
D20EA4E1-3957-11d2-A40B-0C5020524153 -
Administrative Tools
6DFD7C5C-2451-11D3-A299-00C04F8EF6AF -
Folder Options
D20EA4E1-3957-11D2-A40B-0C5020524152 -
Fonts
2559A1F1-21D7-11D4-BDAF-00C04F60B9F0 -
Help
FF393560-C2A7-11CF-BFF4-444553540000 -
History
7007ACC7-3202-11D1-AAD2-00805FC1270E -
Network Connections
2227A280-3AEA-1069-A2DE-08002B30309D -
Printers and Faxes
7BE9D83C-A729-4D97-B5A7-1B7313C39E0A -
Programs folder
E211B736-43FD-11D1-9EFB-0000F8757FCD -
Scanners and Cameras
D6277990-4C6A-11CF-8D87-00AA0060F5BF -
Scheduled Tasks
48E7CAAB-B918-4E58-A94D-505519C795DC -
Start Menu folder
0DF44EAA-FF21-4412-828E-260A8728E7F1 -
Taskbar and Start Menu options
7BD29E00-76C1-11CF-9DD0-00A0C9034933 -
Temporary Internet Files
7A9D77BD-5403-11D2-8785-2E0420524153 -
User Accounts
This is where our brief “journey” ends, a concise, but very insightful tour into the world of true choices. With the power of just one example, you can now easily choose which system icons to be placed on your computer's desktop in just a few seconds. If you've enjoyed this article, feel free to have a look at the previous ones as well, part 1, part 2, part 3, part 4, or to share your registry insights with the rest of the world via our comments section.

 14 DAY TRIAL //