14 DAY TRIAL //
 Internet radio stations have grown in popularity since the Internet itself has evolved, allowing ISPs to offer larger and larger connections to clients. Back in the dial-up age, we had a 5kB/s speed line, which wasn't powerful enough to sustain a broadcasting station at minimum quality. More exactly, listening to a radio which broadcasts at 128kbps requires at least a bandwidth connection of 12kB/s, which was a lot over what dialup could offer. Of course, you could listen to lower quality stations such as 56 or 32 kbps but the sound was lousy and you were better off. Nowadays, every PC has a permanent high-speed connection to the Internet, which is at least 10 times faster than the old dial-up. This allows us to listen to high quality Internet stations which broadcast at 128, 256 or even 320kbps. Unfortunately, you can't control what songs are played on radio stations (except last.fm which offers a bit of control), therefore you can't listen again and again to a song you just heard and fell in love with. However, this guide will enable you to record the Internet stations to local mp3 files, allowing you to play your favorite songs over and over again, whenever you want.
RECORDING SHOUTCAST STREAMS
The SHOUTcast website is a popular site which displays thousand of broadcasting stations all over the world. To record any of these stations, you'll need to have KStreamRipper, which is a front-end to StreamRipper. This application records SHOUTcast streams and splits them up in several mp3 files with file name and ID3 tags based on the information the stream sends.
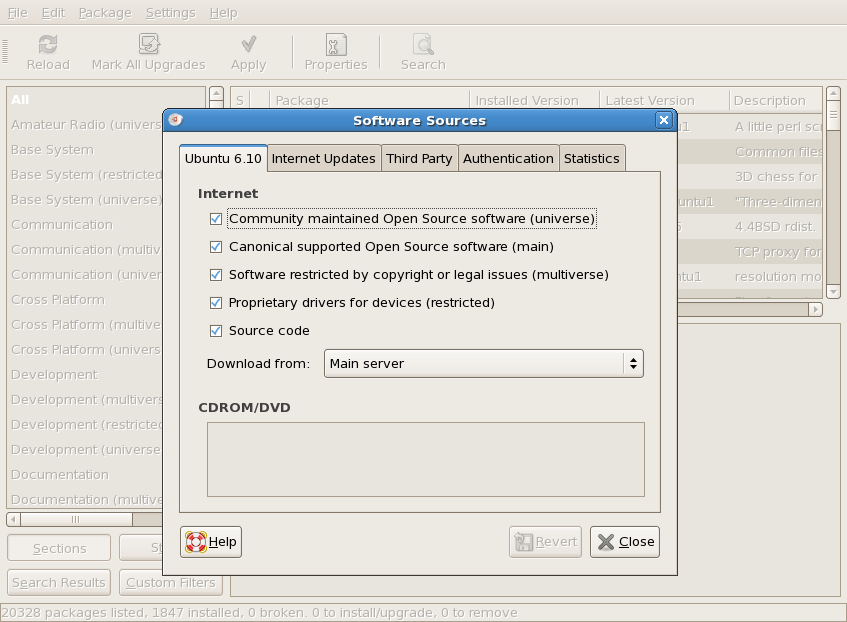
To install KStreamRipper, go to System / Administration / Synaptic Package Manager. Here, go to Settings / Repositories and make sure the Universe repository is enabled:
Now, press the Search button, enter 'streamripper' and press enter. Finally, right click 'streamripper' from the results list, select 'Mark for installation' and press the 'Apply' button on the toolbar. Repeat the process for 'streamtuner'.
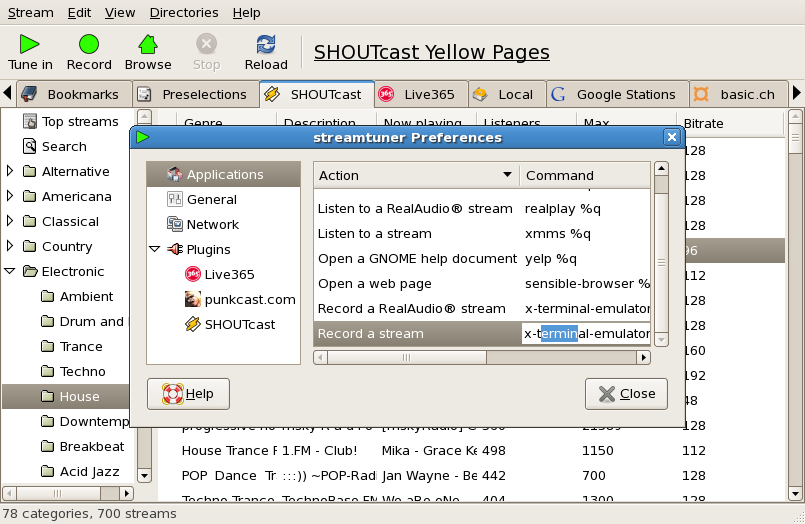
Once installed, run streamtuner by following the menu: Applications / Sound and Video / streamtuner. When it's done loading, go to Edit / Preferences and replace the 'Record a stream' command with

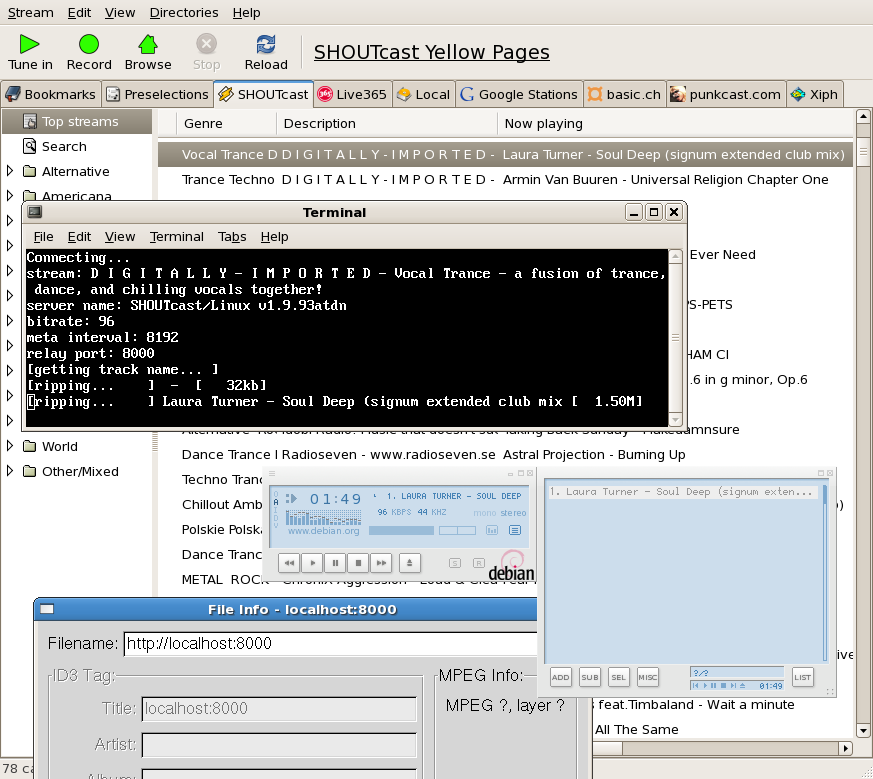
This command will set-up a relay, allowing you to record and listen but also to save bandwidth at the same time. The idea is that without relay, when you play and record the stream, you're downloading the stream twice: once with the player and once with the recorder. With the relay enabled, you are only downloading the stream once for the recorder, then the stream is redirected locally to the player. All you have to do is open a media player (xmms, amarok) and open the link http://localhost:8000 while streamtuner is recording.

RECORDING LAST.FM STREAMS
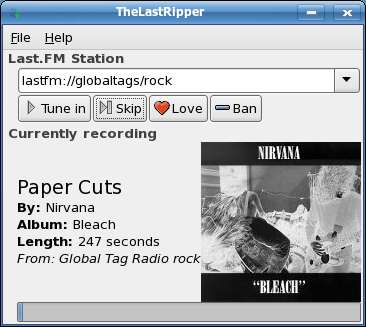
Last.fm service is a bit different from shoutcast. Besides the fact that it requires a username and password to access the streams, you can also change the current playing song by pressing the next button. To record a last.fm stream, you need a program called TheLastRipper. To install it, click HERE and either select Open with GDebi Package Installer, or save the package to Desktop and double click it.
When the package installer starts, press install and wait for it to finish. Next, run TheLastRipper from Applications / Sound and Video / TheLastRipper. and log-in with your Last.FM username and password.
After the login process has completed, simply select a genre from the list and press Tune In. The songs will be recorded to your home directory / music.