
 14 DAY TRIAL //
 Originally introduced in Mac OS X version 10.2 (Jaguar), the screenshot feature allows users to immortalize the action on their monitor by pressing a series of keys. While Jaguar saved these stills in .jpg format, and Mac OS X 10.3 (Panther) in .pdf format, starting with Mac OS X 10.4 (Tiger), Apple set the default screenshot format to .png. So, what can a Mac user do to change that, if they want to go back to .jpg, for instance?
Well, one method implies using the Terminal. It has long been revealed that, in Mac OS X 10.4 and later, the default screenshot format can, indeed, be changed, and very easily too. Users must open the Terminal (located at /Applications/Utilities/Terminal) and type in a command that looks a bit like this:
defaults write com.apple.screencapture type image_format killall SystemUIServer
For the instruction to work, image_format is actually one of the jpg, tiff, pdf, png, bmp or pict formats, so you need to type in the one you want your screens saved in. Thus, if you want them saved as JPGs, your command line should look like this:
defaults write com.apple.screencapture type
jpg
killall SystemUIServer
Or, have a look at the command typed inside the Terminal itself...
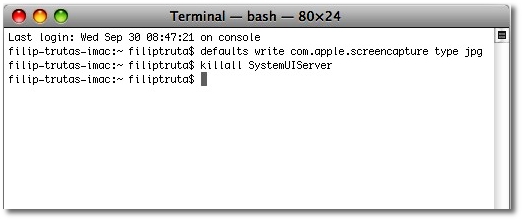
Typing in the command in Terminal.app Ok, so this is probably the easiest way to have the default screenshot format changed. But many of you computer-savvy users most likely have programs like OnyX and SuperDocker installed. If you do, these apps can spare you the command-line trouble via options within their own interface.
In SuperDocker, for instance, all you need to do is fire up the app, choose Miscellaneous from the menu located at the top of its window, and toggle the “file format” under the “capture” category.
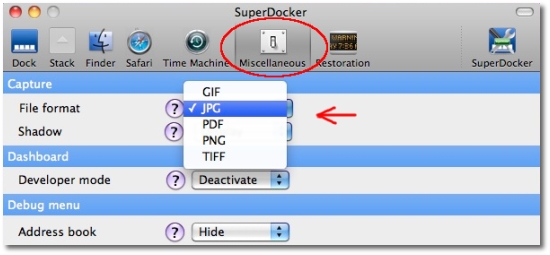
Michael Aubigny’s SuperDocker allows you to make the tweak in seconds As simple as it sounds, SuperDocker will immediately change the default screenshot format to whatever you choose from that list. You’ll also be prompted to type in your administrator password (if that’s how your computer is set up).
Before you go, here’s the criteria by which you can have your screens taken in Mac OS X, depending on where you want your screenshots saved, and how you’re going to use them.
Command-Shift-3 - takes a screenshot of the screen and saves it on the desktop; Command-Shift-4, select an area - takes a screenshot of an area and saves it on the desktop; Command-Shift-4, Space bar, click a window - takes a screenshot of a window and saves it on the desktop; Command-Control-Shift-3 - takes a screenshot of the screen and saves it to the clipboard (for pasting); Command-Control-Shift-4, select an area - takes a screenshot of an area and saves it to the clipboard; Command-Control-Shift-4, Space bar, click a window - takes a screenshot of a window and save it to the clipboard.
Hope this short tutorial was helpful. Any suggestions or pieces of advice you might have for fellow Mac users are more than welcome in the comments.