
 14 DAY TRIAL //
 So what if Ubuntu is a fast operating system?... There is always room for some more tweaking... and I am talking here about some aspects that are NOT useful for the end-users (yes YOU, the regular Ubuntu user). The hacks presented in this guide will greatly improve the overall performance of your Ubuntu 8.04 Linux OS.
WARNING: Please follow the instructions below very carefully, in the order in which they are listed and reboot your machine after each one. It is also possible to do them all at once, but rebooting after each one is much safer. Why? Because if your system won't work properly at a certain point of the tutorial, you'll know what's the last thing you did and you can revert back to the initial configuration. I've applied all these tweaks on three (3) different configurations (with SATA and IDE hard drives) with success!
Step 1 - Boot tweaks
Tweak One - Boot profile Administration -> Login Window...
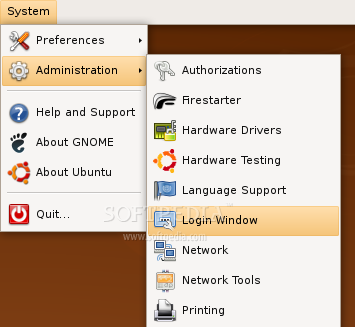
...input your password, go to the fifth tab ("Security"), check the 'Enable Automatic Login' option and choose your username from the drop-down list.
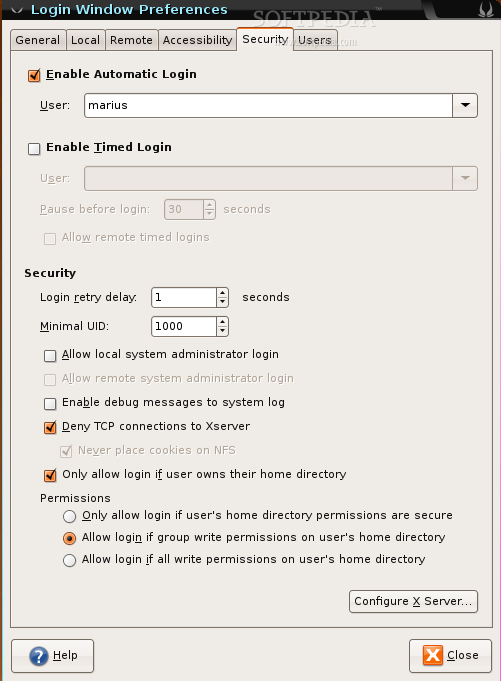
That's it! Close the window and reboot. You will notice that the system will automatically log you in and remember that you've just lost a few important seconds!
Step 2 - System tweaks
Tweak One - Speed up your hard drive
The following tweaks assume that you are using an ext3 filesystem for your Ubuntu OS and they will offer a noticeable performance boost! However, there is also a bad side of them... if you don't have an UPS and your system will power off accidentally or because of a power loss, YOU WILL LOSE IMPORTANT DATA!
Open a terminal (Applications -> Accessories -> Terminal) and type:
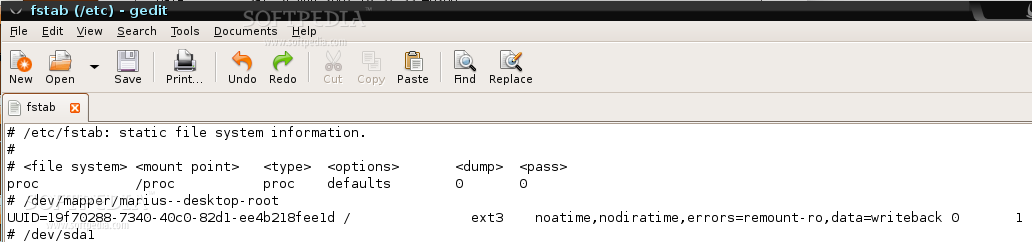
From this:
# /dev/sda1 UUID=19f70288-7340-40c0-82d1-ee4b218fee1d / ext3 relatime,errors=remount-ro 0 1
To this:
# /dev/sda1 UUID=19f70288-7340-40c0-82d1-ee4b218fee1d / ext3 noatime,nodiratime,errors=remount-ro,data=writeback 0 1
See the following screenshot if you do not understand...
Save and close. Now type the following command in the terminal:
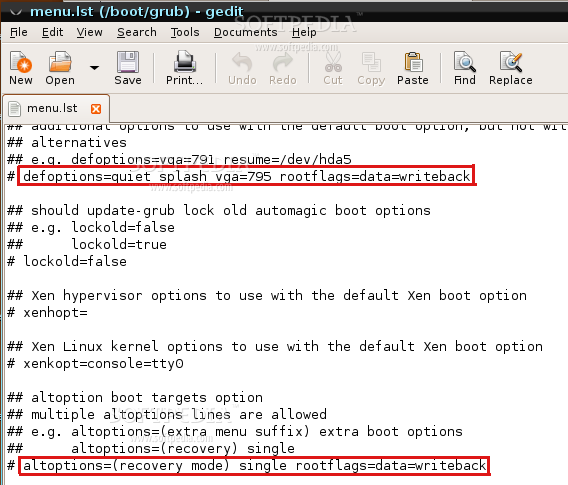
rootflags=data=writeback
...to the end of the following lines:
# defoptions=quiet splash vga=795 (by default, Ubuntu doesn't have the "vga=795" option on this line. It appears if you did the second tweak from the first step (see above)).
# altoptions=(recovery mode) single
They must look like this...
Save and close, and paste the following command in the terminal:
That's all, now reboot your system and when you get back, you should feel an increased speed in video, image or audio usage.
Tweak Two - Tuning Swappiness
If you have been running Linux systems for some time and you have used applications like 'top' to see what's going on in your machine, then you've probably wondered: Where has all my memory gone? You should know that the largest place it is being used in is the disk cache, as the cached memory is free and it can be replaced anytime if a newly started application needs that memory. Linux systems are made like this to use so much memory for disk cache because the RAM is wasted if it is not used and if something needs the same data again, then there is a very good chance to be in the cache memory.
Open a terminal (Applications -> Accessories -> Terminal) and paste the following code:
Tweak Three - Concurrent booting
If you have a dual-core processor or one that supports hyper-threading then concurrent booting allows Ubuntu to take advantage of them. Just open a console and type the following code:
That will be all for now. With these tweaks, your system should perform better and boot faster. Please report if you see any improvements to your system and if anyone has more improvements, you can post them below so others will know about them!