")
 14 DAY TRIAL //
 Mountain Lion comes with a lot of neat stuff under the hood. A most precious enhancement is the memory management, but we’re not here to talk about that. We’re here to talk about how you can use Preview to create 9gag material in seconds.
Many applications in OS X 10.8 have gotten an extra feature here and there. One of them is Preview. In addition to other minor tweaks, Preview now lets you easily annotate images and have them saved to your hard drive in seconds.
Just load up your picture in Preview and hit the Show Edit Toolbar button (represented by a pencil in a frame).
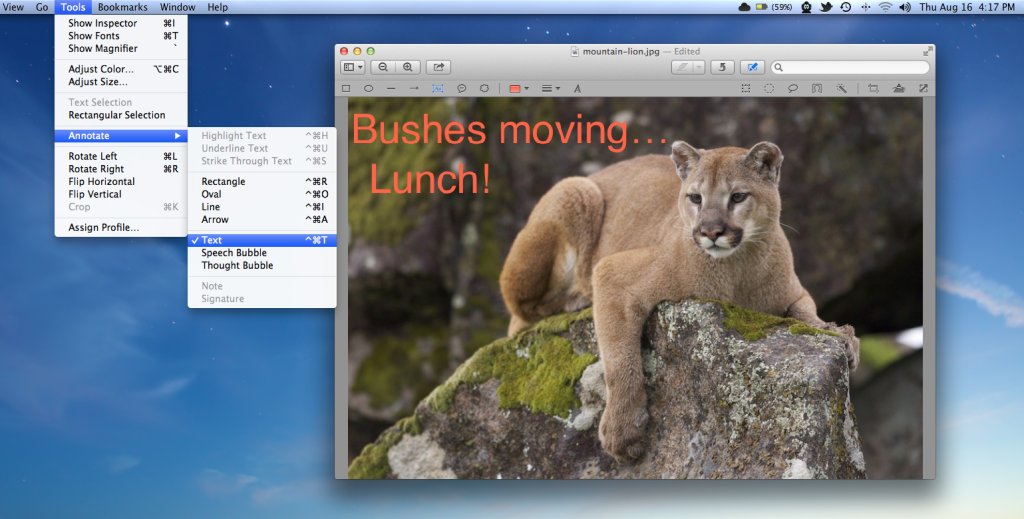
Go up to the menubar and access Tools -> Annotate -> Text. Make a selection in the picture where you want to input your text, then start writing.
You can play around with the options to make your text appear by itself or in a cartoon balloon.
To change the text’s format, select the text and use the Color pop-up menu in the annotations bar to change the color, or click the Show Font Panel button in the annotations bar, to change the text’s font and size.
You can’t edit, move, or delete the text in an actual image (i.e. a jpeg file).
To delete the text or text bubble, click Text or Select in the toolbar, then click the text or text bubble so resize handles appear, and finally press Delete.
That’s it! Hope this tip proved useful for some of you. If so, leave a comment. As usual, you can drop us a line with recommendations for our next Mountain Lion tip.