Did you know that a freshly installed Linux server can be hardened in less than 10 minutes? Here's how!
Step 1: Turn all unneeded services off
There are two kinds of network services:
- those that get started as init.d services; - those that get started by xinetd.
This distinction is important, as xinetd can start services on demand, while services started through init.d run all the time.
Okay, time to start securing your server. On a terminal, as root (and, for the purposes of this tutorial, assume this from now on) run netstat -ltunp. You should see a listing like this one:
Those are all processes listening to specific ports. As you can see, the PID (process ID) and the program name are displayed as well.
Make two lists: one for the services you absolutely need (which you should already know by heart), and one for the services that are expendable or you can start manually when they're needed (tip: each program name usually ships with a man page).
Shutdown each service on the second list (except for xinetd) - that's a pretty straightforward task. Each one of those services is started by init.d. To find out the name of the service control script, just hop to /etc/rc.d/init.d and look for a file with a name similar to the program name.
Example: suppose I don't need mythbackend. To stop it: /etc/rc.d/init.d/mythbackend stop (some distributions provide the service mythbackend stop command, which is easier on your fingers). Now, to disable it: chkconfig --del mythbackend. After doing this, you should check to see if the offending service went away, with the same netstat -ltunp command.
Configuring xinetd
Great. So you got rid of the unneeded services. But there's more. As we saw earlier, xinetd has its own ways. In practice, this means that some services will be started on demand - thus, you won't see them under your netstat -ltunp listing.
To find out which services xinetd manages, hop to /etc/xinetd.d and do a directory listing. You should see some service configuration files. Identify the ones you won't be using and edit each one of them, adding a line that says disable = yes between the curly braces.
Note that some services already ship with disable = yes, but some ship with disable = no. If one of the configuration files says disable = no, just change it to disable = yes. Now, reload xinetd with the famous /etc/rc.d/init.d/xinetd reload, and run netstat -ltunp again, just to be sure.
That's step 1. With a bit of practice, you should be doing this in five minutes or less.
Step 2: Limit access to running services using iptables
So, our server now runs the absolutely required services, and no more. But some of those services aren't meant to be accessed from everywhere, right? For example: I may have a MySQL database server running, but that doesn't mean MySQL should be accessible from any random IP address on the Internet. Thus, we'll use the firewall to stop evil at the door. Again, make a list of services. For each item on the list, identify which IP addresses should be able to reach the service. For each service on your list, write down the TCP/UDP port(s) they use.
In my example, MySQL uses TCP port 3306, and should only be accessible by localhost ( 127.0.0.1 ).
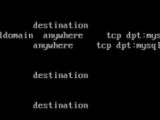
Time to compose and activate the iptables rules. Doing a quick check with iptables -L, I can see that my INPUT chain (the one I'll be working with, since I want to disallow INPUTs to my server) is empty:
Your mileage may vary, because your distribution may already have set up some basic iptables rules; to make these instructions foolproof, I will be inserting rules at the beginning of the INPUT chain. In this case, I want to allow access to 127.0.0.1:3306, and deny access to everyone else on port 3306, in that order. In order to do that, two rules are needed. I'll add the "allow" rule into position 1 (the very first):
[root@localhost ~]# iptables -I INPUT 1 --protocol tcp --destination-port 3306 -s 127.0.0.1 -j ACCEPT
So far, so good. I'm telling the firewall to -j ACCEPT all --protocol tcp connections to --destination-port 3306 from the address -s 127.0.0.1. Now, I'll insert the "deny" rule into position 2:
[root@localhost ~]# iptables -I INPUT 2 --protocol tcp --destination-port 3306 -j REJECT
See how easy it is? Let me explain: rule 2 tells the firewall to -j REJECT all --protocol tcp connections to --destination-port 3306 from any address (since I omitted the address). Since rules are processed "top-down" (from 1 to n), the first one that matches an incoming connection is applied. If no rules match, then the default policy (which is normally ACCEPT) kicks in. Repeat for every service that you want to secure.
Finally, save the rules. For this, you'll need to use your distribution's tools. For Fedora Core, that's as easy as issuing the command service iptables save and ensuring that the iptables service runs at boot time:
chkconfig --add iptables .
It's worth noting that some people prefer to -j DROP instead of DENY ing. DROP means that your server will ignore connection attempts (neither denying connections nor accepting them). I prefer DENY, because it's easier to pinpoint a problem with iptables rules that way, and (most importantly) DROP rules make those ports appear as filtered to a hostile port scanner (which hints to the attacker that a service is running).

 14 DAY TRIAL //

