14 DAY TRIAL //
 Disk space hasn’t always been abundant. Not a long time ago, you had to carefully select Windows features to install, or to carefully pack large files into multiple packages to be distributed.
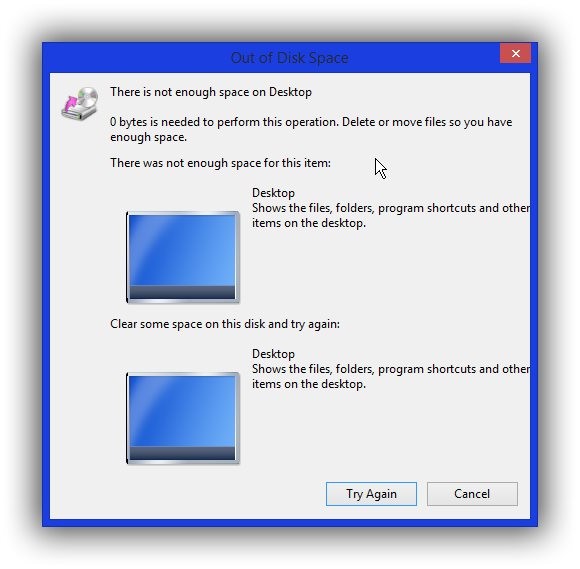
Ironically enough, even with all the physical and virtual space provided by Cloud services, we still seem to run out of bytes to store data. A home computer with multiple users can be affected by this inconvenience, but there’s a way.
Somewhere in the Windows set of features, there’s an option that enables you to create and limit disk space that can be used by other accounts on the same computer. Disk Quotas, as you find them, are a way of making sure you never run out of space because of someone else.
Limiting disk space that can be used
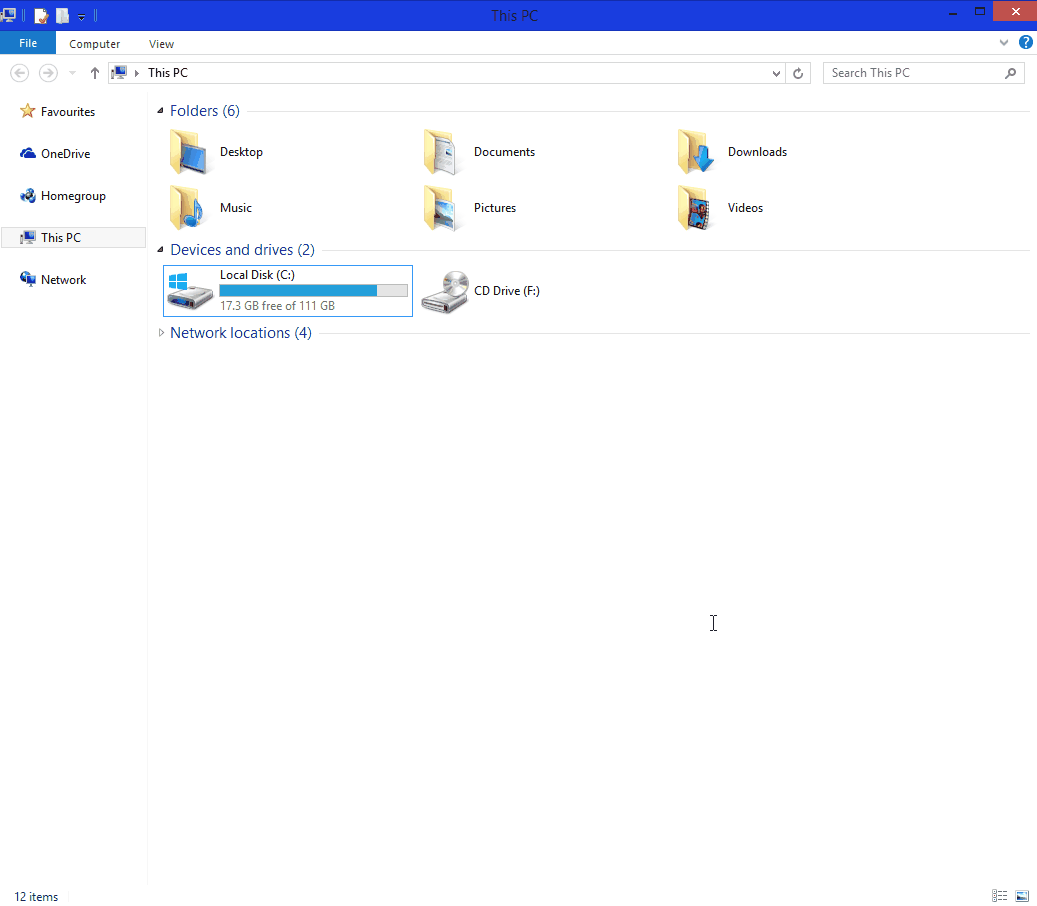
Step 1: Open My Computer and right-click the drive you want to limit.
Step 2: Click on Properties, switch to the Quota tab, and choose to Show Quota Settings. Needless to say that administrator privileges are required for this operation.
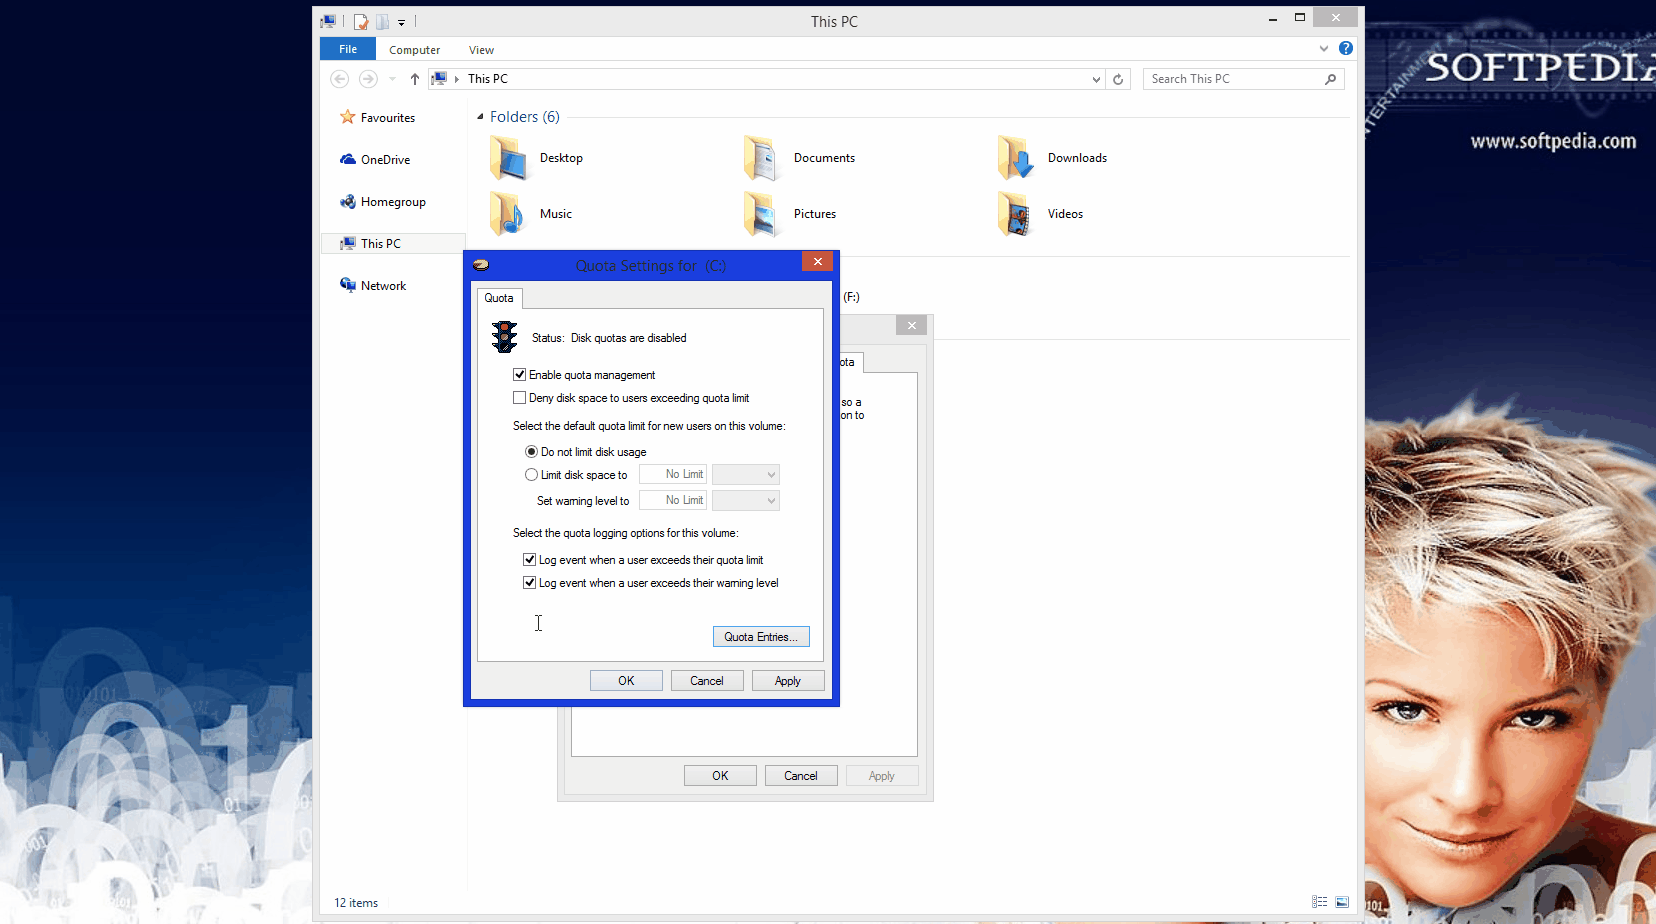
Step 3: Check the box to Enable Quota Management.
Step 4: Choose to Limit disk space to custom values you write down. The drop-down menu lets you select multiplier.
Step 5: Set a value for the Warning Level so that users know when they are close to reaching disk space limits.
Step 6: Check the two Log options so that you later on know what operations are performed and by which user.
Note: Doing this limits disk space for the selected drive for ALL users, including the active one. The following method describes how to limit space for a specific user.
Limiting space for a specific user
Step 1: Repeat the first three steps from above.
Step 2 (optional): Check to Deny disk space to users exceeding quota limit.
Step 3: Press the Quota Entries button.
Step 4: Under the Quota menu, choose to create New Quota Entry.
Step 5: Write down the exact username in the big, empty space. If you’re not sure, press Advanced, Find Now, and select the user from the results.
Step 6: Set Warning Level and Space Limit, and press OK to confirm changes.
Note: This only limits the space for the selected disk drive. Adding another limit rule for a different drive requires you to repeat the whole process.
In conclusion
Using this method to restrict disk space usage either for some users or the entire PC is not quite the easiest way. Literally all files are a possible target, and setting custom rules is a complicated process. To undo limitations, simply disable Quota management, or lift the limitation for users.