14 DAY TRIAL //
 Ubuntu 9.04, also known as the Jaunty Jackalope, arrived exactly on April 23rd, 2009 and is the tenth release of Ubuntu OS. We've created the following tutorial to teach Linux newcomers how to install the Ubuntu 9.04 operating system on their personal computer. Therefore it is addressed to people who have just heard about Ubuntu, those who have never installed Ubuntu before and want to test it, but don't know how.
The tutorial will make things very simple for you, but if you get stuck somewhere in the middle of the installation and you need help, do not hesitate to use our commenting system at the end of the article!
Requirements:
· You will need the Ubuntu 9.04 Desktop ISO image that corresponds to your hardware architecture (i386 or amd64), and which can be downloaded from here. When the download is over, burn the ISO image with your favorite CD/DVD burning application (Nero, CDBurnerXP, Roxio) on a blank CD at 8x speed.
· Reinsert or leave the CD in your CD/DVD-ROM device and reboot the computer in order to boot from the CD. Hit the F8, F11 or F12 key (depending on your BIOS) to select the CD/DVD-ROM as the boot device.
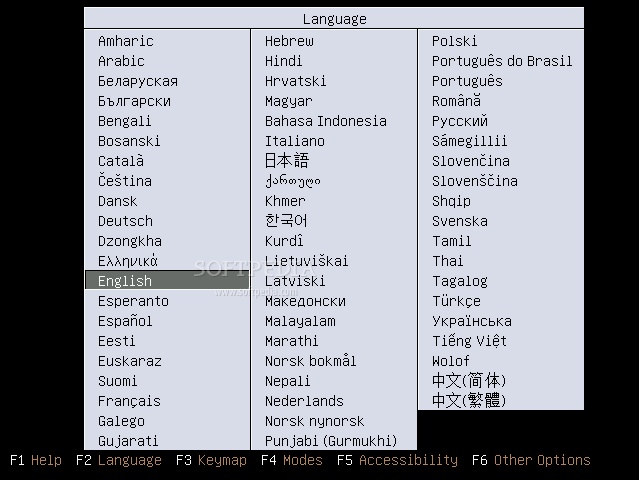
Select your language when asked...
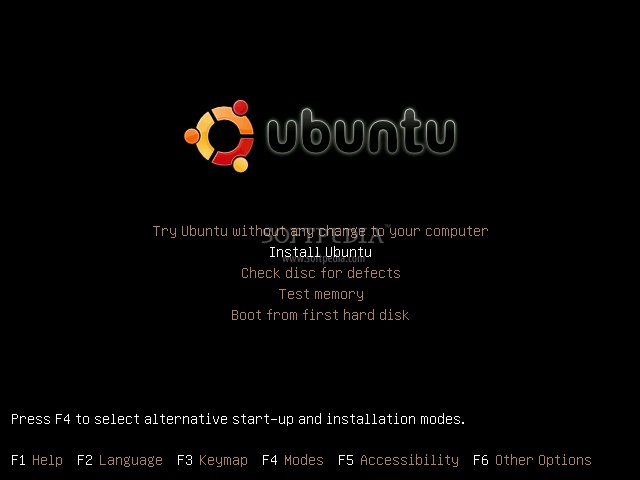
Select the second option "Install Ubuntu," and hit the “Enter” key...
Wait for the CD to load into RAM...

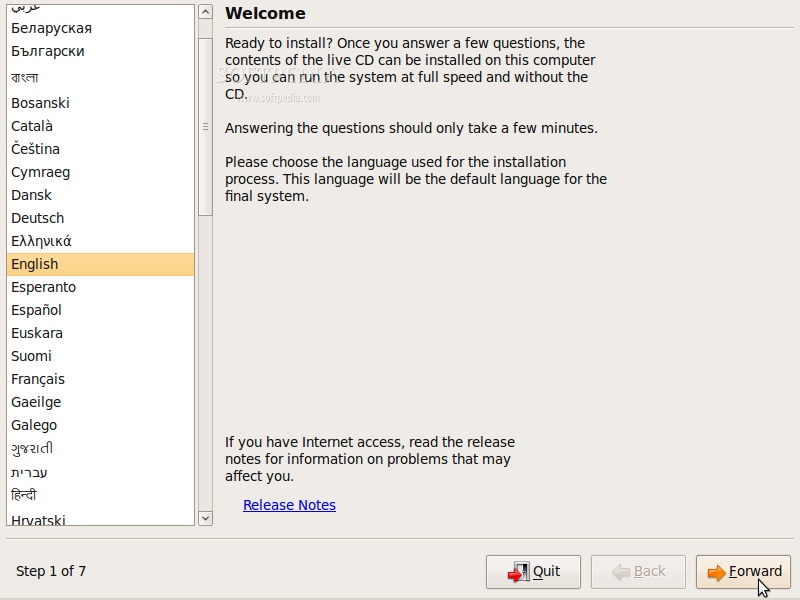
You will see the wallpaper for a few seconds. When the installer appears, you will be able to select your native language for the installation process. Click the “Forward” button to continue...
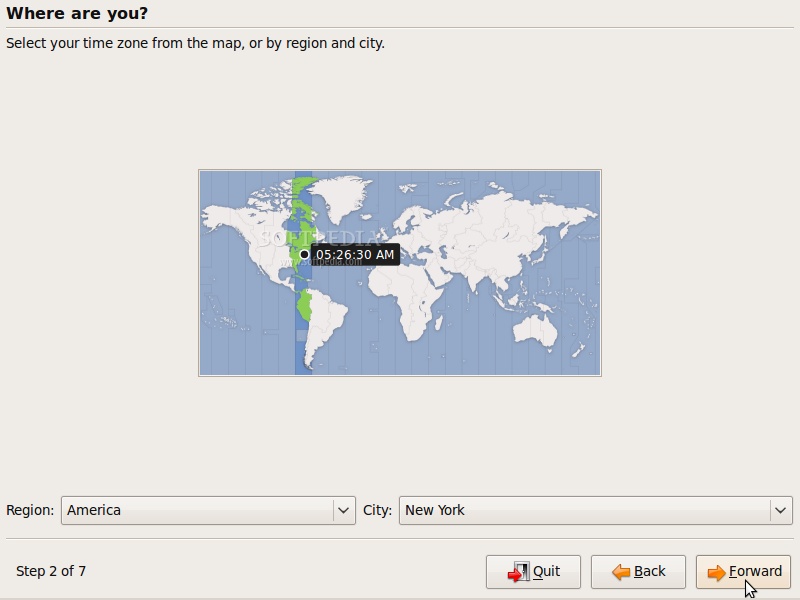
Where are you?
· The second screen will feature a map of the Earth. Upon the selection of your current location, the time for the final system will adjust accordingly. You can also select your current location from the drop down list situated at the bottom of the window. Click the “Forward” button after you have selected your desired location...
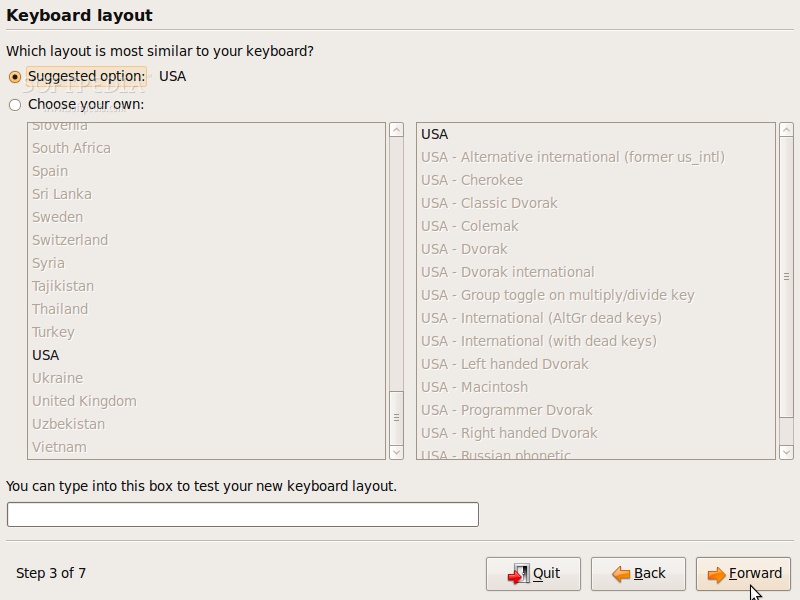
Test your keyboard
· On the third screen, you will be able to choose a desired keyboard layout. But the default automatic selection should work for most of you. Click the “Forward” button when you have finished with the keyboard configuration...
Hard disk partitioning
· You have four options here:
1. If you have another operating system (e.g. Windows XP) and you want a dual boot system, select the first option: "Install them side by side, choosing between them at each startup"

Note: This option will ONLY appear if you have another operating system installed, such as Microsoft Windows. Remember that, after the installation, the Windows boot loader will be overwritten by the Ubuntu boot loader!
2. If you want to delete your existing operating system, or the hard drive is already empty and you want to let the installer automatically partition the hard drive for you, select the second option, "Use the entire disk"
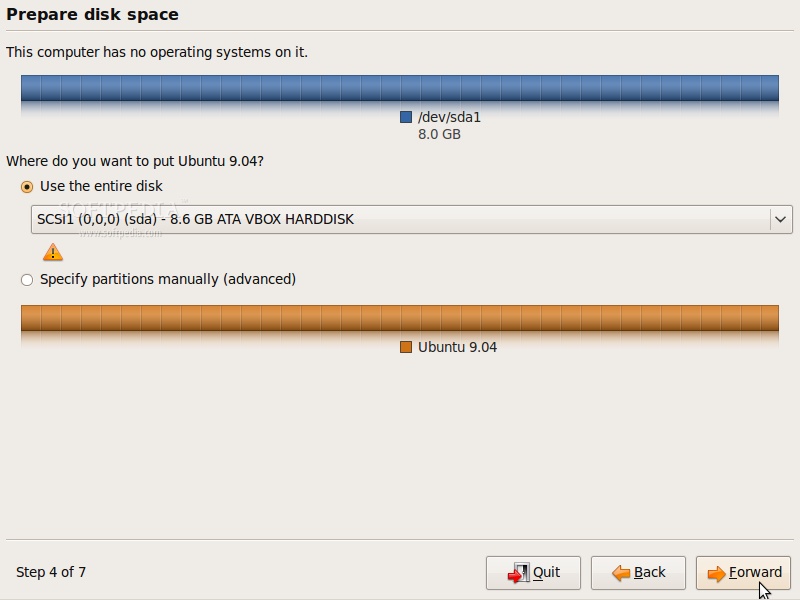
3. The third choice is "Use the largest continuous free space" and it will install Ubuntu 9.04 in the unpartitioned space on the selected hard drive.
4. The fourth choice is "Specify partitions manually" and it is recommended ONLY for advanced users, to create special partitions or format the hard drive with other filesystems than the default one.
WARNING: Be aware that all the data on the selected hard drive or partition will be ERASED and IRRECOVERABLE.
Click the “Forward” button to continue with the installation...
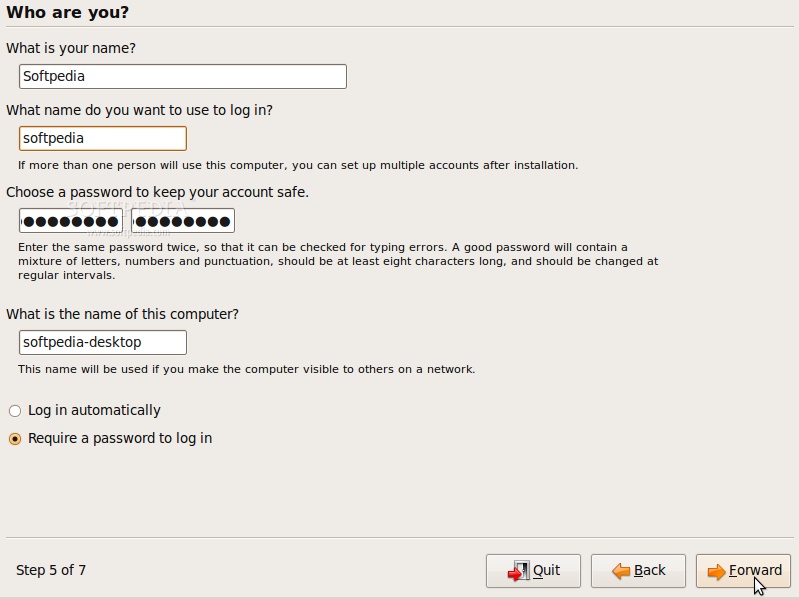
Who are you?
· On this screen, you must do exactly what the title says. Fill in the fields with your real name, the name you want to use to log in on your Ubuntu OS (also known as the “username,” which will be required to log in to the system), the password and the name of the computer (automatically generated, but can be overwritten).
Also at this step, there's an option called “Log in automatically.” If you check the box on this option, you will be automatically logged in to the Ubuntu desktop. Click the “Forward” button to continue...
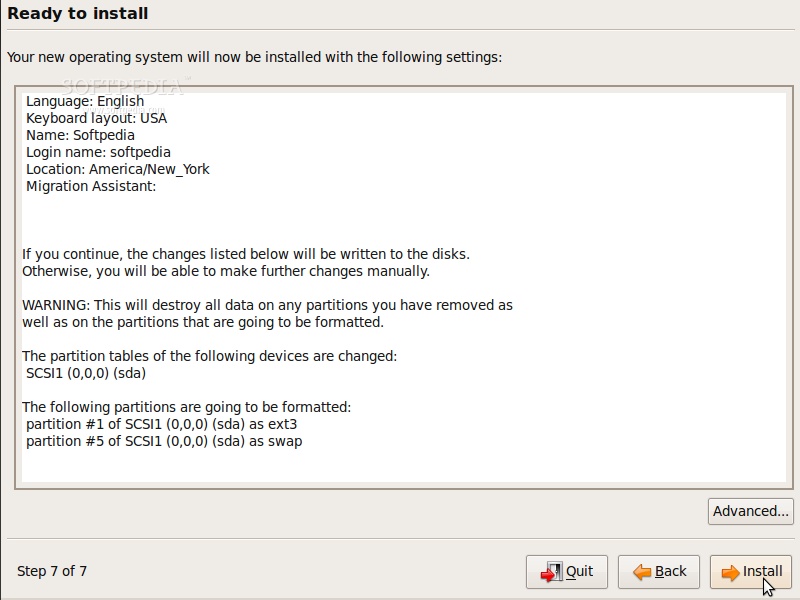
Are you really ready for Ubuntu?
· This is the final step of the installation. Here, you can select to install the boot loader on another partition or hard drive than the default one, but it is only recommended for advanced users. Most of you can just click the "Install" button to start the installation process...
The Ubuntu 9.04 (Jaunty Jackalope) operating system will be installed...
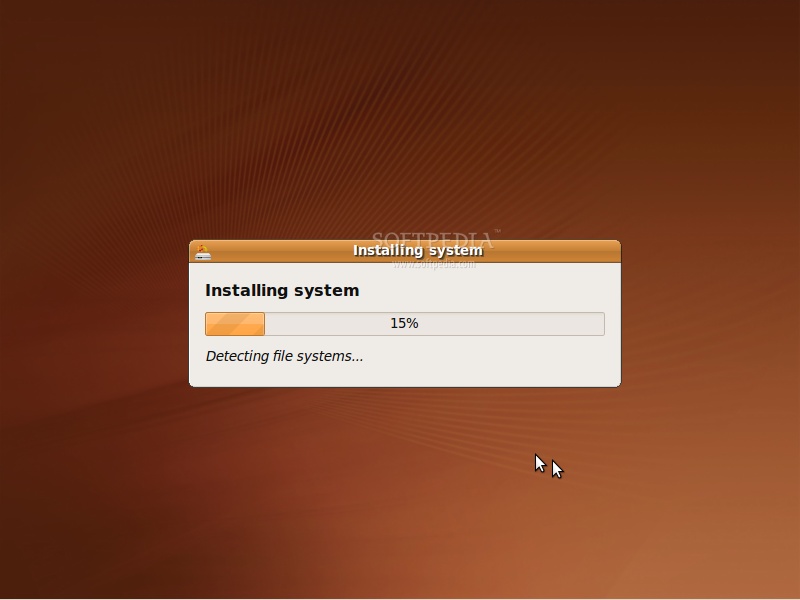
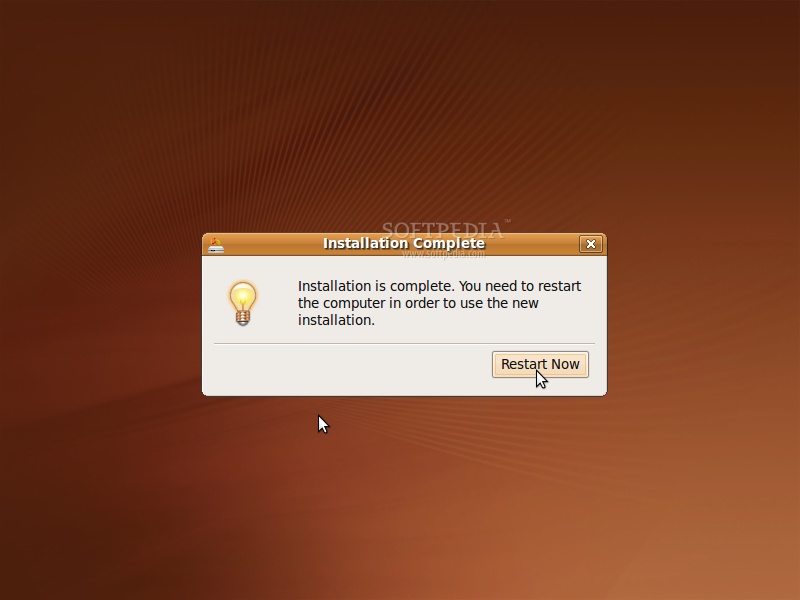
After approximately 8 to 15 minutes (depending on your computer's specs), a pop-up window will appear, notifying you that the installation is complete, and you'll need to restart the computer in order to use the newly installed Ubuntu operating system. Click the “Restart Now” button...
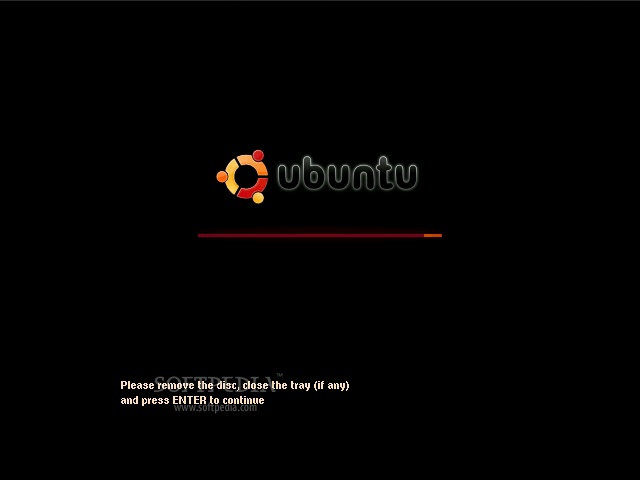
The CD will be ejected; remove it and press the “Enter” key to reboot...
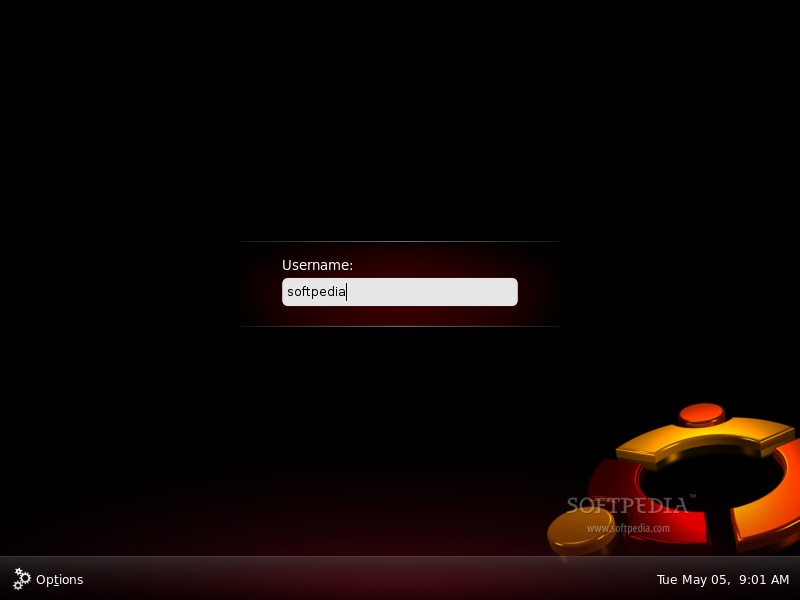
The computer will be restarted and, in a few seconds, you will see the Ubuntu login screen. Input your username and password...
Have fun using Ubuntu 9.04!