
 14 DAY TRIAL //
 Nvidia finally decided to release an updated version of its proprietary video driver for Linux systems, one that supports the controversial XServer 1.5, which is present in bleeding-edge distributions, such as Fedora 9.
Ok, so this tutorial is here to help actual and future Fedora 9 users to install the video drivers for their graphics cards and, as a bonus from Softpedia, a nice step-by-step AWN installation guide, assuming you have a fresh Fedora 9 installation with the GNOME desktop environment.
Step 1 - Install the Livna repository
First of all, make sure your system is up to date, then install the Livna repository like this:
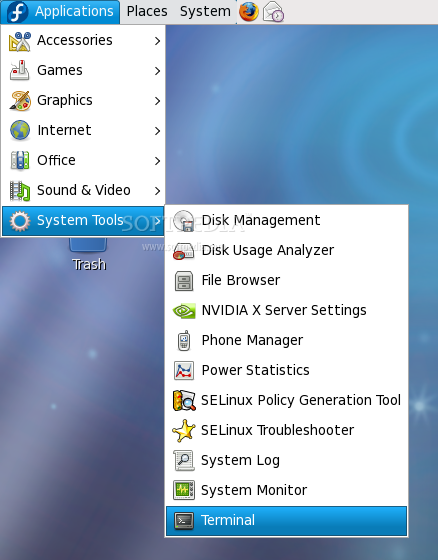
Open a terminal (Applications -> System Tools -> Terminal)...
...and switch to root (system administrator) with the following command:
su -
Type the root password (the one you have set up when you've installed Fedora). Then, as root, type:
rpm -ivhU http://rpm.livna.org/livna-release-9.rpm
Now that the Livna repository is installed, you can continue with the driver installation part.
Step 2 - Install the Nvidia drivers
I presume you did not close the Terminal window; if you did close it, fire it up again from Applications -> System Tools -> Terminal, log in as root and type:
yum -y install kmod-nvidia
To verify if the installation was successfully completed, reboot your computer, log back in, open up the terminal (Applications -> System Tools -> Terminal) and type:
glxinfo | grep direct
If the output of the above command is: direct rendering: Yes the Nvidia driver installation was successfully completed and you can now use OpenGL applications and desktop effects such as Compiz Fusion.
Step 3 - Install the Avant Windown Navigator (AWN)
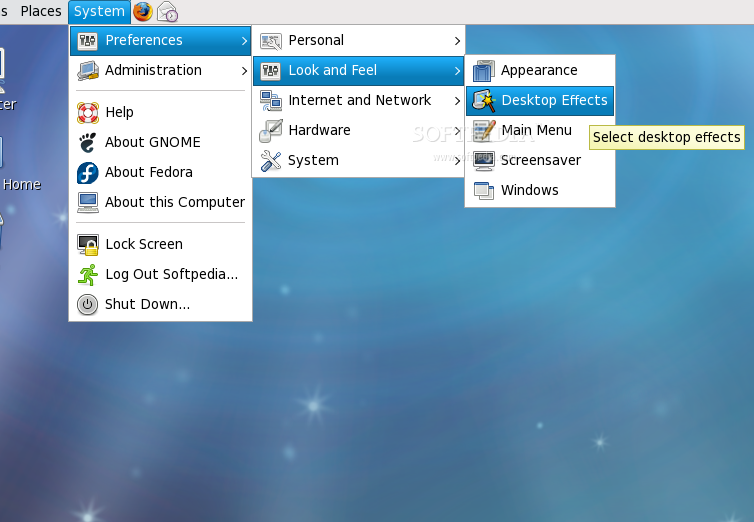
First of all, let's make sure that the desktop effects are working. Go to System -> Preferences -> Look and Feel -> Desktop Effects and enable them.
Now open again the terminal from Applications -> System Tools -> Terminal and type or paste the following command as root:
yum -y install avant-window-navigator awn-extras-applets
Step 4 - Start and configure AWN
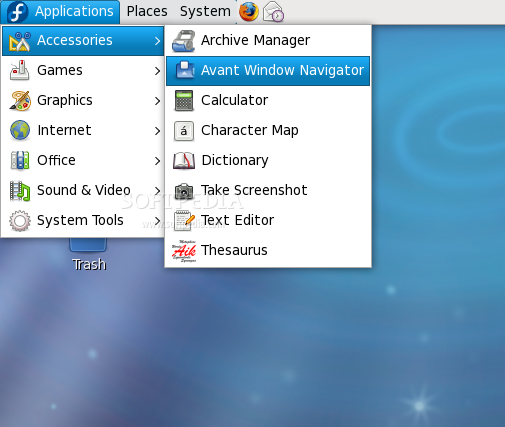
Start AWN from Applications -> Accessories -> Avant Window Navigator.
WARNING: Be aware that AWN will appear over your bottom GNOME panel, therefore you should delete the panel before launching AWN!
Start AWN from Applications -> Accessories -> Avant Window Navigator.
...and voila, AWN on Fedora 9!

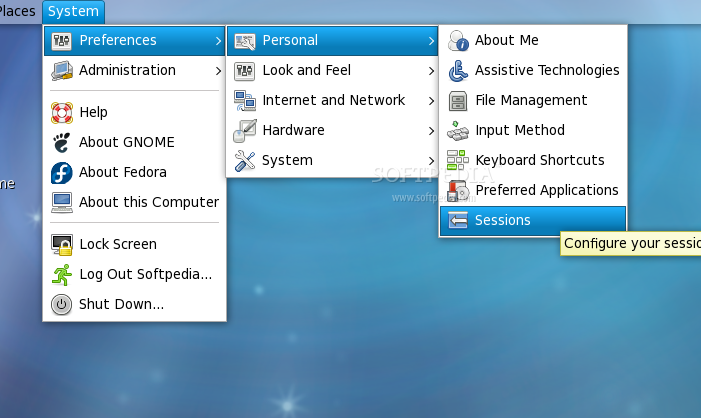
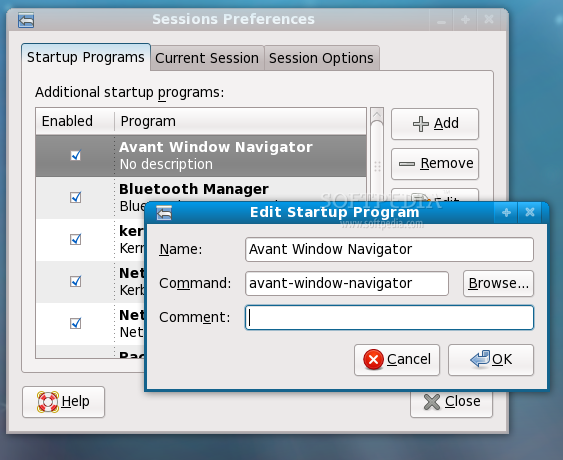
For the Avant Window Navigator to automatically appear every time you log-in, open the Sessions program from System -> Preferences -> Personal -> Sessions...
On the "Startup Programs" tab, click the 'Add' button and fill the fields like in the image below.
That's all folks! Have a nice and modern Fedora desktop!