14 DAY TRIAL //
 Connecting to the web has never been easier and more flexible than with Yosemite. It may sound like a textbook marketing quote, but it’s true. OS X 10.10 is a haven for people who often crave Wi-Fi on their Macs.
With the release of Yosemite, Apple advertised a bunch of features under the name Continuity. These include taking and placing calls on your Mac, sending and receiving SMS, starting a document on one device and finishing it on another, and one tiny extra called Instant Hotspot.
Access the web literally anywhere
Instant Hotspot doesn’t have its own promo video or a dedicated marketing page on Apple.com. It’s advertised as just one of the many Continuity features in the new desktop OS unveiled by Apple at WWDC and then deployed to the masses this fall. But it’s big!
Instant Hotspot, as many of you should already know by now, turns your iPhone into a moving Wi-Fi hotspot. Sometimes referred to as “tethering,” this functionality isn’t exactly new. But in Yosemite, it’s different. Instead of forcing you to tinker with both devices with a 50 / 50 success rate, this time you just select your iPhone from the Wi-Fi menu on your Mac and boom!, you’re surfing.
Don’t rush to the menubar just yet. The initial setup requires you to flip some switches on both devices, and you first need to make sure that your devices are indeed compatible with the feature. Without further ado, let’s go through the motions together.
Verify that you meet the system requirements
First things first. Check and see if your Mac is a 2012 or later model and that your iDevice is a new-generation type running iOS 8.1 (or later) and it's equipped with the Lightning connector. If all these things are in check, then you’re good to go. However, if your Mac is pre-2012 and your iDevice is based on the old-generation 30-pin connector, you’re out of luck.
Also very important, you need to make sure your carrier allows you to employ your device as a mobile hotspot. If your plan includes this feature, Personal Hotspot will appear in your iDevice’s settings panel at the top (in between Cellular and Carrier). If your plan doesn’t include this feature, it will not be displayed or it will be grayed out. Onto the actual steps!
On your iPhone
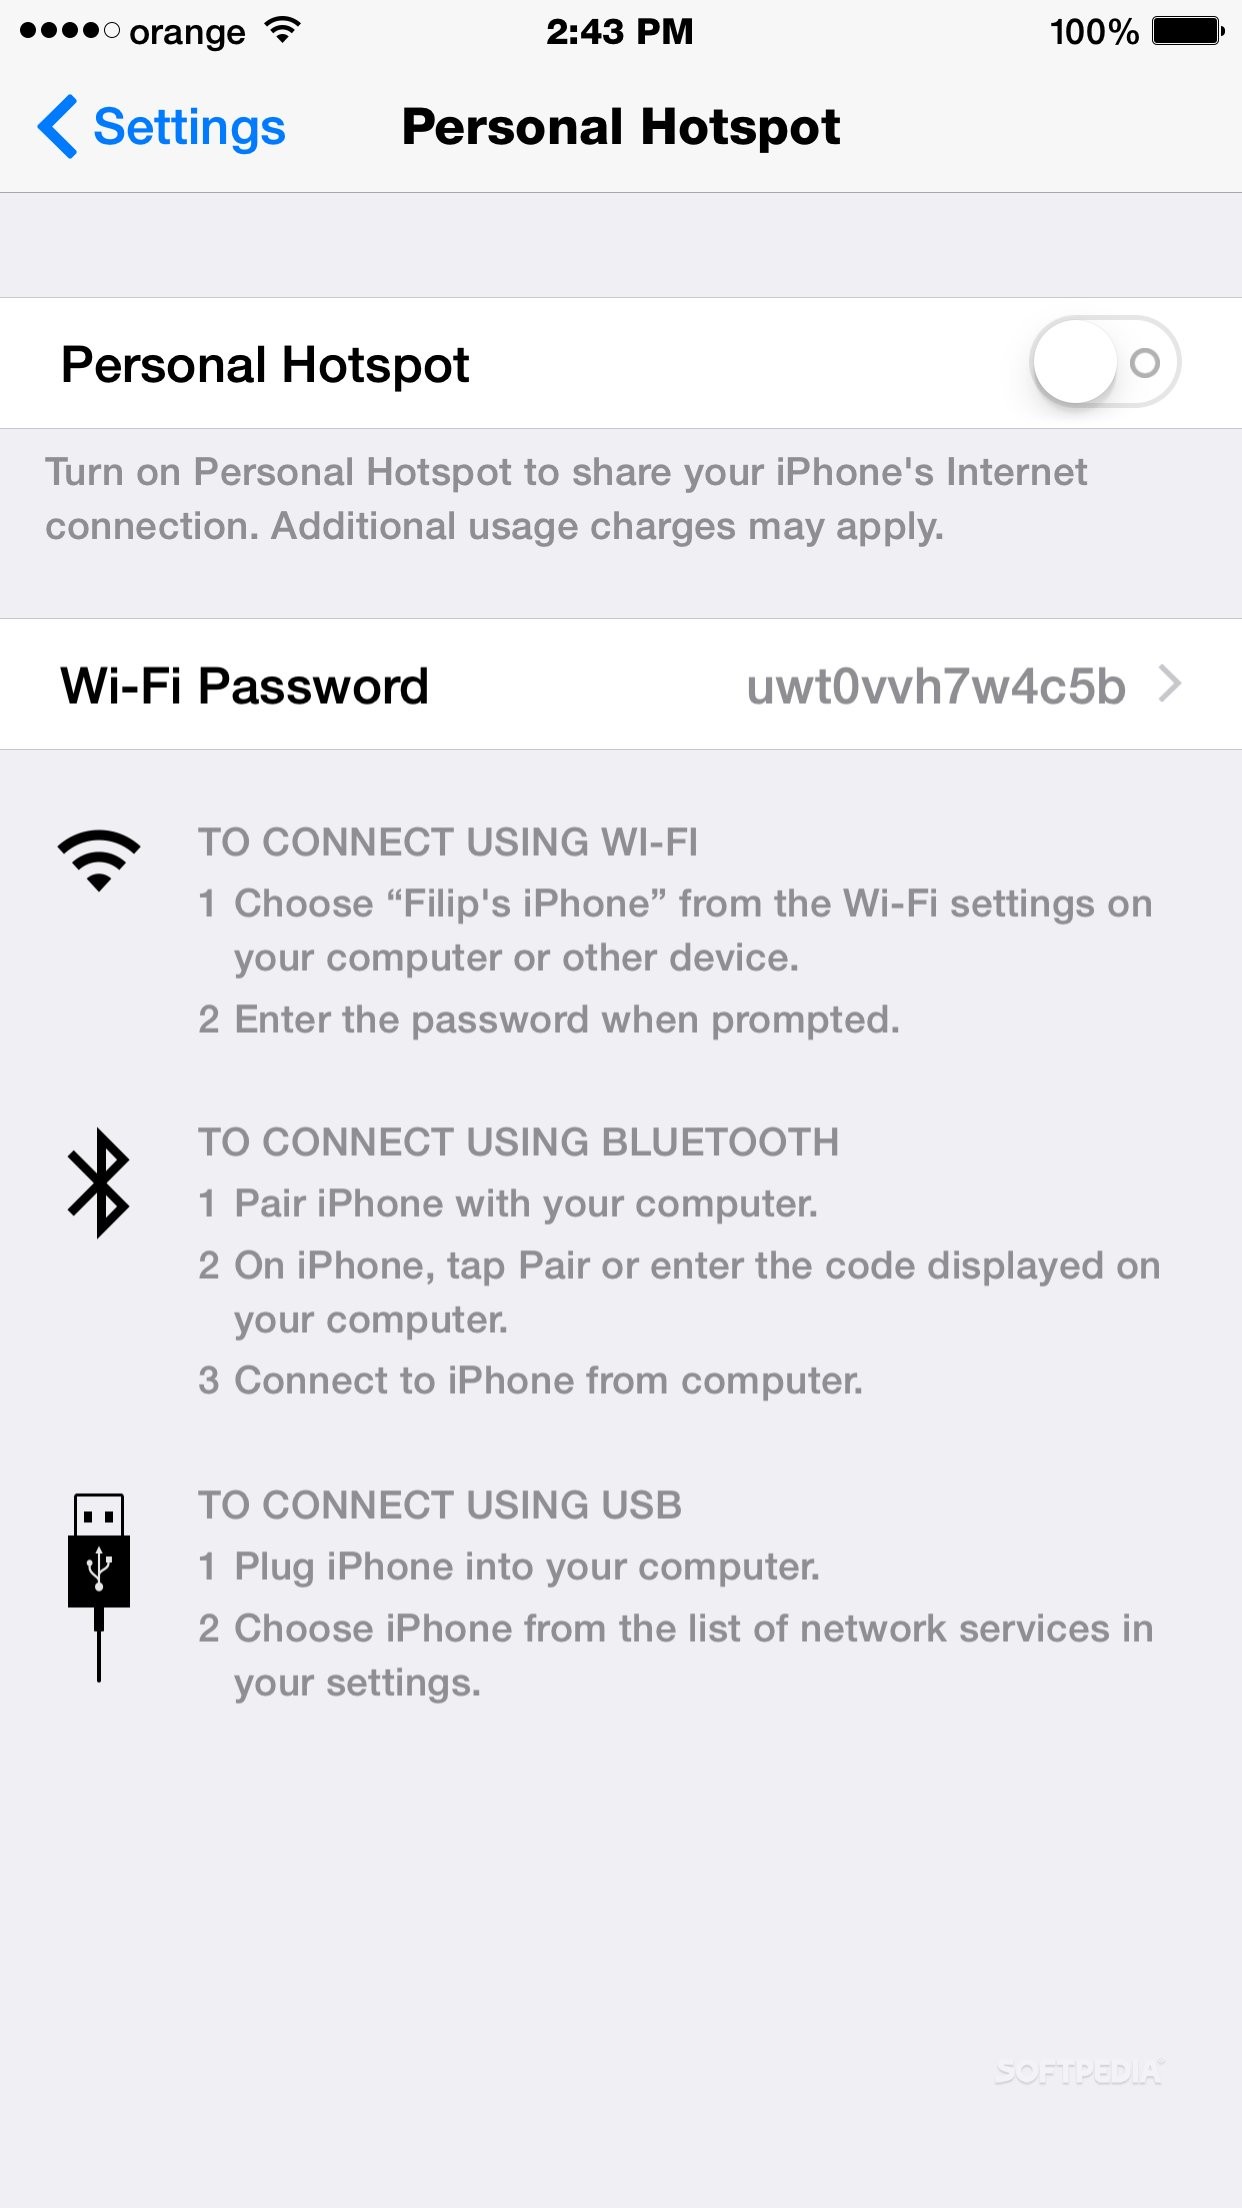
1. Access Settings and look for Personal Hotspot. As noted above, it’s situated at the top in between Cellular and Carrier and it’s represented by two entangled hula-hoops. Found it? Good. Tap it to enter the Personal Hotspot menu.
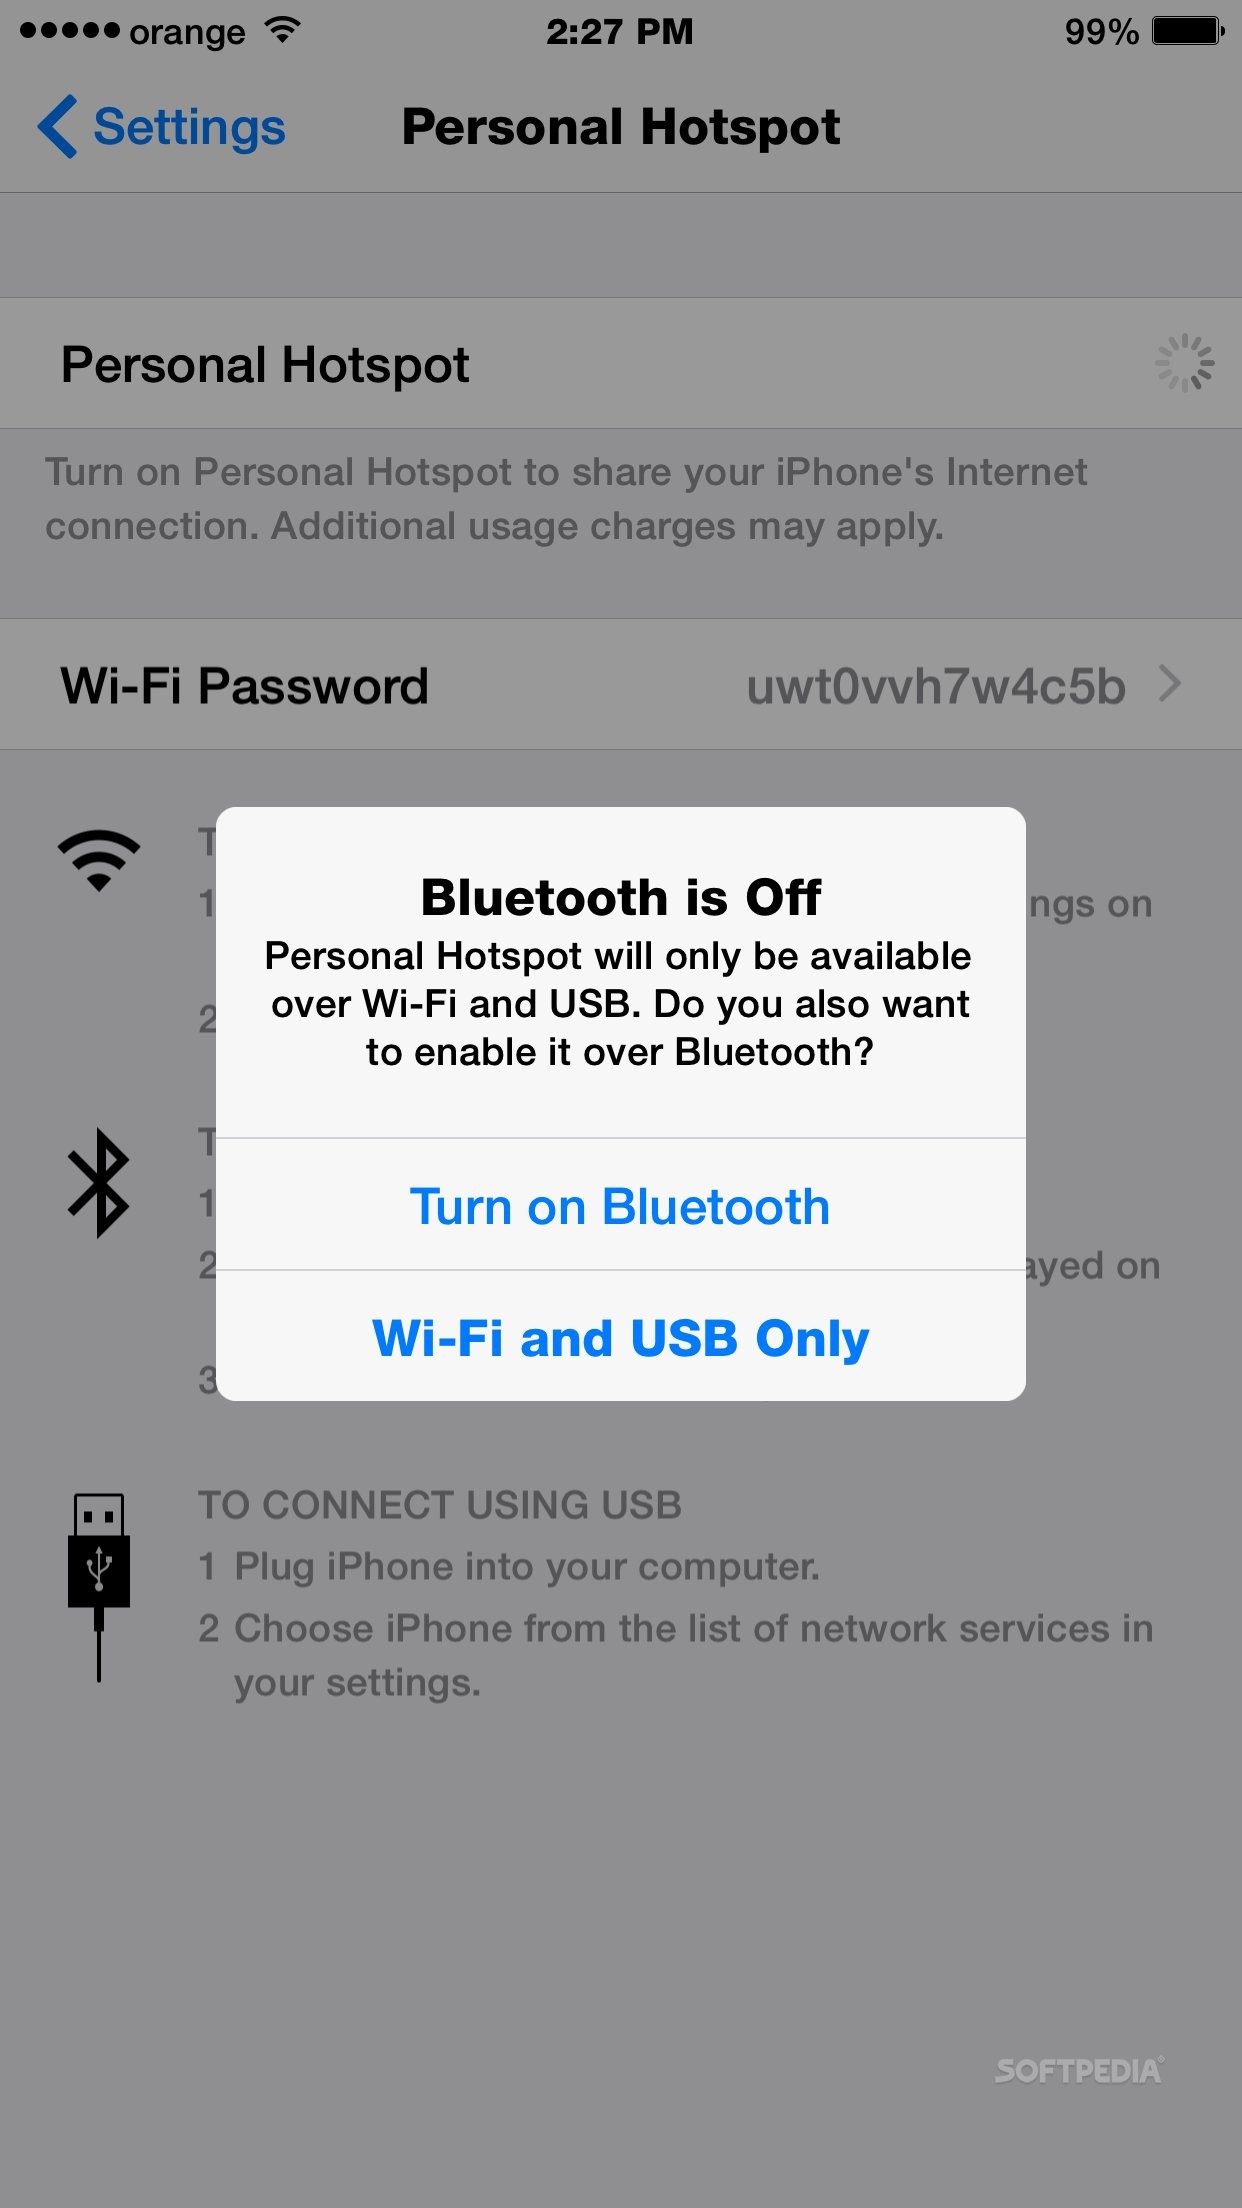
2. Once inside Personal Hotspot, there will be a flip switch at the top. Tap it or slide it to the right to toggle it on. A prompt will pop up asking you to turn on Bluetooth or stay with Wi-Fi and USB Only. Whatever you do, you need Wi-Fi set to on. If you don’t want to be tethering your iDevice to the Mac using wires, then agree to turn on Bluetooth.
On your Mac
3. At this point you’re almost done. On your Mac, just click the Wi-Fi icon in the menubar, allow the drop-down menu to... well, drop down of course, and choose your phone’s name from there (i.e. Mary’s iPhone). You’ll notice that Yosemite displays not only the device’s name, but also its signal strength and even the battery life.
Once you’ve selected your phone from the list, you should be connected to the Internet. That’s it! Three simple steps to get up and running, and from there on it’s just a one-click affair every time you want to use Instant Hotspot.