
 14 DAY TRIAL //
 Turning your personal computer into a media server means that you will be able to play video (AVI, MPEG, MPEG-2, DivX, XviD, MKV, WMV, MP4 or even DVD ISOs or VIDEO_TS folders) and audio files (MP3, OGG, FLAC or WMA) or view your favorite photos (JPG, PNG, GIF, TIFF) stored on your PC's hard drive on a big screen TV set or LCD/Plasma high-definition display, via a PlayStation 3 or Xbox 360 console. The following tutorial will teach you how to set up such a media server, step-by-step, from configuring your PC and gaming console, to installing and setting up the media server software in your Linux box. We've offered two media server installations, so you can choose whichever fits you best.
STEP 1 - Setting up your Linux machine for Media Serving
Set up the PC network connection You will need to have:
1. Two 10/100 or 10/100/1000 (recommended) network cards; 2. An Ethernet cable (it has to be as long as the distance between the PC and the console).
Assuming you already have a network card on your PC:
· Insert the second network card into an empty PCI slot on your motherboard.
· Connect one head of the Ethernet cable on the second network card and the other one into the gaming console.
· Hit ALT+F2 and type the following command:
gksu gedit /etc/network/interfaces
· Enter your password when asked.
· A text file will open. Add the following lines (copy and paste) to the end of the file:
# The secondary network interface auto eth1 iface eth1 inet static address 192.168.1.1 netmask 255.255.255.0 broadcast 192.168.1.255 network 192.168.1.0
· Save the file and reboot your PC.
Set up the console network connection
For PlayStation 3:
· Go to Settings -> Network Settings -> Media Server Connection -> Enable
· Go to Settings -> Network Settings -> Internet Connection Settings.
· Select "Yes" when asked if you want to perform Internet connection settings.
· Select "Easy" and wait for the wizard to check the network configuration.
· Select "Manual" and enter the following:
IP Address: 192.168.1.10 Subnet Mask: 255.255.255.0 Default Router: 192.168.1.1 Primary DNS: (type the first DNS from your provider) Secondary DNS: (type the second DNS from your provider)
Editor's note: To see the DNS of your ISP (Internet Service Provider) type the following command in a terminal: cat /etc/resolv.conf. The two IP addresses can be used in the above configuration.
· Select "Automatic" for MTU.
· Select "Do Not Use" for Proxy Server.
· Select "Enable" for UPnP.
· Hit X to accept the settings and test the connection.
For Xbox 360:
· Go to System Blade of the Xbox 360 dashboard and select Network Settings.
· Click Edit Settings, then go to Basic Settings. You will see IP Settings, DNS Settings and other options.
· Click IP settings and select "Manual" to set the IP address, subnet mask and gateway manually:
IP Address: 192.168.1.10 Subnet Mask: 255.255.255.0 Gateway: 192.168.1.1
· Go back to the previous menu and select DNS settings.
· Select "Manual" to set the DNS addresses manually.
STEP 2 - Installing and configuring a Media Server
Method One - uShare Media Server
Advantages:
· Works with PlayStation 3 and Xbox 360; · Very easy, one-time configuration. Disadvantages:
· Command-line only; · You will be able to play ONLY the video/audio/image files supported by the consoles.
The GeeXboX uShare is a free UPnP Audio/Video & DLNA Media Server for Linux platforms. It works with Xbox 360 and PlayStation 3 gaming consoles. uShare is very easy to install; just open your package manager software, search for ushare, libdlna and libupnp, and install them.
Installing uShare in Ubuntu:
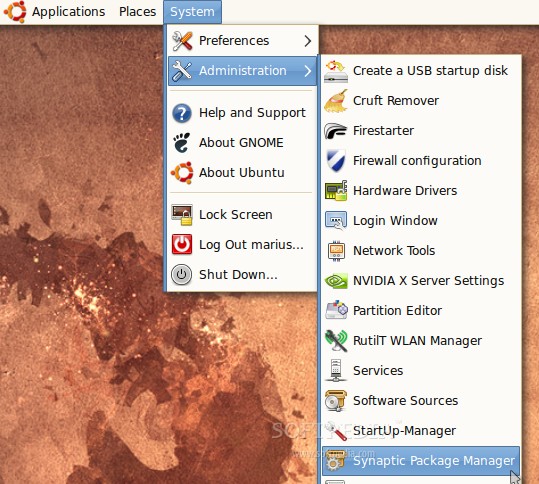
Open Synaptic from System -> Administration -> Synaptic Package Manager
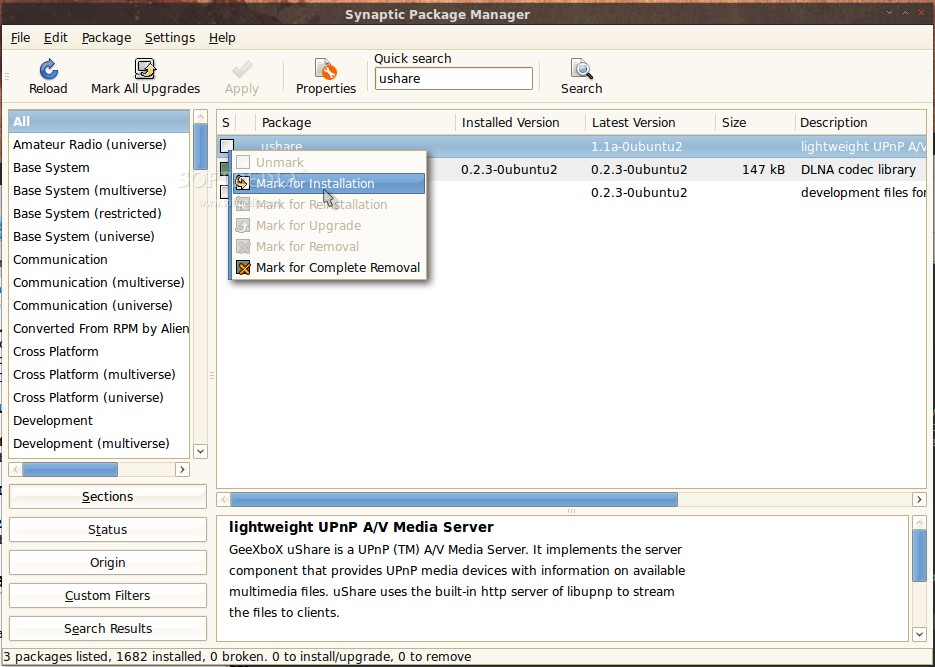
Enter your password when asked and search for ushare. Mark the "ushare" package for installation...
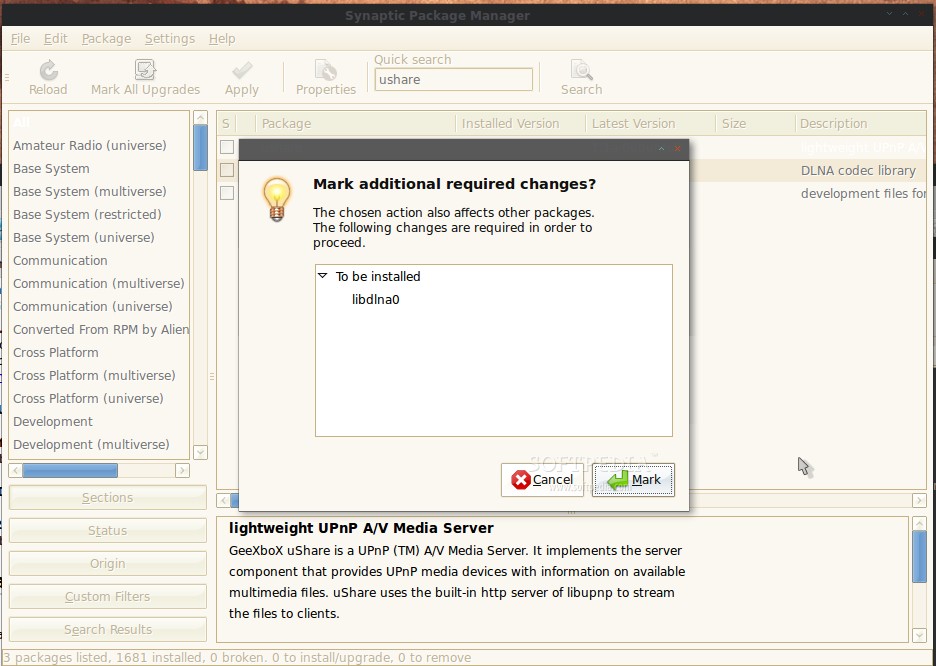
Click the "Mark" button when asked if you want to install the "libdlna0" required package:
Click the "Apply" button to install the packages. Close Synaptic when the installation is complete.
Configure uShare:
The uShare configuration file will be found under the /etc folder. To edit the file, hit ALT+F2 and type the following command:
gksu gedit /etc/ushare.conf
Enter your password when asked.
The configuration file has no more than 10 (ten) settings. The following 5 (five) are the ones you need to edit:
1. USHARE_IFACE=eth1 (Put here the name of the network interface you use for sharing (see STEP 1). Usually it's the second one, eth1). 2. USHARE_PORT=49200 (Put here the port you want uShare to use for serving media. 49200 is fine!). 3. USHARE_DIR= (Put here the path of the folders you want to share. For example, let's say you want to share your home folder's Video folder... just type: USHARE_DIR=/home/YOURUSERNAME/Video) 4. ENABLE_XBOX=yes (Type yes here if you have an Xbox 360 gaming console. Otherwise leave it as it is). 5. ENABLE_DLNA=yes (Type yes here if you have a PlayStation 3 gaming console. Otherwise leave it as it is).
Save the configuration file when you're done. Hit ALT+F2 and type the following command to start the uShare media server:
gksu /etc/init.d/ushare start
For an easy usage of the uShare media server, it's a very good idea to create a desktop shortcut of the reload function. Otherwise, you will always have to open a terminal and type the reload command when you add/delete files to the shared folder.
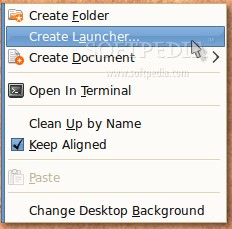
Right click on your desktop and select Create Launcher...
Type "uShare Media Server" (without quotes) in the "Name" field and then paste the following line in the "Command" field:
gksu /etc/init.d/ushare reload
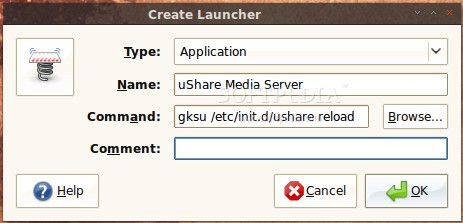
You can also add a nice icon if you click on the left icon box. Various icons can be found under the /usr/share/icons/Human/scalable folder. Click OK to create the launcher.
Editor's note: Every time you will add or delete files in the shared folder (remember that from now on you will use ONLY the folder(s) you've set up in the uShare configuration file, for storage of the videos you want to play) you must reload the uShare media server by double clicking on the desktop shortcut.
Method Two - PS3 Media Server
Advantages:
· Has Graphical User Interface; · You will be able to play all of the video file formats; · Has auto-refresh; · Flickr/Picasa photo viewing support; · DVD ISO image playback; · Multi-platform.
Disadvantages:
· Works ONLY with PlayStation 3.
The PS3 Media Server is a DLNA compliant UPnP Media Server for the PlayStation 3 gaming console. PS3 Media Server is written in Java, therefore it can be used on Linux, Windows and Macintosh platforms. It doesn't require any installation! Even if the PS3 Media Server is able to play all the video files out there, some of them (the ones that are not supported by the PlayStation 3, yet) will require real-time video transcoding. For the transcoding operation you will need to have at least an Intel Core 2 Duo processor and 1 GB of RAM, especially for 720p/1080p high-definition files, such as the MKV ones.
Installing PS3 Media Server in Ubuntu:
As we've mentioned above, the PS3 Media Server does not require any installation, just grab the latest version from here and extract the archive on your home folder. It is written in Java, so make sure that you have a valid Java installation in your PC. For an easy usage, we will create a desktop shortcut of the PS3 Media Server executable (otherwise, you will always have to open the home folder and double click the executable, in order to start it).
ATTENTION: The Mplayer, Mencoder and FFMpeg packages need to be installed in your Linux box. Ubuntu users can install them using the Synaptic Package Manager or by issuing the following command in a terminal: sudo apt-get install mplayer mencoder ffmpeg
Right click on your desktop and select Create Launcher...
Type "PS3 Media Server" (without quotes) in the "Name" field and type the path where you've extracted the PS3 Media Server archive in the "Command" field:
/home/YOURUSERNAME/pms-linux-1.03/PMS.sh
Note: You need to replace YOURUSERNAME in the above line with your username (e.g. /home/marius/pms-linux-1.03/PMS.sh).
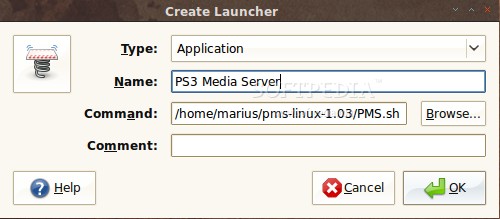
You can also add a nice icon if you click on the left icon box. Various icons can be found under the /usr/share/icons/Human/scalable folder. Click OK to create the launcher.
Configure the PS3 Media Server
Just like the "installation" part, the PS3 Media Server does not require any configuration. Once started, the server will immediately appear on the XMB (PlayStation 3's interface).
However, we suggest the following settings:
1. Set the character encoding of your PlayStation 3, under the "General Configuration" tab. To see what charset your PS3 is using, go to System settings -> Charset on the XMB. 2. Under the "Navigation/Share Settings" tab check the following options: Hide #Video Settings# Folder, Hide file extensions, Hide trancoding engine names. 3. Under the "Navigation/Share Settings" tab add the folders where you keep your video, audio and image files that you want to play on the PlayStation 3, in the "Shared folders" box. Otherwise, the PS3 Media Server will list the entire file system! 4. Under the "Transcoding Settings" tab you can change the Video quality settings to:
keyint=1:vqscale=1:vqmin=1 /* Lossless Quality, Crazy Bitrate */ (for 720p video files) keyint=1:vqscale=1:vqmin=2 /* Best Quality */ (for 1080p video files)
Also, setting the Audio to "2 channels Stereo" is a good idea. ONLY if you own a HDMI 5.1 capable receiver you can switch to the "6 channels 5.1" option.
5. When everything is set up, and ONLY if the PS3 Media Server window is "bothering" you (because it doesn't have a tray icon yet), you can check the "Start minimzed" option under the "General Configuration" tab. However, this will hide the PS3 Media Server interface. To get it back, you need to edit the PMS.conf file in your home folder, and replace the "true" value of the minimized option with "false" (without quotes).
That's it! Enjoy, have fun and don't forget to use our commenting system below for any issues with the tutorial.