14 DAY TRIAL //
 This step-by-step guide presents the safest procedure to be used when you want to restore your iPod to its factory settings.
If you have an iPod, you must have come across at least one of the following problems: your iPod freezes while playing a movie or song, does not respond to any of your commands, or just goes blank and nothing you tried brings it back to life.
If you haven’t experienced any of these problems until now you are a lucky guy/girl and this guide is not for you. You may still hang around though, reading the rest of the article, just in case your iPod will one day decide to show you its ugly face.
Almost all these problems appear because all Apple iPod devices’ firmware. An iPod’s firmware is a layer between its hardware and software which is closely tied to your iPod’s hardware and it basically controls all its basic functions from the moment you power it up.
Knowing that it controls how your device behaves you should have guessed by now that it may also be behind your iPod’s problems.
Because restoring or updating your device’s firmware will, in most cases, render your iPod usable again this is probably the easiest way to get rid of all problems plaguing your device and, inherently, your overall user experience.
Restoring or updating
First of all, before getting all pumped up and getting ready to press the Restore button it is very important to understand the difference between "updating" and "restoring" your iPod.
While updating it will not affect your settings or songs and will simply install any available updated software for your iPod, restoring the device is something totally different.
The restore process will completely erase your iPod’s disk and will restore the device to its original factory.
NOTE: If you want to update an iPod shuffle, this should be done on the computer where music is normally synced; updating it on another Mac will result in all songs being removed from the device.
WARNING: Although restoring an iPod has a quite reassuring connotation because it actually means deleting all the content on your iPod and starting over, it just proves to be misleading.
Because of this you have to MAKE SURE TO BACK UP any files you've saved on your iPod. All your files will be synced back to your iPod if you back them up to your iTunes library (go here for a detailed Apple written guide on how to do it).
The steps
If you have now backed up your device and you want to restore an iPod nano, iPod mini, iPod, iPod classic, iPod classic, iPod shuffle or an iPod touch to its factory settings, this is a step-by-step on how to do it (as detailed by Apple here):
1. Check to see if you have a working Internet connection.
2. Launch iTunes (install the latest version of iTunes if necessary) and connect your iPod to your Mac.
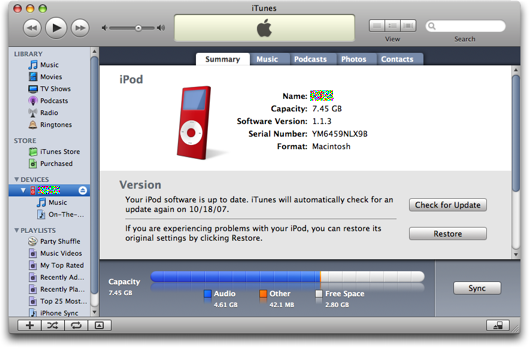
3. Wait a few moments and, after your iPod appears on iTunes’ left side, select the iPod and go to the Summary tab to see information about your iPod .
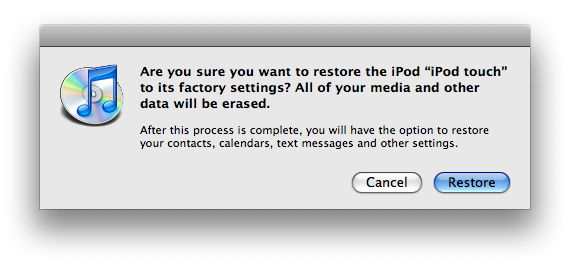
4. Click the Restore button. Now you will be presented with a number of restore options. These are the 4-possible restore options:
a. Restore - Restores the device using the iPod Software version already on.
b. Use Same Version - Restores using the iPod Software version already although a newer version is available.
c. Use Newest Version - Restores using the latest iPod Software currently on your Mac.
d. Restore and Update - Restores only after going online and downloading the latest iPod Software to your Mac.
5. Now you will be asked to enter your administrator’s name and password.
6. The progress bar that will appear on your Mac’s screen indicates that stage one of the restore process has begun. When the stage is done, you will be presented with one of the following two messages with instructions to the specific iPod model you are restoring.
a. Disconnect iPod and connect it to iPod Power Adapter (applies to older iPod models).
b. Leave iPod connected to computer to complete restore (applies to newer iPod models).
7. In stage two of the restore process, your iPod will display an Apple logo and a progress bar at the bottom of its display.
It is crucial to keep the iPod connected to the iPod power adapter or your Mac during this stage (you may not see the progress bar because the backlight on your iPod display may turn off).
8. After completing stage two the restore process will be complete and the iTunes Setup Assistant window will appear on your Mac’s screen.
Here you can rename your iPod (this way you will make sure it iTunes thinks it is the first time you have connected it to your Mac) and setup the syncing preferences.
This is the complete procedure your will have to follow to make sure your iPod is as good as new (except the scratches on its case).
If you encountered problems while restoring your iPod or you know of other ways to obtain the same results in less time and following easier steps, leave us and the other readers a word in the comments section below and we will make sure to follow up with an answer to your problem or put your alternate restore solutions to the test.