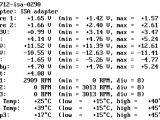
The primary goal of the lm_sensors project is to provide the best and most complete hardware health monitoring drivers for Linux. The project developers strive to produce well organized, efficient, safe, flexible and tested code, free of charge, to all Linux users employing the x86 hardware platform. This software can be used on one hand by users who are curious of knowing the hardware health status of their machine. Some users will always try to squeeze every ounce of use out of their hardware by applying various tweaks to their hardware. This software can not only help users do that, but it can also show them how the rest of the hardware is doing. On the other hand, this project can also be used on high-end/unattended servers by setting it to monitor the hardware and email the administrator in the event of a problem, before it becomes critical.
Unfortunately, the lm_sensors project can't be pre-configured to work out-of-the-box because of the different hardware people use. Therefore, if you want to use it, you'll need to configure to suit your system and hardware specs.
Installing lm_sensors
- Open Synaptic GUI, search and install 'lm_sensors' or open a terminal and type:
OR
$ nano mkdev.sh
# Here you can set several defaults.
# The number of devices to create (max: 256)
NUMBER=32
# The owner and group of the devices
OUSER=root
OGROUP=root
# The mode of the devices
MODE=600
# This script doesn't need to be run if devfs is used
if [ -r /proc/mounts ] ; then
if grep -q "/dev devfs" /proc/mounts ; then
echo "You do not need to run this script as your system uses devfs."
exit;
fi
fi
i=0;
while [ $i -lt $NUMBER ] ; do
echo /dev/i2c-$i
mknod -m $MODE /dev/i2c-$i c 89 $i || exit
chown "$OUSER:$OGROUP" /dev/i2c-$i || exit
i=$[$i + 1]
done
#end of file
Running lm_sensors
- Open a terminal and type
# I2C adapter drivers
# modprobe unknown adapter NVIDIA i2c adapter 2 at 2:00.0
i2c-isa
# I2C chip drivers
eeprom
it87
$ sudo modprobe eeprom
$ sudo modprobe it87
Installing lm_sensors GUI front-ends
Optionally, you can install a front-end that shows the sensor info in Gnome or KDE.
- For Gnome (Add applet to taskbar):
After everything has been installed and proved it's working, reboot your system.

 14 DAY TRIAL //
