14 DAY TRIAL //
 Each time I hear a new open source application just arrived on the software market I want to be the first to get my hands on it. It may come with the job (we try to bring you the latest and the freshest Mac apps each and every day) but, on second thought, I do remember that it's always been this way: open source always made me get on my feet and sent me directly into a downloading frenzy followed by endless tweaks and tests, followed by some more tweaks and tests. Well, you get the idea.
It may be because I know that people use their knowledge to create it without expecting any kind of reward (except maybe the recognition that they did a hell of a job - if the case) or because I like tinkering around and finding a way to make it work on a certain computer setup. Yes, open source software is usually cross-platform, which means that if you are ready to get your hands dirty and compile it you may run it on almost any given OS be it Windows, *NIX, or your good ol' Mac.
This doesn't mean that you won't be banging your head on the monitor to understand what some exotic looking error given by your compiler means. What dependencies have you forgot to install? Which library is not yet present in your system? Or, if the library does exist, how can you make sure the compiler knows where to find it so it can do its job?
You may find out eventually what more you need to install to be able to build your open source program from sources using your compiler but it won't happen without a lot of internet digging and asking for help on God knows what discussion site.
What it is
The solution to your problem - if you happen to want to build your open source program on OS X - is Fink. As its developers say, "Fink is an attempt to bring the full world of Unix Open Source software to Darwin and Mac OS X. Packages are downloaded and built automatically and installed into a tree managed by dpkg, all with full dependency tracking. You can choose whether you want to download precompiled binary packages or build everything from source."
Fink will allow you to easily install lots of UNIX programs on your Mac, without you having to think about building libraries by hand, setting up paths from your command-line, going through the "configure-make-make install" process, toying around with makefiles or anything else similar.
The best new feature Fink just got on June 26th is that Leopard support. A day before, I installed it from sources and I have to say it definitely isn't a job for a beginner. After solving the couple of problems I ran into after building it from sources, I went away with my daily duties testing the hell out of all the apps I got my hands on until the end of the working hours.
The next day I had the pleasant surprise to see the Fink dev team had released a fresh Leopard installer and on that moment I knew I had to do something to let others know about it. Unfortunately, up to now I didn't have the time but, now that I do, let's see how you can use it to your advantage and put more of your time into using your UNIX apps instead of installing them.
How to install and use it
First of all, you can go HERE to grab the installer package. Once you have downloaded it double-click the dmg file to mount the image and run the installer package you will find inside. Follow the instructions on screen and, after the installation ends, be sure to allow the pathsetup utility that will launch to edit your shell's configuration files. After this step of the installation process has also completed you are all set!
Although everything should be ok, there are times when some things just don't go how they should and that is when errors appear. In such cases your best chance to solve your problem is to check the "Getting Help" option you can find on Fink's development website, but hopefully you won't have to pay them a visit after all.
Now that you're all set with your own version of Fink on your Mac, take care to update it just to be sure you have its newest release. You can easily do that by opening a Terminal window (you can find it in Applications/Utilities) and launching the following command from the prompt (without the quotes): "fink selfupdate". Some people insist on doing this using "sudo" but Fink is smart enough and will ask for your password if it thinks you do not have the necessary permission for some task to be performed on your system (to be exact, it will ask for your administrator password only the first time you will run a task that needs special credentials), therefore you will not need to do any sudoing on your command-line while using it.
The next step would be to install your first app but to be able to do that you have to know what apps are available. Run "fink list" and this will give you a long enough list of all the available apps together with a short description for each of them so you can have an idea of what you will need to install on your Mac. If you notice that this command truncates the package names you can use the following one to be sure you get to see every single detail you need: "fink list --width 120 xfree".
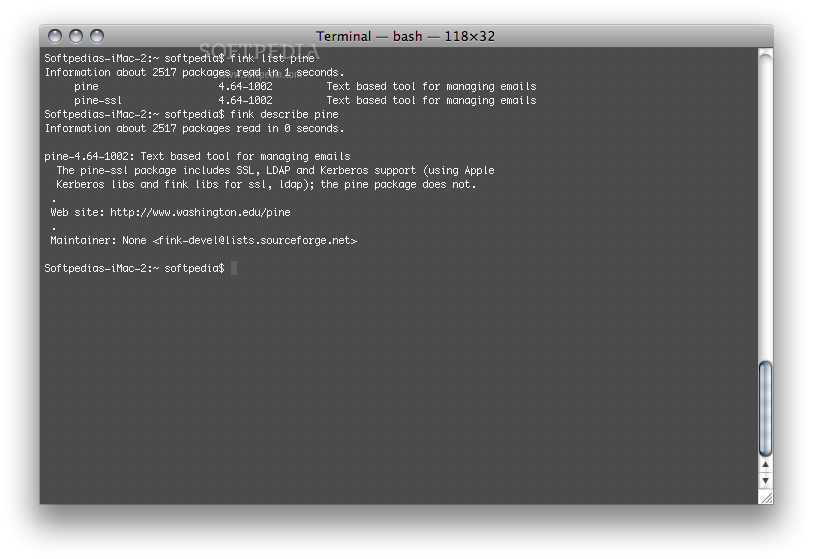
To be able to get more details about a certain app you can run "fink list foo" (where foo is the name of the app you want to find out more about). To install the foo app on your system you have to run "fink install foo" and Fink will take care of all the installing, tracking down each and every dependency for the program you want to install, installing the needed packages or updating the ones already installed that needed to be updated in order for the new program to work, and every other detail that you don't want to waste your time with trying to get it done. To remove the foo package from your system you will have to use the "fink remove foo" command which will get rid of the foo package yet leave behind all its configuration files. To do the job properly and completely remove every trace of the foo package from your Mac you should use "fink purge foo", a command that will send the troublesome foo into oblivion.
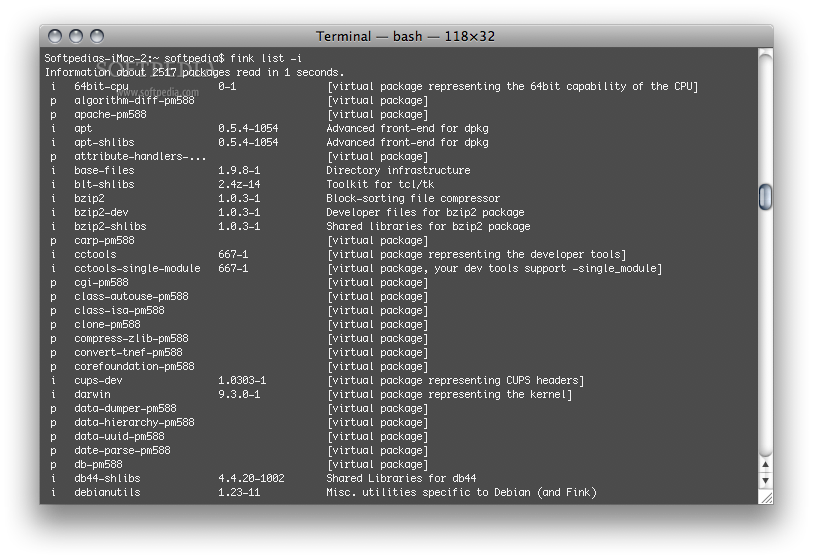
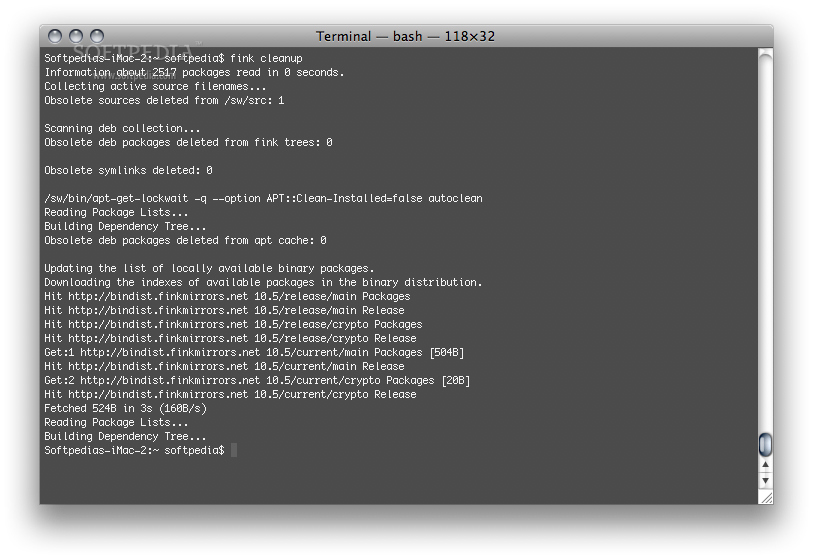
To get a quick look at all the installed packages you have to type "fink list -i" and to be able to check the information on a certain installed package you can run "fink info foo" or "fink describe foo" (where, once again, foo is the name of the package you want to get information on). Also, Fink features a cleaning lady under the hood and if you want it to get to work you will have to issue the "fink cleanup" command from your Terminal window.
Now that you know how to install, remove, view the packages that you installed and even cleanup Fink's traces there is one last thing that you have to learn. Using the "fink update-all" command, you will be able to easily and quickly update all the packages you have previously installed just to be sure they are all up to date and ready to use. If you want to update a specific package you can do this with "fink update foo", a command that will keep your foo fresh and action greedy as it was the day it was first installed.
Advantages
Remember what I said above about Fink being very easy to use? What do you think now? And there are lots of other advantages to take into consideration when using Fink. It will provide you with a very smooth package updating experience, it's safe because it will not install in the /usr/local directory and it will not have you mess around various commands, thus highly reducing the risk of interfering with your OS X system or any other third party packages. Everything that Fink will ever install - and even Fink itself - will go to the /sw directory, therefore uninstalling any package you have installed using Fink (or Fink itself) is as simple as issuing the "sudo rm -rf /sw" command from a command-line.
If I forgot to mention anything important here you can easily find everything you need to know about Fink using the "fink -help" command, which will display (obviously) Fink's help and the most common options that you can use. If you've got your own tips on how to use it feel free to post your comments to let everybody else know about them.