
 14 DAY TRIAL //
 The following tutorial will teach you guys how to install the highly anticipated GNOME 3 desktop environment on the Ubuntu 11.04 (Natty Narwhal) operating system.
GNOME 3 is the next evolution of the GNOME desktop environment, and it has been released on April 6th, 2011, on mirrors worldwide. GNOME 3 is a light desktop environment used in many popular Linux distributions, such as Ubuntu, Mandriva, PCLinuxOS, etc.
We've tested the tutorial on the beta version of the upcoming Ubuntu 11.04 (Natty Narwhal) distribution. To install GNOME 3 on your system follow the next step-by-step (with screenshots) tutorial.
WARNING: Attention! If you follow this toturial, you'll break your Unity session. There is no downgrading method for now. You've been warned!
Step 1 -
Add the GNOME 3 repository
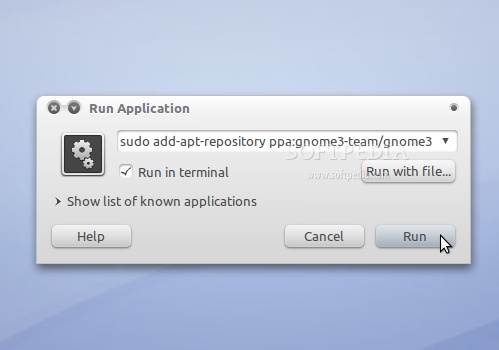
Hit the ALT+F2 key combination on your keyboard, check the "Run in terminal" option and paste the following command in the "Run Application" dialog:
sudo add-apt-repository ppa:gnome3-team/gnome3
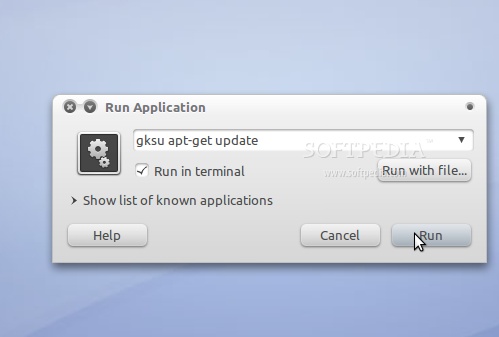
gksu apt-get update
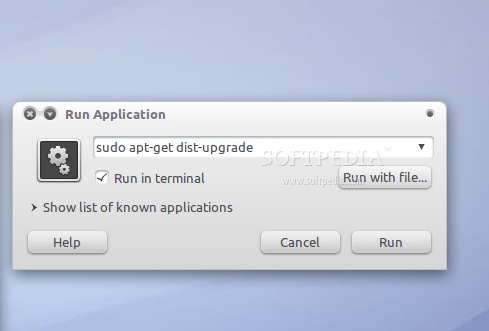
Hit the ALT+F2 key combination again, check the "Run in terminal" option and paste the following command in the "Run Application" dialog:
sudo apt-get dist-upgrade
Step 2 -
Install GNOME 3
Hit the ALT+F2 key combination again, check the "Run in terminal" option and paste the following command in the "Run Application" dialog:
sudo apt-get install gnome-shell
Enter your password and hit Enter. When you will be asked if you want to install gnome-shell, type Y and hit Enter. The terminal window will automatically close when the installation is over.
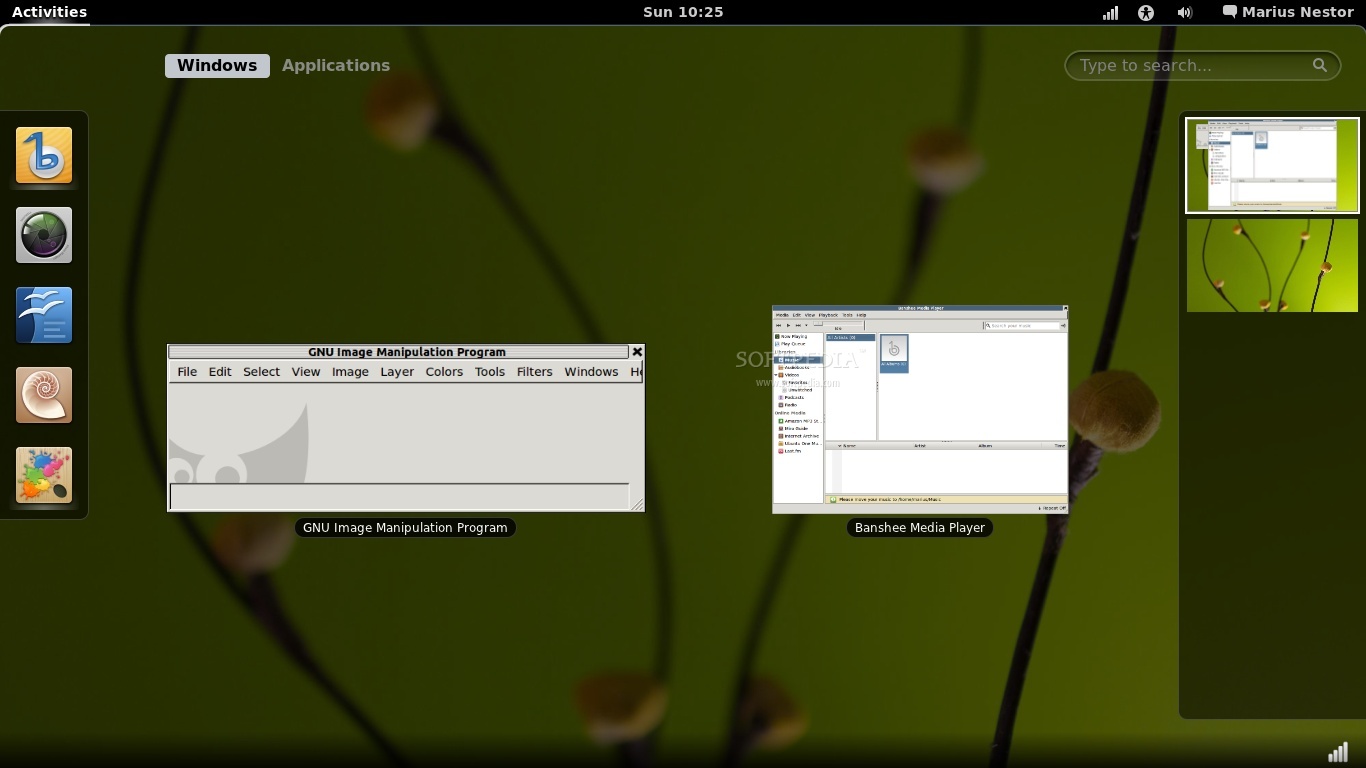
That's it! GNOME 3 is now completely installed in your Ubuntu machine. All you have to do now is to reboot your system and choose Ubuntu GNOME Shell Desktop at the login screen.
Enjoy your new GNOME 3 desktop environment!
If you have problems with the tutorial, do not hesitate to comment below!