 14 DAY TRIAL //
 As everyone already knows, the highly anticipated Ubuntu 10.04 LTS (Lucid Lynx) operating system was released on April 29th, after 6 months of work. The new features of this release can be seen by clicking the link above, however... it appears that Canonical refused to fix a bug. And we are talking about the Ubuntu logo shown during boot. (Please read the Plymouth README file located under the /usr/share/doc/plymouth/ directory, for more details).
Long story short, the logo looks fine when you install Ubuntu, but, after you install the proprietary Nvidia and ATI video drivers, the logo gets bigger and ugly! Below, we provide two fixes for this issue: the first one will fix the resolution of the Ubuntu logo, pretty much like it was when you installed Ubuntu; and the second one will remove the logo, showing only a dark screen until the login manager appears.
Without any further ado, follow the instructions below to fix your boot splash in Ubuntu 10.04 LTS (Lucid Lynx).
Editor's note: The instructions provided here are created for beginners in Linux. No terminal hassle! The first fix was developed by Hoa Nguyen from the Ubuntu community. All credits go to him! All I did was to find a second fix and compile them both in a very easy and user-friendly tutorial.
Alternative One - Fixing Plymouth's resolution
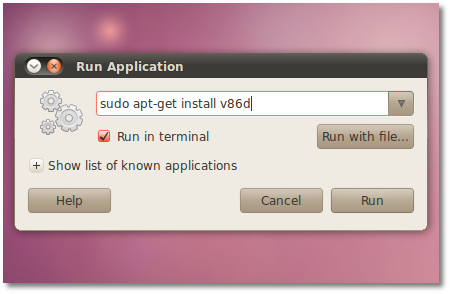
Step 1: Hit the ALT+F2 key combination, paste the following command and check the "Run in terminal" option:
sudo apt-get install v86d
...a terminal window will appear. Enter your password when asked, hit the Enter key and wait for the package to be installed. The terminal window will automatically close!
gksu gedit /etc/default/grub
...enter your password when asked and hit the Enter key.
- Replace the following line (line number 9):
GRUB_CMDLINE_LINUX_DEFAULT="quiet splash"
with this one:
GRUB_CMDLINE_LINUX_DEFAULT="quiet splash nomodeset video=uvesafb:mode_option=1280x1024-24,mtrr=3,scroll=ywrap"
- Replace the following line (line number 18):
#GRUB_GFXMODE=640x480
with this one:
GRUB_GFXMODE=1280x1024
The file should look like this:

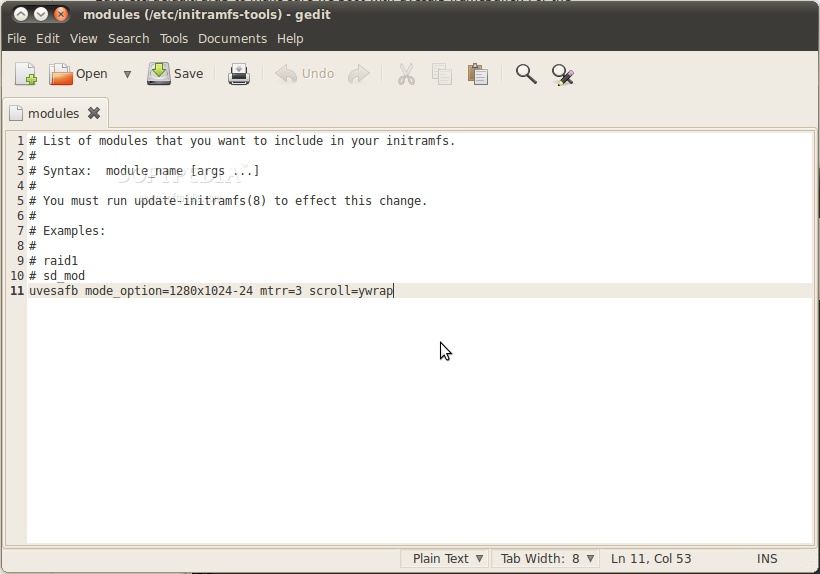
Step 3: Hit the ALT+F2 key combination, paste the following command and check the "Run in terminal" option:
gksu gedit /etc/initramfs-tools/modules
When the text window appears, add the following line at the end of the file:
uvesafb mode_option=1280x1024-24 mtrr=3 scroll=ywrap
It should look like this:
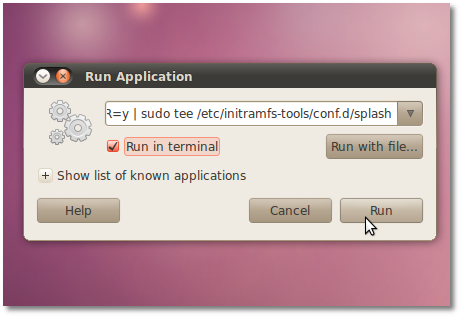
Step 4: Hit the ALT+F2 key combination, paste the following command and check the "Run in terminal" option:
echo FRAMEBUFFER=y | sudo tee /etc/initramfs-tools/conf.d/splash
...a terminal window will appear for a second or two. The terminal window will automatically close!
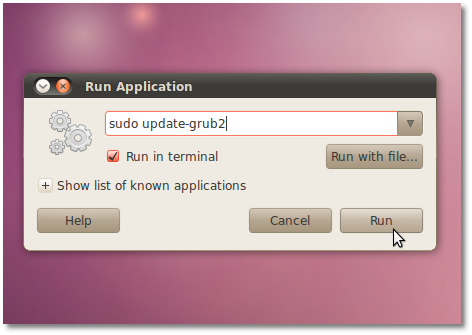
sudo update-grub2
...a terminal window will appear. Enter your password when asked, hit the Enter key and wait for the command to finish. The terminal window will automatically close!
sudo update-initramfs -u
...a terminal window will appear. Enter your password when asked, hit the Enter key and wait for the command to finish. The terminal window will automatically close!


Alternative Two - No logo at boot
Click the link below to install the Startup Manager application.
If you use Firefox, choose "apturl" when asked and install the package. Wait for the installation to finish and go to System -> Administration -> StartUp-Manager.
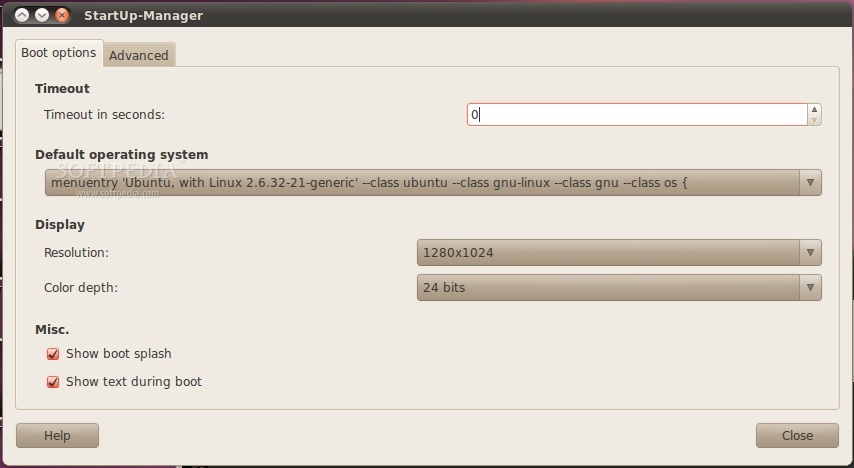
Wait a few seconds for the program to start, and then choose 1280x1024 and 24 bits in the "Resolution" and "Color depth" drop-down menus. Also, check the "Show boot splash" option, and you can reduce the "Timeout in seconds" option to 0 (zero)! It should look something like this:
From our tests, this will make the Ubuntu logo disappear. All you will see is a dark screen, until GDM (GNOME Diplay Manager) appears. Editor's note: You can play a little with the resolution of the first fix, as 1280x1024 may not work for everyone! Just make sure that you change it in all three locations as indicated above.