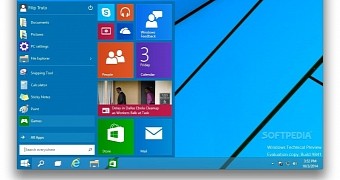
Excited about Microsoft’s all-new Windows 10 announcement? Want the best of both worlds? Parallels has you covered.
The virtualization expert is capitalizing on the hype surrounding Windows 10 by offering Mac users a way to download and use Windows 10 Technical Preview inside a virtual machine on their OS X computers. All for free.
What’s the catch?
There is none. You get both Parallels Desktop 10 and Windows 10 Technical Preview free of charge if you follow the company’s instructions. Parallels can be used in trial mode for 14 days without any limitations. After two weeks, you can decide if you want to use it indefinitely and buy a license. Same goes with Windows 10, when the final bits are out.
The steps
With that out of the way, you’ll need to download three separate things. We recommend you keep track of them by downloading them all separately on your desktop.
Step 1
Download Windows 10 Technical Preview.
Step 2
Download Parallels Desktop 10 and install it on your Mac. Choose to run it as a free trial app if you don’t have a license key. If you do, register your Parallels Desktop installation using your existing serial key.
Step 3
Download Windows 10 Technical Preview VM shell, unpack the archive, then move the resulted file (Windows 10 Technical Preview VM shell 2.pvm) to ~/Documents/Parallels. Don’t leave this location. The next step happens here.
Step 4
Double click Windows 10 Technical Preview VM shell 2.pvm and choose “copied” when prompted.
Step 5
If Parallels asks to decrease an amount of RAM assigned to the virtual machine, hit Don’t Change. When the Preboot eXecution Environment (PXE) screen goes into effect, go to Actions in the menubar at the top of your desktop and choose Stop.
Step 6
Select Actions again, go to the bottom of the drop down menu, and choose Configure. Now choose the Hardware tab and select CD/DVD 1. Browse for the Parallels Desktop 10 Technical Preview ISO file and make sure the Connected option is checked.
Step 7
Launch Windows 10 Technical Preview VM shell virtual machine and continue with the installation. You’ll need to select Custom Install when prompted, as well as to choose a drive (if you want one specifically). If you don’t choose Custom Install, the installation will not proceed.
The rest is history
That’s about it. All you need to do now is proceed with installing Parallels Tools (Actions > Install Parallels Tools), and if it doesn’t work, you can always go to This PC, double-click on DVD Drive (D:) and access the Parallels Tools installation menu from there.
Parallels hasn’t yet optimized its VM client for Windows 10 (since it’s only been out for a couple of days), so don’t expect a bug-free experience. We hope this guide was helpful.

 14 DAY TRIAL //