
 14 DAY TRIAL //
 The lock screen is one of the great additions to Windows 8 and Windows 8.1, coming with a modern design that can also hold quite a plethora of useful details, including the current time, date, network status, weather information, battery level and many others.
Although it’s pretty clear that the lock screen comes in handy to many users out there, Redmond has only implemented a limited number of configuration settings, so it could take a while until you actually manage to tweak it in such a way that it could easily match your ideas.
Basically, both Windows 8 and Windows 8.1 only let you change the lock screen wallpaper and pick the applications whose information is displayed, including mail, weather tools, calendars, or others.
The problem with the lock screen is that it can’t be disabled straight from Windows, so in case you want to get rid of it and get straight to the screen where you need to input the password for your account, you have basically two different options: you can either use a third-party app that can do that for you or go for some registry hacks supposed to disable the lock screen.
Today, we’re going to present you with two different ways to disable the lock screen manually by following a few simple steps which only require just a couple of minutes.
METHOD 1 -> Using the Registry Editor
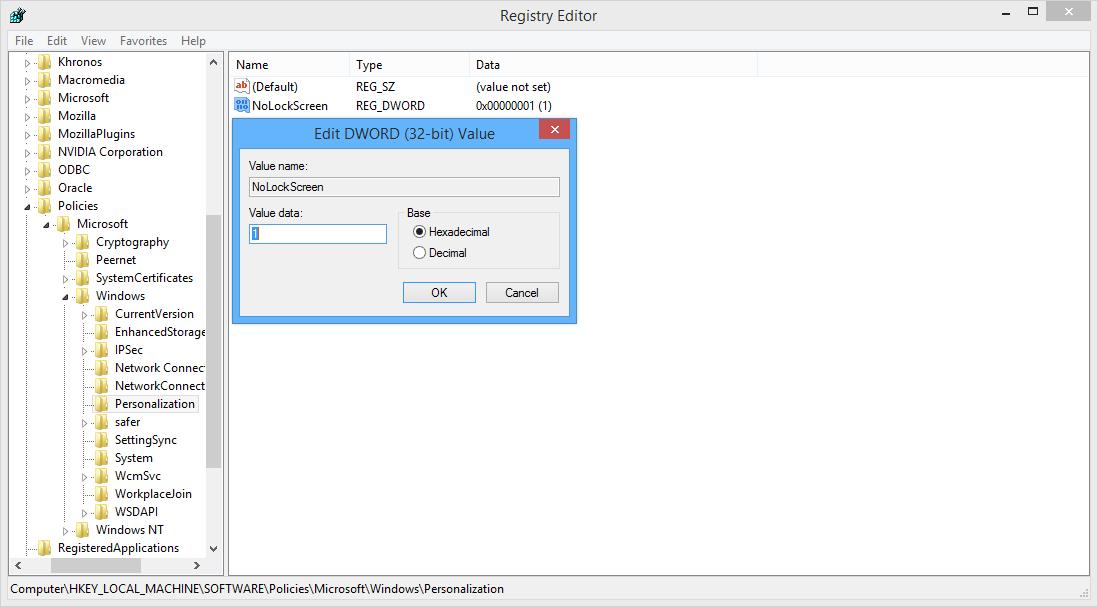
First of all, go over to the Start screen, type “regedit” and hit the “Enter” button. Make sure you launch the Registry Editor with administrator privileges in order to be allowed to make changes to the registry.

While the Personalization item is selected, right-click in the right side of the window and create a new DWORD (32-bit value) registry entry that’s called “NoLockScreen.” Double-click this newly-created entry and change the value from 0 to 1.
One you do all these changes, close the Registry Editor and reboot the computer. The modifications should come into effect without any additional steps.
METHOD 2 -> Using the Local Group Policy Editor
This second trick is a bit easier especially for beginners who are afraid that they could break down the registry and damage the operating system.
This time, we’re going to use the Local Group Policy Editor, but keep in mind that administrator privileges are still required to make changes to the default configuration.
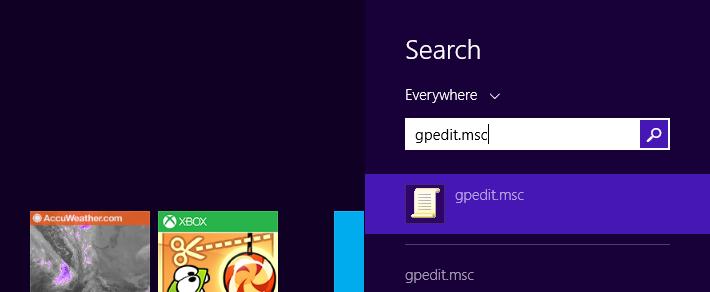
Go over to the Start screen and type “gpedit.msc” to launch the Local Group Policy Editor. Navigate to the following path:
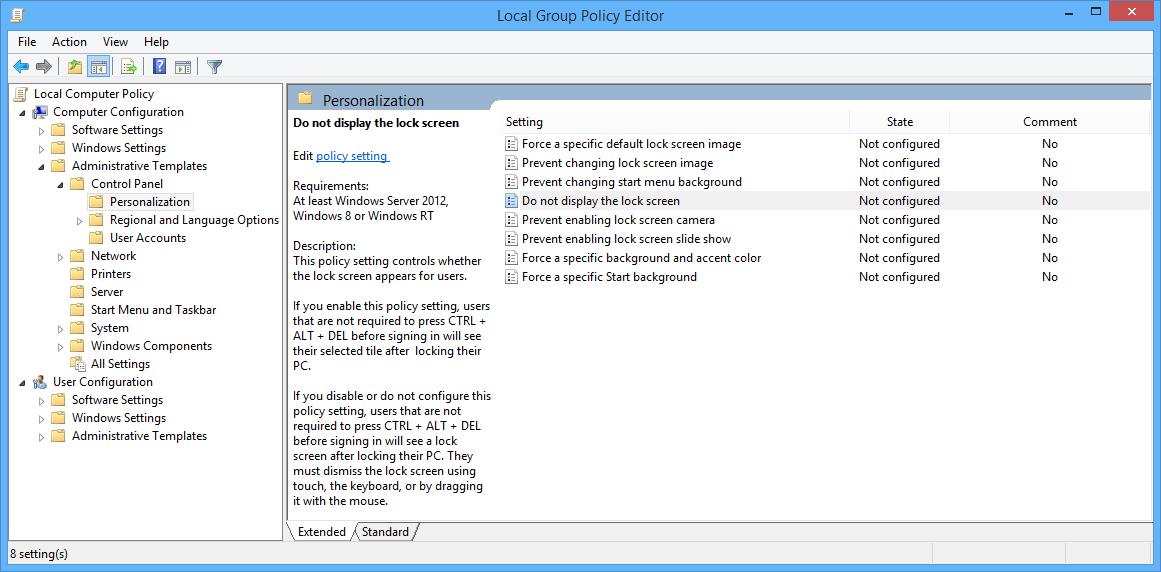
This time, no reboot is required and you could easily test the new configuration by simply locking the system (which can be done by pressing Win key + L) to determine whether the lock screen has been turned on or not.
Keep in mind, however, that in case you decide to disable the lock screen, the synchronization feature across devices should no longer work as it should, as the operating system syncs lock screen appearance on tablets and desktops by default using the Microsoft user account.

To check your existing synchronization configuration, go to the Start screen, type “PC Settings” and hit the enter key on your keyboard. In the “Change PC Settings” screen, click on “SkyDrive” and then open the “Sync” settings menu item.
Check whether the Sync your settings on this PC option is turned on and under the “Personalization settings” section decide the type of settings you want to synchronize across devices.