14 DAY TRIAL //
 Microsoft hopes that all users of the previous Windows version will make the move to Windows 8 at some point, even though some of them prefer to stick to Windows 7.
Around 4 million users have agreed to upgrade to Windows 8 in the first weekend after Microsoft officially rolled out the new operating system, CEO Steve Ballmer proudly said, so the new product is more or less appealing to certain user categories.
Upgrading to Windows 8 from another Windows version is an easy task thanks to Microsoft’s very own tools, but getting rid of the leftovers isn’t quite a piece of cake.
No matter if you upgrade, reinstall or simply refresh your Windows 8 OS, you’re left with a “Windows.old” folder on your computer that comprises all files of the previous Windows installation. Of course, it’s quite annoying for most users, so it’s no wonder that many are actually looking into ways to get rid of the folder.
The traditional “Delete” or “Shift + Delete” methods do not work, so a special trick is required in this case. There are several ways to remove the “Windows.old” directory, but here’s the one that seems to be the easiest to use for most consumers.
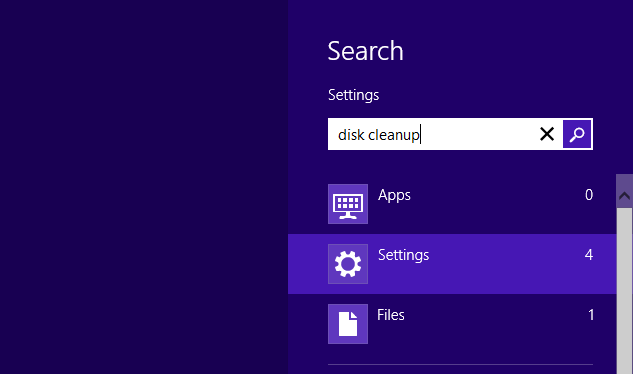
It all comes down to the “Disk Cleanup” utility. So go over to the “Start Screen” (you know, that confusing screen full of live tiles) and write down “Disk Cleanup.” Click on “Settings” and then hit the option that reads “Free up disk space by deleting unnecessary files.”
Doing so should bring up a new dialog prompting you to choose the drive you wish to clean up. In our case, you must select the drive holding the “Windows.old” folder. A scanning process that can take anywhere from a few seconds to several minutes should start.
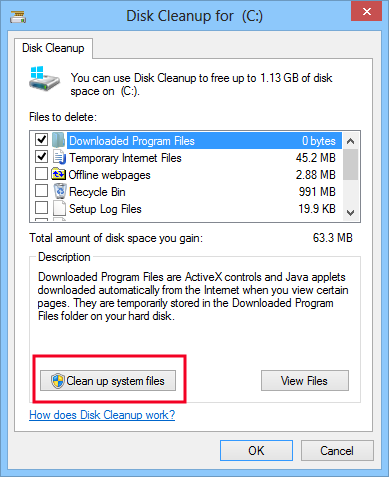
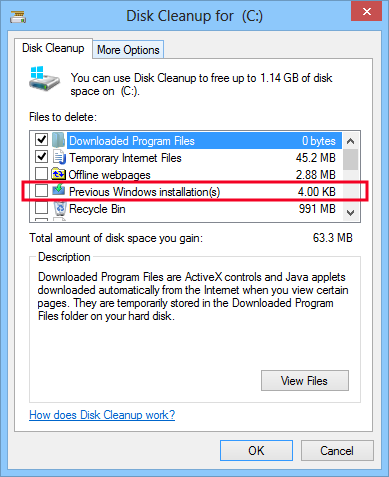
Once again, you are asked to pick the drive you wish to clean up which, again, is the one with the folder you attempt to remove. Another scanning process that could take a while and you’re brought back to the previous “Disk Cleanup” screen, with the only difference that you can now see system files too.