Microsoft rolled out the new Windows 10 Technical Preview build 9860 this week, but as compared to the original testing version of the new OS, this fresh release is only available via the built-in update system and no dedicated ISOs are provided for download.
This means that those who want to install a fresh copy of the operating system have basically no other choice but to get the original build 9841 and deploy the update, as Microsoft wants to use the very same system for all future OS updates.
And still, there are several ways to build your very own ISO with Windows 10 Technical Preview 9860, but most come down to several steps and third-party software that require extra work to achieve this goal.
Unless you’ve already downloaded Windows 10 TP build 9860 on another computer or in a virtual machine and you can use the deployed files to build your own ISO. All you need is a special PowerShell script, which was first put together by Deployment Research to perform the whole thing.
ESD files coming to the rescue
Instead of launching dedicated ISOs for users who want to install the new OS build, Microsoft ships all improvements as part of an ESD file, which stands for Electronic Software Distribution.
This way, the ESD file is deployed to your computer once you start the download of the new build in PC settings and the built-in Windows update system automatically extracts all needed items and then starts the main installation system.
The whole purpose of the script that you’ll find after the jump is to convert the ESD file to ISO and thus make it possible for those who’d want to install the OS from scratch to do it easily.
First things first
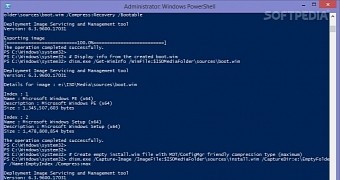
The code you can find below needs to be pasted in a Windows PowerShell window launched with full administrative privileges. You need to be logged in Windows 10 Technical Preview build 9860 to build the ISO, so the main drive should be the standard “C:\” in order to find the required files.
If you are using a dual-boot configuration and you’re currently logged on a different installation, make sure you replace the “C:\” tag in the script with the drive letter where Windows 10 TP build 9860 is installed.
Keep in mind that you need around 3 GB of space on your main drive for the ISO and the whole process takes a while, so do not close it before it’s completed. Simply copy the code below and paste it by right-clicking in the Windows PowerShell window to start the process. Once it’s ready, you can find the new ISO on the main drive in the “ISO” folder.
# The native DISM cmdlets didn't like the ESD files very much, so using dism.exe instead.
$ESDFile = 'C:\RecoveryImage\Install.esd'
$ISOMediaFolder = 'C:\ISO\Media'
$ISOFile = 'C:\ISO\Windows10_build9860.iso'
$PathToOscdimg = 'C:\oscdimg'
Write-Output "Checking for oscdimg.exe"
If (Test-Path $PathToOscdimg\oscdimg.exe){
Write-Output "Oscdimg.exe found, OK, continuing..."
Write-Output ""
}
Else {
Write-Output "Oupps, cannot find Oscdimg.exe. Aborting"
Break
}
# Create ISO folder structure
New-Item -ItemType Directory $ISOMediaFolder
dism.exe /Apply-Image /ImageFile:$ESDFile /Index:1 /ApplyDir:$ISOMediaFolder
# Create empty boot.wim file with compression type set to maximum
New-Item -ItemType Directory 'C:\EmptyFolder'
dism.exe /Capture-Image /ImageFile:$ISOMediaFolder\sources\boot.wim /CaptureDir:C:\EmptyFolder /Name:EmptyIndex /Compress:max
# Export base Windows PE to empty boot.wim file (creating a second index)
dism.exe /Export-image /SourceImageFile:$ESDFile /SourceIndex:2 /DestinationImageFile:$ISOMediaFolder\sources\boot.wim /Compress:Recovery /Bootable
# Delete the first empty index in boot.wim
dism.exe /Delete-Image /ImageFile:$ISOMediaFolder\sources\boot.wim /Index:1
# Export Windows PE with Setup to boot.wim file
dism.exe /Export-image /SourceImageFile:$ESDFile /SourceIndex:3 /DestinationImageFile:$ISOMediaFolder\sources\boot.wim /Compress:Recovery /Bootable
# Display info from the created boot.wim
dism.exe /Get-WimInfo /WimFile:$ISOMediaFolder\sources\boot.wim
# Create empty install.wim file with MDT/ConfigMgr friendly compression type (maximum)
dism.exe /Capture-Image /ImageFile:$ISOMediaFolder\sources\install.wim /CaptureDir:C:\EmptyFolder /Name:EmptyIndex /Compress:max
# Export Windows Technical Preview to empty install.wim file
dism.exe /Export-image /SourceImageFile:$ESDFile /SourceIndex:4 /DestinationImageFile:$ISOMediaFolder\sources\install.wim /Compress:Recovery
# Delete the first empty index in install.wim
dism.exe /Delete-Image /ImageFile:$ISOMediaFolder\sources\install.wim /Index:1
# Display info from the created install.wim
dism.exe /Get-WimInfo /WimFile:$ISOMediaFolder\sources\install.wim
# Create the Windows Technical Preview ISO
# For more info on the Oscdimg.exe commands, check this post: http://support2.microsoft.com/kb/947024

 14 DAY TRIAL //