14 DAY TRIAL //
 Just like the previous Windows versions, the new Windows 8 comes with a dedicated screenshot taking utility that allows users to quickly capture the screen without any additional software.
The whole process is pretty simple and it all comes down to the Windows key + Print Screen hotkey. Whenever you use this key combination, the screenshot is automatically saved to your picture library, in a newly-created “Screenshots” folder.
If you’re using Windows RT, you can easily take a screenshot by simply pressing the Windows key on your tablet and the volume down button. Once again, the screenshot is automatically saved in the “Screenshots” folder in your picture library.
But what if you want to save these screenshots to your desktop or any other folder? There doesn’t seem to be any dedicated options in this regard in the built-in Control Panel, so how can you do that?
It’s all very easy actually. Truth is, some configuration options for the screenshot taking tool would come in pretty handy, but still, it’s a good thing that at least you can do it.
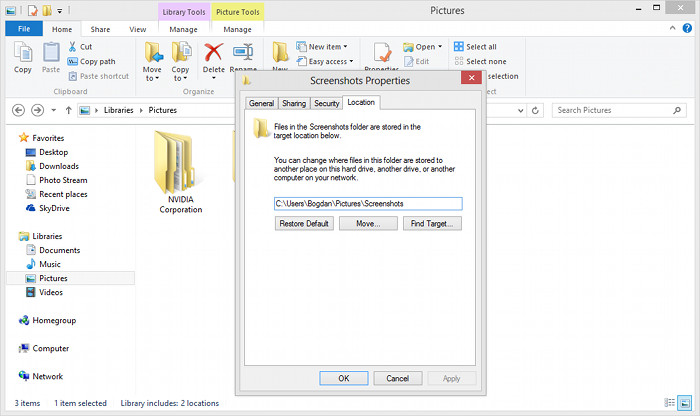
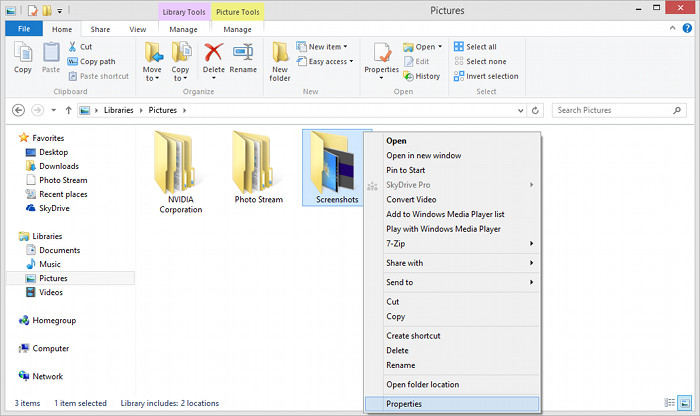
First of all, you need to browse to the “Screenshot” folder in your picture library. The default path to this folder is the following:
As you can see, Microsoft also provides some information on this particular tab and tells you that “you can change where files in this folder are stored to another place on this hard drive, another driver or another computer on your network.”
Navigate to your desired location and hit the “Select Folder” option. That’s basically it. Just a few clicks to deal with such an important issue.
This trick works on both Windows 8 and Windows RT, so Surface RT users can safely follow the above steps too.