 banner")
 14 DAY TRIAL //
 Those who've acquired / plan to acquire the new iPod shuffle may find the device extremely useful not just to listen to music (and the “announcer”) but also to carry around other important stuff, like pictures, videos, etc. There are a few simple steps to learn in order to store files properly on your iPod shuffle. Here's how.
According to Apple, owners of the third generation iPod shuffle can use the device to carry their data, as well as their music. So, you can use iPod shuffle as an external disk to store data files, but first, here's how to sync iPod shuffle with music.
Adding music files to iPod shuffle
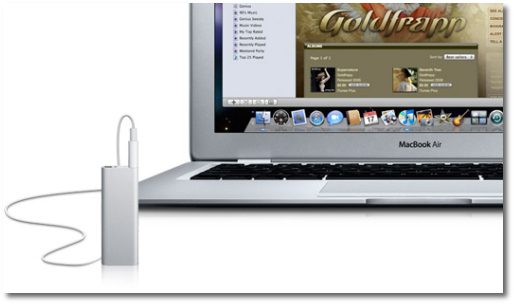
First of all, you need iTunes. The latest version is always the best choice. As Apple indicates, you can’t play audio files that you’ve copied to iPod shuffle using the Macintosh Finder or Windows Explorer.
By default, iPod shuffle is set to sync all songs and playlists when you connect it to your computer. Apple says this is the simplest way to add music to iPod shuffle. So, just connect iPod shuffle to your computer (using the USB cable it came with), let it add songs, audiobooks, and audio podcasts automatically, and then disconnect it and go. If you added any songs to iTunes since the last time you connected iPod shuffle, they’re synced with iPod shuffle. If you deleted songs from iTunes, they’re removed from iPod shuffle. To sync music with iPod shuffle, simply connect iPod shuffle to your computer. If the device is set to sync automatically, the update begins.
Manually adding Music to iPod shuffle is done by connecting iPod shuffle to your computer and dragging songs and playlists individually to iPod shuffle. You can also delete songs and playlists individually from iPod shuffle. Using this option, you can add songs from more than one computer without erasing songs from iPod shuffle. When you manage music yourself, you must always eject iPod shuffle from iTunes before you can disconnect it. More on “Managing iPod shuffle Manually” is available in the iPod shuffle user guide (PDF).
Enabling iPod shuffle as an external disk
1- Connect iPod shuffle to your computer. 2- In iTunes, select iPod shuffle in the list of devices. 3- Click the Summary tab. 4- In the Options section, select “Enable disk use.” You may need to scroll down to see the disk settings. 5- Click Apply.
When you set iTunes to autofill iPod shuffle, you can reserve space for disk use. When you use iPod shuffle as an external disk, the iPod shuffle disk icon appears on the desktop on a Mac, or as the next available drive letter in Windows Explorer on a Windows PC. When iPod shuffle is enabled as a hard disk and you connect it to your computer, the status light blinks orange continuously. Apple urges users to be sure they eject iPod shuffle in iTunes before they disconnect it from their computer.
If you have a problem while trying to sync audio files to iPod shuffle, try these steps one at a time until the problem is resolved (the user guide contains more tips on how to resolve issues with iPod shuffle):
1 - Reset iPod shuffle by turning it off, waiting 10 seconds, and then turning it back on again. 2 - Retry with a different USB 2.0 port if you cannot see iPod shuffle in iTunes. 3 - Restart your computer, and make sure you have the latest software updates installed. 4 - Reinstall iTunes software from the latest version on the web. 5 - Restore iPod shuffle.
Check with the related articles below for more iPod shuffle (3rd gen) coverage, or visit Apple's Support section here for more shuffle (all generations) troubleshooting.