
 14 DAY TRIAL //
 Because many people have computers with Windows pre-installed or the operating system has been installed by other people, they don't know how to work with the existing disks. On the market there are a lot of software applications that ease the job and let users manage and work with HDDs, CD-ROMs or other disk units installed on their systems but... they cost money. That's why we believe that a closer look to Windows XP will be helpful. Microsoft's operating system provides a build in solution for disk management.
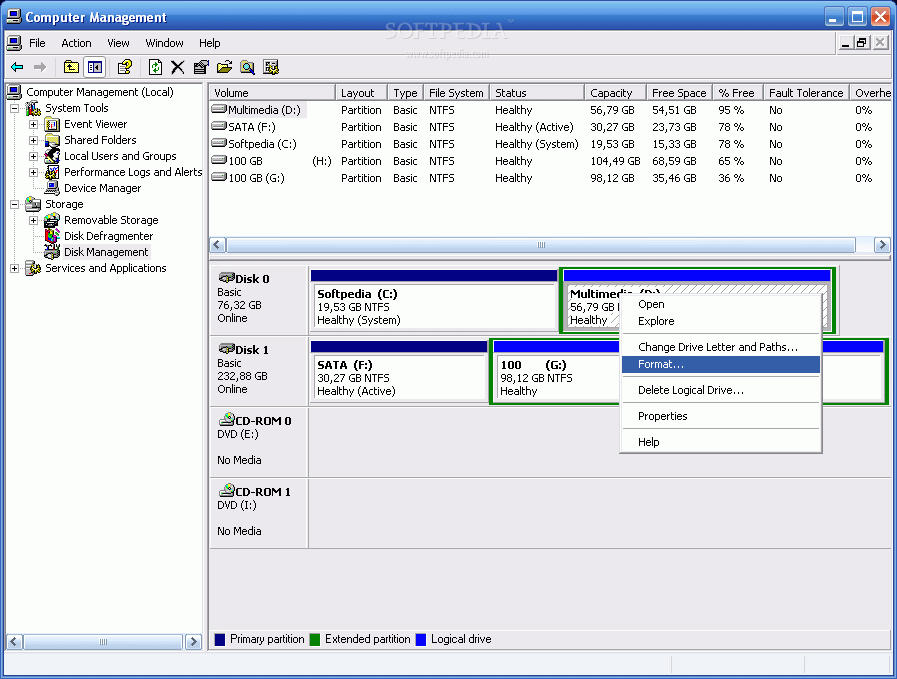
To access the disk management tool right click on My Computer and select Manage from the menu. There will appear a window with 3 categories in the left: System Tools, Storage and Services and applications. By selecting Storage, the menu will expand and from the dropped down list choose Disk Management, which is the purpose of this tutorial. In the right panel of the window there are shown the disks with partitions, as well as the CD-ROM / DVD-ROM drives.
Here are the jobs that can be fulfilled through the disk management tool:
1. Convert Basic to Dynamic Disks in Windows XP Professional
Windows XP Professional supports two types of disk storage: basic and dynamic. Basic disk storage uses partition-oriented disks. A basic disk contains basic volumes (primary partitions, extended partitions, and logical drives).
Dynamic disk storage uses volume-oriented disks, and includes features that basic disks do not, such as the ability to create volumes that span multiple disks (spanned and striped volumes).
Before doing the conversion you should know that:
■ The dynamic volumes cannot be changed back to partitions; ■ Local access to the dynamic disk is limited to Windows XP Professional and Windows 2000; ■ Dynamic disks are not supported on portable computers or Microsoft Windows XP Home Edition; ■ All existing volumes must be deleted from the disk before you can convert it back to a basic disk.
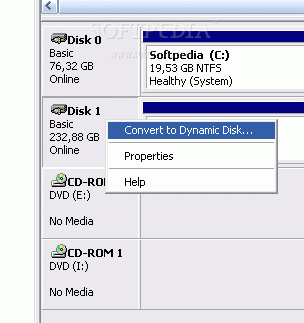
To convert a basic disk to a dynamic disk: In the lower-right pane, right-click the basic disk that you want to convert, and then click Convert to Dynamic Disk.
You have to right-click the gray area that contains the disk title on the left side of the Details pane. Select the check box that is next to the disk you want to convert (if it is not already selected), and then click OK. Click Convert. Click Yes when you are prompted to convert, and then click OK.
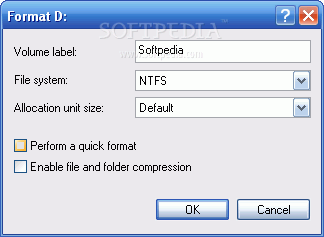
2. Format a partition
To format a partition, select the desired one, right click on it and then, from the menu, choose Format. A format window will appear where you can: select the file system (FAT32/NTFS), name the partition (volume label), and select an allocation unit size and to choose the format method (normal/quick). Please note that the format option will only be available for logical drives and partitions that are not active. The primary partition, the one with the operating system cannot be formatted.
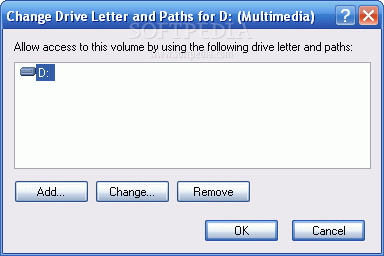
3. Change drive letter and Paths
This action can be done through the same procedure like the one described above, and that is by selecting the Change drive letter and Paths task from the menu. In the window you will be able to add a letter, change or delete one.
To assign a drive letter to a drive, a partition, or a volume, follow these steps: Right-click the drive, the partition, the logical drive, or the volume that you want to assign a drive letter to, and then click Change Drive Letter and Paths. Click Add. Click Assign the following drive letter if it is not already selected, and then either accept the default drive letter or click the drive letter that you want to use. Click OK.
To change an existing drive letter on a drive, on a partition, or on a volume, follow these steps: Right-click the drive, the partition, the logical drive, or the volume that you want to assign a drive letter to, and then click Change Drive Letter and Paths. Click Change. Click Assign the following drive letter if it is not already selected, click the drive letter that you want to use, and then OK. Click Yes when you are prompted to confirm the drive letter change.
You can also change the drive and path for the CD-ROM / DVD-ROM disks by right clicking on the gray area that contains the disk title on the left side of the Details pane.
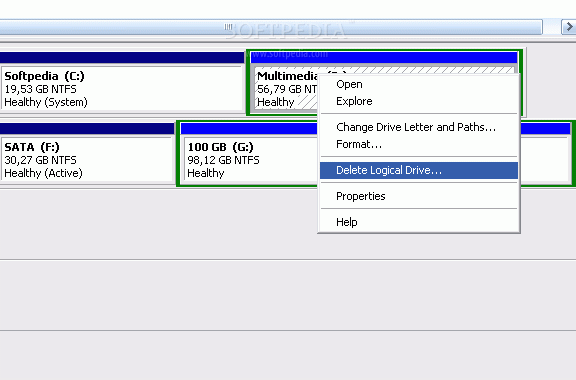
4. Delete a logical disk or partition
To delete a logical drive (not the partition where the operating system is installed) just select it and then using right click choose from menu Delete Logical Drive.
To understand the terms, there is also a legend available in the lower section of the Disk Management window. There you will see that Primary partitions are marked in navy blue, Extended partitions in green and Logical disks in Blue.
5. Initialize new disks
New disks appear as Not Initialized. Before you can use a disk, you must first initialize it. If you start Disk Management after adding a disk, the Initialize Disk Wizard will appear, so you can initialize the disk. So, right-click the disk you want to initialize, and then click Initialize Disk; in the Initialize Disk dialog box, select the disk(s) to initialize.
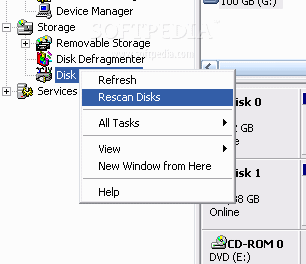
6. Detect new disks installed
To detect new installed disks right click on Disk Management and select Rescan disks. This action will reveal the new disks added to your computer. If the installed disk is not shown restart the computer.
7. Create a partition or a logical drive
To do that, right-click an unallocated region of a basic disk, and then click New Partition, or right-click free space in an extended partition, and then click New Logical Drive. In the New Partition Wizard, click Next, Primary partition, Extended partition, or Logical drive, and then follow the instructions on your screen.
10 Tweaks to Make Windows More Comfortable
Windows versus Windows or 32-bit versus 64bit
Seagate Announced the First Drive to Go Past A Transfer Rate of 100MBps