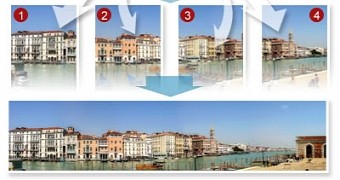
Cameras have greatly evolved in an incredibly short time. Almost every mobile device can now take multiple stunning pictures. Stitch them together and you get a wider view of a landscape.
These types of photos are called Panorama Pictures and it’s a common practice for photographers. However, not all devices can clearly capture images sequentially and have them automatically stitched together in a wide image.
Doing a little research over the web is sure to solve the problem. With time and effort, you can even use Paint to create Panorama pictures, or other specialized applications, just as described below.
Stitching images in Paint
Step 1: Locate the first picture of the stitching sequence. For instance, use the image that is the left border.
Step 2: Right-click it and select Edit. This automatically opens it in Paint if you don’t have other default image editing applications.
Step 3: Use the zoom tool and right-click on the canvas to zoom out.
Step 4: Drag the border of the canvas as far to the right as possible.
Important step: Zoom in to a detailed location. Once the imported image is no longer selected, things get a little more complicated. If this happens, you can always either undo or select the picture again.
Step 5: From the Paste menu, select Paste From. This brings up an open dialog with the location set to the location of the image you’re editing.
Step 6: Select the picture that follows up and hit Open.
Step 7: Position the opened image so it creates a continuous view.
Hint: Zoom in as much as you want on an area filled with details to help you match both pictures. In Windows 8, switch to the View menu and enable Gridlines and Rulers for more accuracy.
Step 8: Repeat steps 5 to 7 until all images are added.
Step 9: Go to File and save the new picture.
Combining multiple images with RasterStitch
Step 1: Download, install, and run RasterStitch.
Step 2: Click on Open 1st image to load the left picture, and do the same in the right panel.
Note: If images need to be combined vertically, use the View menu to split the canvas horizontally.
Step 3: Press the Side-by-side button to have them combined.
Step 4: In the File menu select Save as to generate the new image.
Alternative method
Step 1: Load both images.
Step 2: Hit the 1st point button and double-click an area as close to the meeting border as possible.
Step 3: Hit the 2nd point button and double-click an area at a fair distance from the first, close to the border, and in the same image.
Step 4: Repeat steps 2 and 3 for the second image. Try to keep first and second points as close as possible to the meeting border and to one another.
Step 5: Press the Stitch button, adjust settings if necessary, and hit OK to confirm.
Step 6: Repeat with more images until the whole picture is in the left panel.

 14 DAY TRIAL //


